Owen Bradley
 A desktop PC survives years of daily use sitting still on a desk, then arrives at a new address with a cracked slot, a snapped cooler mount, or a graphics card that no longer posts. Moving is where more gaming systems die than at any other point in their lives, and almost always for the same reason: the heaviest parts inside the case hang off small plastic clips and a couple of screws that were never designed to absorb road vibration. This guide covers how to transport a desktop PC safely, from deciding what to remove to bracing the interior and packing the case so nothing shifts during the journey.
Why Desktops Get Damaged in Transit
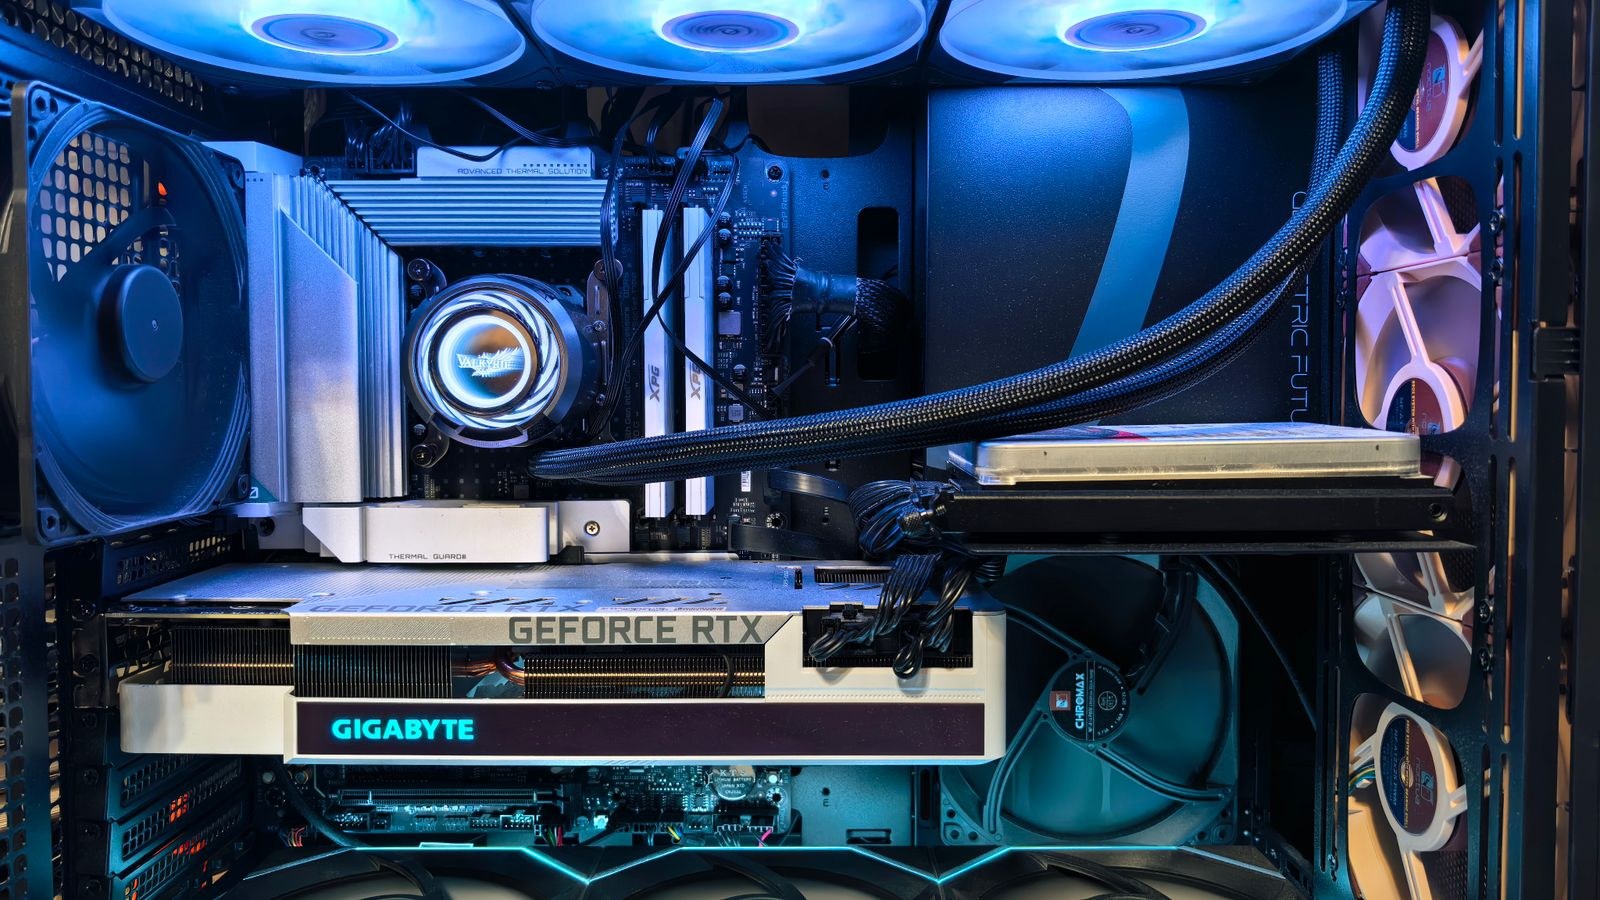
The motherboard is a thin fibreglass board held at a handful of standoff points. Bolted to it are components that weigh far more than the board itself. A large air cooler can weigh over 1kg, and a modern graphics card can exceed 1.5kg while being held only by a slot latch and two bracket screws.
Sitting still, that is fine. In a moving vehicle, every bump multiplies those weights momentarily. The result is leverage on the PCIe slot, flex across the board around the CPU socket, and repeated small impacts that crack solder joints or bend the board permanently. Add loose cables swinging around and a case laid on its side under a box, and the damage is entirely predictable.
What You Need Before Packing
- The original boxes for the graphics card, cooler, and PC case if you kept them. Nothing protects better than the packaging designed for the part.
- A sturdy double-walled cardboard box at least 10cm larger than the case on every side, if the original is gone.
- Anti-static bags for any removed components. A plastic carrier bag is not a substitute.
- Bubble wrap, foam sheets, or clean towels for bracing and padding.
- A Phillips screwdriver, ideally magnetized, and a container for screws.
- Packing tape, cable ties, and a marker pen for labelling.
- Your phone, for photographing cable routing before you disconnect anything.
Step-by-Step: Preparing and Transporting Your PC
- Back up your data first. Before any physical work, copy irreplaceable files to an external drive or cloud storage. Drives can fail from impact, and a backup turns a hardware loss into an inconvenience rather than a disaster.
- Shut down fully and disconnect. Perform a complete shutdown rather than sleep, switch off the power supply at the rear, then unplug the mains cable and every peripheral. Wait a minute before opening the case.
- Photograph everything. Take clear photos of the rear ports with cables attached and of the interior before removal. Reassembly at the other end becomes trivial with reference images.
- Label the cables. Wrap a strip of tape near each connector and write what it plugs into. Coil each cable and secure it with a tie, then pack them all in one labelled bag.
- Open the case and assess the heavy parts. Lay the case on its side on a towel and remove the side panel. Identify anything that is both heavy and cantilevered: the graphics card, a large tower cooler, and any radiator mounted only at one end.
- Remove the graphics card. This is the most important single step for any card longer than about 20cm. Disconnect its power cables, undo the bracket screws, release the slot retention clip, and lift the card out straight. Bag it and place it in a padded box or its original packaging.
- Remove a heavy CPU cooler if the journey is long. Large tower coolers put constant leverage on the motherboard. For a short local move a well-mounted cooler usually survives, but for a long drive or any shipping, take it off. Keep the mounting hardware together in a labelled bag and buy fresh thermal paste for reassembly.
- Secure everything left inside. Check that memory sticks are fully latched, drives are screwed down rather than resting in trays, and the power supply is bolted in. Tighten any screw that has worked loose over time.
- Brace the interior. Wedge foam sheets or rolled towels into the empty space so nothing can move, particularly around the cooler and any remaining cards. The padding should be firm enough to stop movement but not so tight that it flexes the board.
- Tidy and secure loose cables. Bundle internal cables with ties and keep them clear of fan blades. A loose PCIe cable swinging into a fan during transit will damage both.
- Refit the side panel and pack the case. Put the panel back on and tighten its screws. Wrap the whole case in bubble wrap, paying particular attention to the corners and any glass panel, then place it in the box with at least 5cm of padding on every side including underneath.
- Transport it upright in the passenger area. Stand the case in its normal orientation, ideally in a footwell or on a seat with a belt around it. Never lay it flat under other boxes, and never put it in a truck load where furniture can shift onto it.

Short Move Versus Long-Distance Shipping
The right amount of effort depends on the journey. For a short local move in your own car over smooth roads, removing the graphics card, bracing the interior, and carrying the case upright on a seat is usually enough.
For a long drive or a house move in a hired van, also remove any heavy air cooler, take out secondary drives if they are in flimsy trays, and use a proper double-walled box with generous padding.
For courier shipping, treat it as the harshest case. Couriers routinely stack, drop, and invert parcels. Remove the graphics card and cooler without exception, pack each separately, brace the case interior thoroughly, and double-box the whole thing with foam between the two boxes. Insure it for full replacement value.
Cases That Travel Well
Chassis design matters more than people expect. Heavy steel cases with rigid frames and internal support brackets protect their contents far better than thin, panel-heavy designs. Full tempered glass side panels look excellent but add weight and are the most common transit casualty. If you move often, a compact chassis with carry handles from our best portable PC cases guide is far easier to handle, while the sturdier builds in our best mid-tower PC cases and best PC cases for gaming roundups often include a GPU support bracket that helps in transit as well as on the desk.
Reassembly at the Other End
- Let the PC reach room temperature. If it travelled in a cold vehicle, leave it boxed for a few hours before opening. Bringing cold hardware straight into a warm room causes condensation, and powering that on can short components.
- Unpack and inspect. Open the case and look for anything that has shifted, any loose screw, or any cable that has pulled free. Check the board around the CPU socket and PCIe slot for visible flex or cracking.
- Refit the removed components. Reinstall the graphics card until the retention clip clicks, reconnect its power cables, and refit the cooler with fresh thermal paste if it was removed.
- Reconnect using your photos. Attach the peripherals and the mains lead, matching your reference images.
- First boot with the panel off. Power on and watch that all fans spin and the system posts. Listen for anything rubbing or rattling.
- Verify and stress test. Confirm the operating system reports the correct memory, drives, and graphics card, then run a game or stress tool for 20 minutes while watching temperatures before refitting the panel.
Safety Notes
- Always unplug the mains cable and switch off the power supply before opening the case. Standby power remains live otherwise.
- Touch the bare metal chassis before handling components, and keep removed parts in anti-static bags rather than on carpet or fabric.
- Lift a full tower with both hands underneath rather than by the top panel or a glass side, which can detach.
- Never transport a PC in a vehicle boot alongside unsecured furniture.
- Do not power the machine on immediately after a cold journey. Wait for it to warm up naturally.
Common Mistakes That Break Hardware
- Leaving a heavy graphics card installed. The most frequent cause of transit damage by a wide margin.
- Laying the case flat and stacking boxes on it. Panels bow inward and glass cracks under surprisingly little weight.
- Packing with no internal bracing. An empty interior lets everything vibrate freely for the whole journey.
- Using a single thin box with no padding. Cardboard alone absorbs almost nothing.
- Skipping the backup. Drive failure after a move is common enough to plan for.
- Forgetting to photograph the cabling. Reassembly becomes guesswork, especially with multiple monitors and audio devices.
Frequently Asked Questions
Do I really need to remove the graphics card?
For anything longer or heavier than a compact dual-fan card, yes. The slot and bracket were designed to hold the card steady, not to resist repeated impacts. Removing it takes five minutes and eliminates the most likely failure entirely.
Should I remove the CPU cooler too?
For a short car journey, a properly mounted cooler is usually fine. For long-distance moves or courier shipping, remove any large tower cooler. If you would rather avoid the job in future, a lighter, well-braced design from our best air CPU coolers guide puts far less strain on the board.
Can I transport a PC lying on its side?
Standing upright in its normal orientation is best, because that is the direction the mounting hardware was designed to support. If space forces it flat, lay it with the motherboard tray down so the board is supported from beneath, and never place anything on top.
What about liquid cooling?
Sealed all-in-one coolers travel acceptably, but keep the case upright so the pump does not sit at the highest point and collect air. Support any radiator that is mounted at one end only, and check for leaks and pump noise on the first boot after arrival.
Is it safer to just carry the PC in the car myself?
Almost always. Personal transport in the passenger area, upright and padded, is far gentler than any courier network. If you must ship, double-box, remove the heavy parts, and insure it properly. High-end cards especially are worth carrying by hand; the models in our best GPUs for gaming guide are expensive enough that a separate padded box is a trivial precaution.
Final Thoughts
Transporting a desktop safely comes down to one principle: nothing heavy should be left hanging on a small mount during a journey. Back up your data, photograph the cabling, remove the graphics card and any large cooler, brace the empty space inside, and pack the case upright with real padding around it. At the other end, let it warm up, inspect before powering on, and stress test before you close it up. Follow that sequence and your PC will arrive in exactly the condition it left in, ready to work the moment you plug it back in.