
 Owen Bradley
 An all-in-one liquid cooler looks intimidating in the box, but installing one is mostly a sequence of careful, low-risk steps: swap a mounting bracket, screw a radiator into place, seat the pump block, and route a few cables. The loop arrives sealed and pre-charged, so there is no filling or bleeding to worry about. What separates a quiet, cold system from a noisy, warm one is not skill with a screwdriver but the decisions you make about radiator placement, pump orientation, and which fan headers you plug into. This guide walks through the entire process so you can install an AIO cooler confidently the first time, avoid the mistakes that cause gurgling pumps and thermal throttling, and end up with a build that stays quiet under load.

What You Need Before You Start
Gather everything in one place before opening the cooler box. Most AIO kits include every bracket you need, but a missing standoff discovered halfway through is a frustrating way to lose an evening. Lay the parts out and check them against the manual’s parts list.
- A Phillips #2 screwdriver, ideally magnetized, for radiator and bracket screws.
- Thermal paste if your cooler did not ship with a pre-applied layer on the cold plate.
- Isopropyl alcohol (99%) and lint-free cloth to clean the old paste off the CPU lid.
- The mounting hardware for your socket, since Intel and AMD kits use different backplates and standoffs.
- Zip ties or Velcro straps for tidying fan and pump cables behind the motherboard tray.
Also confirm compatibility first: check that your case supports the radiator size, that your socket is on the cooler’s supported list, and that RAM height will not conflict with a top-mounted radiator.
Choosing the Right Radiator Size and Case
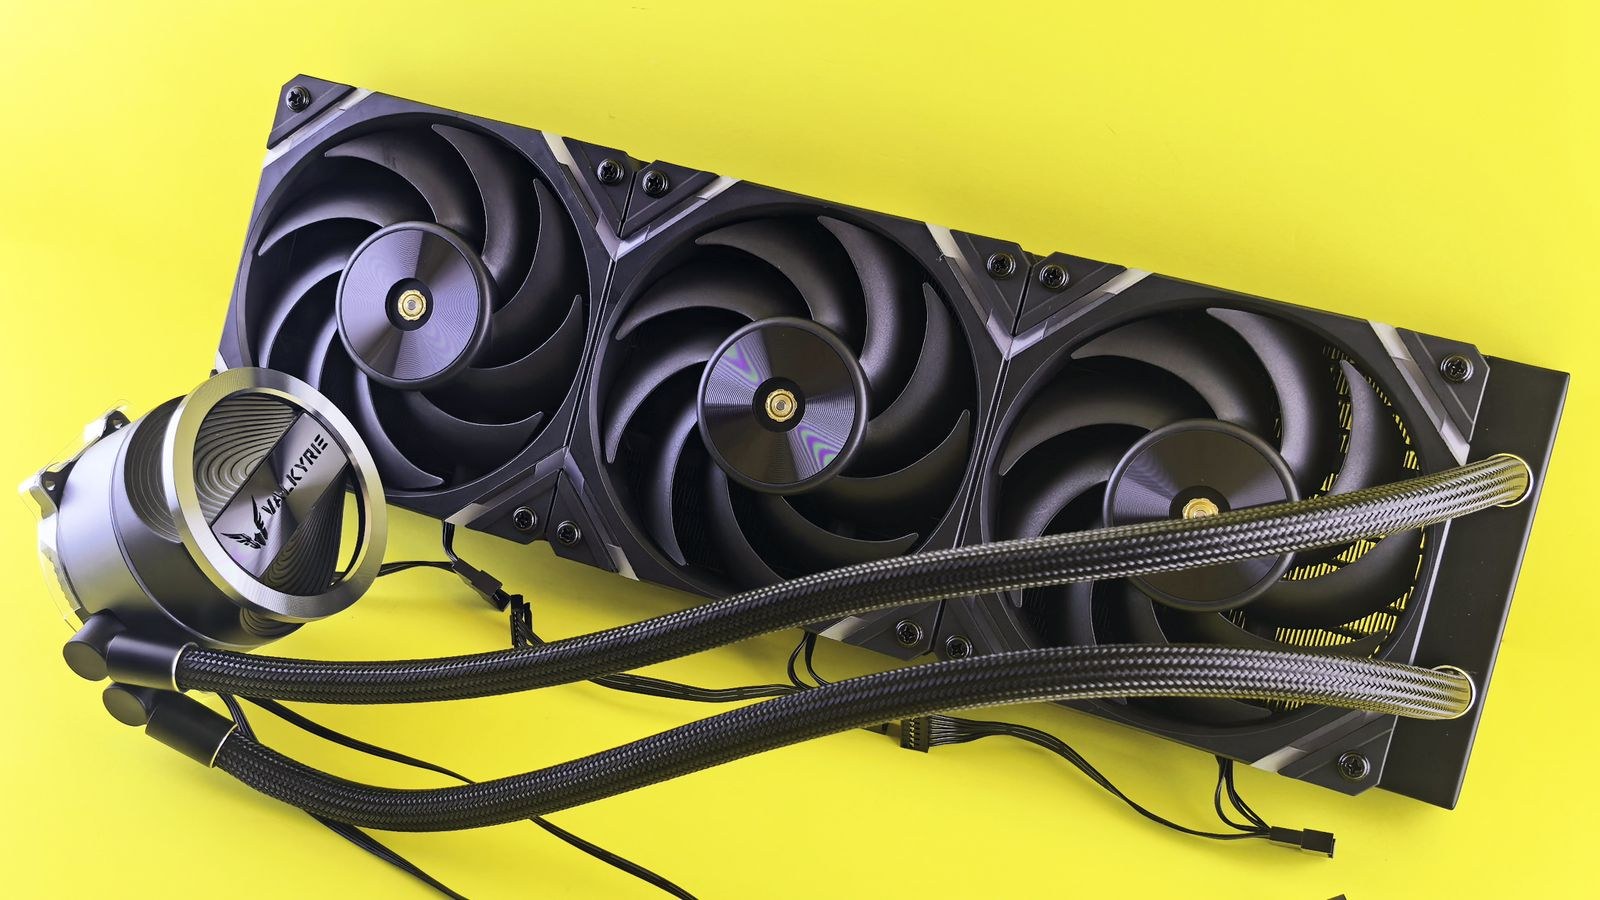
Radiator surface area, not pump speed, determines how much heat the loop can shed. A 240mm radiator suits most mainstream six and eight-core processors and fits a wide range of mid-tower cases. A 360mm radiator gives noticeably more headroom for high-core-count or overclocked chips, and more importantly it lets you run the fans slower for the same temperature, which is where the real acoustic win comes from.
If you are still choosing hardware, compare options in our roundup of the best AIO CPU coolers, then narrow by size with the best 240mm CPU coolers for compact builds or the best 360mm CPU coolers if your case has a long top or front mount. Chassis choice matters just as much, so check the best PC cases for water cooling to make sure the radiator, fans, and tubing all clear your motherboard and drive cages.
Where to Mount the Radiator
Placement affects both temperature and pump longevity. The golden rule is simple: the pump must never be the highest point in the loop. Air naturally collects at the top of the coolant, and if that pocket sits in the pump housing you will hear a rattling gurgle and the pump will wear out early.
Three placements work well. A top mount with the radiator above the pump is the safest and most common, exhausting warm air out of the case. A front mount also works well as long as the tubes exit at the bottom of the radiator, keeping the top of the radiator, not the pump, as the highest point. A rear mount suits 120mm units in small cases. Avoid mounting a radiator below the pump with the tubes on top, which guarantees air migrates into the pump.
Intake or Exhaust
Front intake feeds the radiator cool room air, giving the lowest CPU temperatures but dumping warm air over the GPU and motherboard. Top exhaust gives slightly warmer CPU temperatures because the radiator receives pre-warmed case air, but keeps the rest of the components cooler and usually looks tidier. For most builds the difference is a few degrees on the CPU, so pick based on your case layout. Understanding the wider picture of PC cooling fans, liquid cooling, and airflow helps you balance the two.
Step-by-Step AIO Cooler Installation
- Power down and discharge. Shut down the PC, switch the power supply off at the rear, and unplug the mains cable. Hold the case power button for five seconds to drain residual charge, then touch a bare metal part of the chassis to ground yourself.
- Lay the case on its side and open both panels. You will need access to the rear of the motherboard tray to fit the backplate, so remove the right-hand panel too.
- Remove the existing cooler. Unplug its fan header, loosen the screws in a diagonal cross pattern a few turns at a time, then twist gently and lift straight up. If the CPU sticks to the cooler, do not yank it; warm the system for a minute first, then twist slowly.
- Clean the CPU lid. Wipe the old thermal paste off with isopropyl alcohol on a lint-free cloth until the surface is mirror clean and dry. Clean the AIO cold plate the same way if it is not factory pre-applied.
- Fit the backplate and standoffs. Slide the socket-specific backplate against the rear of the motherboard, aligning it with the four mounting holes, and thread the standoffs in from the front until finger tight. Many AMD boards reuse the stock backplate, so read the manual rather than assuming.
- Install the fans on the radiator. Decide airflow direction first, then attach fans so the arrow on the fan frame points the way you want air to travel. Use the short screws for fans and the long screws only where the manual specifies, because a screw that is too long will puncture the radiator fins and end the loop permanently.
- Mount the radiator in the case. Hold the assembly in position, start all screws by hand before tightening any of them, and route the tubes toward the socket without kinking them. Snug the screws in a cross pattern.
- Apply thermal paste. If the cold plate is not pre-pasted, place a pea-sized dot in the centre of the CPU lid, or a thin line down the centre for rectangular chips. The mounting pressure spreads it; you do not need to smear it manually.
- Seat the pump block. Lower it flat onto the CPU without sliding it around, then hand-tighten the thumb nuts in a diagonal cross pattern, a couple of turns each, until they stop. Even pressure is what makes contact good, so never fully tighten one corner first.
- Connect the cables. Plug the pump into the header labelled AIO_PUMP or CPU_OPT, not the fan header. Connect radiator fans to CPU_FAN, using the supplied splitter or fan hub if you have three. Attach the RGB or USB header for the block if the cooler uses software control.
- Tidy and close up. Route cables behind the tray, secure them with ties away from fan blades, and confirm nothing touches a spinning fan. Refit both side panels.
- First boot and verify. Power on and immediately enter the BIOS. Confirm the pump reports RPM and watch the CPU temperature at idle for a minute; it should settle low and stable rather than climbing steadily.
Configuring Fan and Pump Curves
An AIO on default settings often sounds worse than the air cooler it replaced, because motherboards ramp fans aggressively against instantaneous CPU spikes. Fix that in the BIOS fan control page. Set the pump to a constant speed, since pumps are quiet at full speed and varying them buys almost nothing. Then build a gentle fan curve: keep radiator fans near minimum below 50°C, ramp to around 60% by 70°C, and reach full speed only near 85°C. Add a step-up and step-down delay of a few seconds so the fans ignore brief spikes. The coolant is a thermal buffer, so slow response is exactly what you want.
Safety and Handling Notes
- Never run the system with the pump unplugged. Without circulation the CPU heats rapidly and the coolant near the block can boil.
- Do not overtighten the pump block. Thumb nuts should stop naturally against the standoffs; forcing them can bend the motherboard or crack a die.
- Avoid kinking or twisting the tubes. A sharp bend restricts flow and stresses the fittings that keep the loop sealed.
- Handle the radiator by the frame. Fins are thin aluminium, bend easily, and block airflow once bent.
Troubleshooting Common Problems
The pump gurgles or rattles
This is almost always trapped air passing through the impeller. Confirm the pump is not the highest point in the loop and that radiator tubes exit at the bottom on a front mount. Gently tilting the case in different directions while powered on for a minute helps move the bubble back into the radiator, where it belongs. A brand-new cooler often quiets down on its own within a few days of use.
CPU temperatures are far too high
Check the pump is actually spinning and reporting RPM in the BIOS. If it is, the usual culprit is mounting pressure: remove the block, inspect the paste spread, and remount if coverage is uneven or the plate protective film was left on. That clear plastic film is a classic and completely invisible mistake.
Fans spin but the system will not post
Reseat the RAM and the 8-pin CPU power connector, both easy to knock loose while working around the socket.
Mistakes That Cost People a Cooler
The most expensive error is using the wrong screw length on the radiator fans and puncturing a coolant channel, which cannot be repaired. Measure or count threads against the manual before driving anything into a radiator. The second most common is mounting the radiator lower than the pump, which guarantees noise and shortens pump life. Third is forgetting the protective film on the cold plate, producing temperatures so bad that people assume a defective unit. Finally, always use the dedicated pump header rather than a low-speed fan header.
Frequently Asked Questions
Do I need to refill an AIO cooler?
No. Sealed AIO units are not user-serviceable and are designed to run for years without maintenance. Coolant does permeate slowly through the tubing over a long lifespan, which is one reason performance can drift after many years, but there is no refill port on most models.
Is liquid cooling risky for my components?
Modern AIOs are extremely reliable, and leaks are rare because there are no user-made joints. The realistic failure mode is a pump that stops after several years, which shows up as rising temperatures rather than a spill. Monitoring pump RPM occasionally is enough.
How long does the installation take?
Plan on 45 to 90 minutes for a first-time install in an empty case, and a little longer if you are replacing a cooler inside a fully built system where you must work around the graphics card and cables.
Final Thoughts
Installing an AIO liquid cooler rewards patience far more than technique. Confirm clearance before you buy, mount the radiator so the pump sits below the highest point of the loop, use the correct screw lengths, spread even pressure across the block, and give the pump its own dedicated header. Then spend ten minutes in the BIOS building a calm fan curve, because that step does more for perceived noise than any hardware choice. Get those fundamentals right and your cooler will hold temperatures steady and quietly for years.









