
 Owen Bradley
 Every beginner streaming setup guide eventually runs into the same awkward truth: you can start with what you already own, and you probably should. The gear that appears in polished channel tours represents years of incremental spending, not a starting point, and copying it is the fastest way to spend a lot of money on a hobby you have not yet tested. That said, some upgrades genuinely change how a stream looks and sounds, and some are almost pure decoration. This guide breaks a streaming setup into its real components, explains what each tier actually costs, and gives you a sensible order for spending your first upgrade money so nothing is wasted.
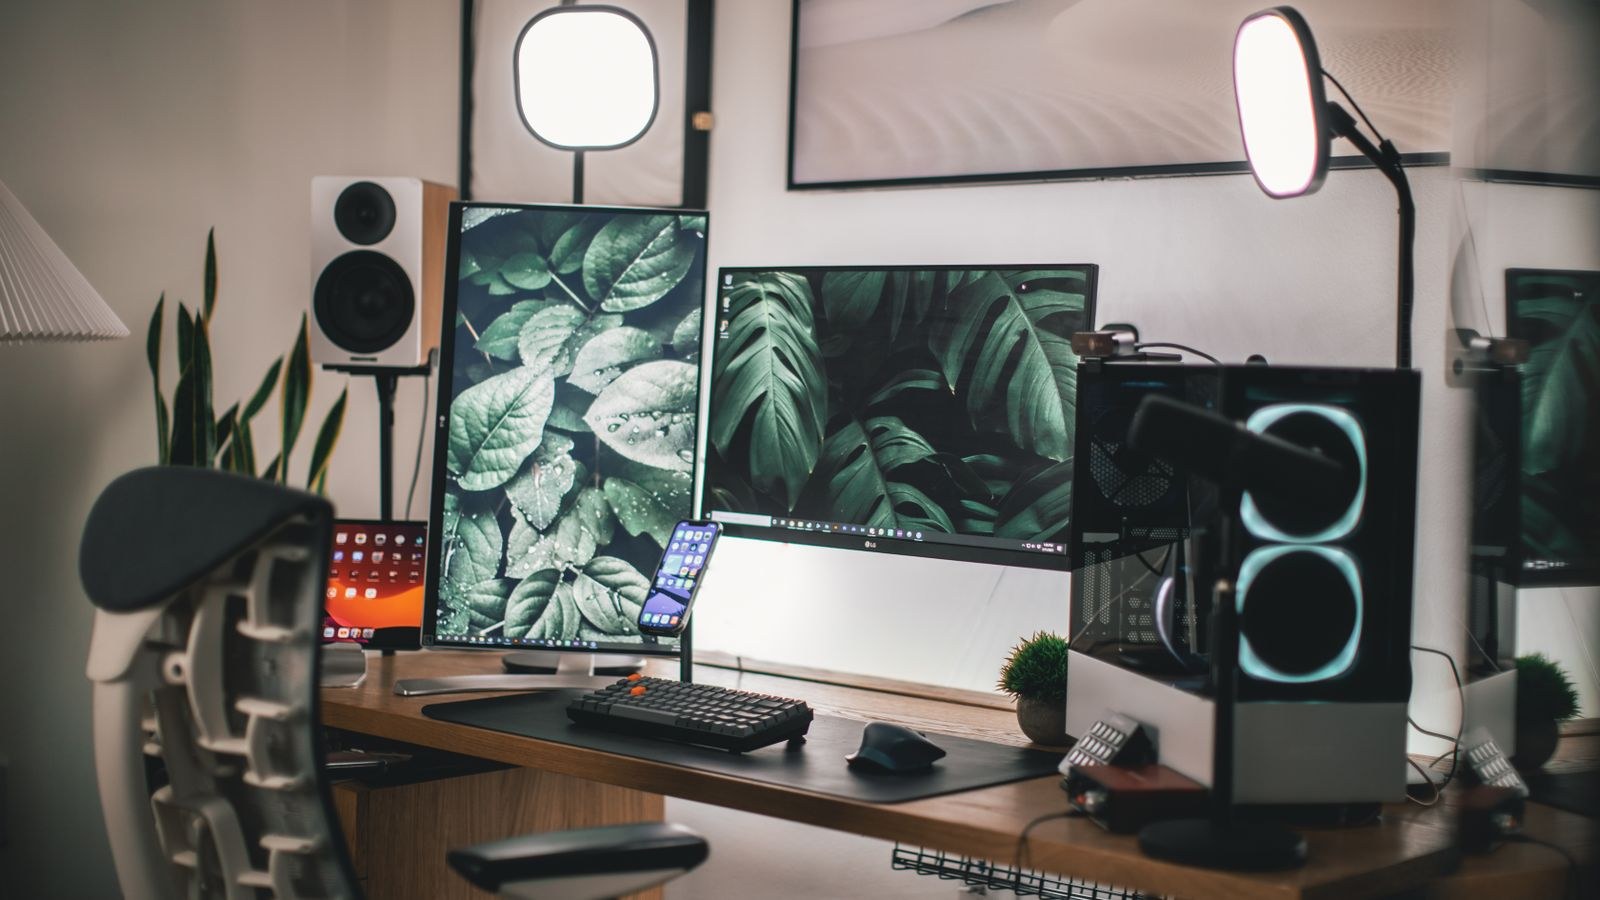
The Six Parts of Any Streaming Setup
Every stream, from a first broadcast to a full-time channel, is built from the same six elements. Understanding them separately keeps you from overspending on one while neglecting another.
- Compute. The processor and graphics card that run your game or application and encode the video at the same time.
- Audio. The microphone and whatever you monitor through. The single most important element for retention.
- Video. A camera, if you appear on screen at all. Many successful channels never do.
- Lighting. The cheapest way to make any camera look dramatically better.
- Connection. Upload bandwidth and its stability, which caps your quality regardless of everything else.
- Space. The desk, chair, acoustics and background you sit in for hours at a time.
Beginners typically overspend on video and underspend on audio and lighting, which is precisely backwards.
Audio First, Always
Viewers will tolerate a soft picture for an hour. They will leave within thirty seconds of harsh, echoing or clipping audio. If you have money for exactly one upgrade, make it the microphone.
The practical entry point is a USB condenser or dynamic microphone on a desk stand, which needs no interface and works immediately. Dynamic microphones are the smarter choice for most rooms because they reject off-axis sound, meaning less of your keyboard, your chair and your room’s echo reaches the stream. Condensers capture more detail but also capture everything else, which punishes an untreated room.
Placement matters as much as the microphone itself. Get it within about 15 to 20 centimetres of your mouth, slightly off-axis so plosives pass by rather than into the capsule, and on a boom arm rather than a desk stand so keyboard vibration does not travel up through the surface. A modest microphone placed well beats an expensive one placed badly, every time.
Monitoring and Headsets
You need to hear your own stream to catch problems, and you need game audio that does not leak into your microphone, which rules out speakers for most setups. A closed-back headset with a decent microphone can also serve as your entire audio solution on day one, which is why many people start there before adding a standalone microphone later. Our roundup of the best headsets for streaming covers models that handle both jobs competently.
Compute: What Encoding Actually Demands
Streaming means doing two heavy jobs at once: running the game and compressing the video. How you split that work determines whether your stream stutters.
Modern graphics cards include dedicated hardware encoders that handle compression almost independently of the rest of the card, costing only a small percentage of gaming performance. This is why the standard advice is to encode on the GPU rather than the processor, and why the encoder generation matters more than raw gaming benchmarks for streaming purposes. Newer encoder blocks produce noticeably cleaner output at the same bitrate.
Processor-based encoding can produce slightly better quality at a given bitrate but consumes many cores, which is only viable on a strong multi-core chip or a separate machine. For a beginner, hardware encoding on the graphics card is the right answer. Memory is the other easy win: 16GB is a workable floor and 32GB gives comfortable headroom once a browser, chat client and streaming software are all open. Cards with capable encoders are compared in our list of the best gpus for streaming.
Lighting: The Cheapest Big Improvement
Cameras cannot invent light. In a dim room, any camera raises gain, adds noise, and produces the grainy, muddy image beginners blame on their hardware. Adding light fixes it for a fraction of the cost of a better camera.
The basic arrangement is a key light placed in front of you and slightly to one side, raised a little above eye level and angled down. Diffuse it through a softbox, a shade or a bounce off a pale wall, because a bare bulb produces hard shadows and harsh contrast. That one light does most of the work.
From there, a fill light on the opposite side at lower intensity softens the shadow on your dark side, and a backlight behind you separates your outline from the background, which is what gives professional streams their sense of depth. Colour temperature should match across all your lights, typically around 5000K to 5600K, and it should not fight the daylight from a window. Avoid sitting with a bright window behind you at all costs.
Camera: Only If You Appear on Screen
Plenty of successful channels never show a face, and a webcam is optional rather than mandatory. If you do use one, remember it occupies a small corner of the frame, so resolution matters less than clean low-light performance and a steady frame rate.
Prioritise a decent sensor, an aperture of f/2.0 or wider, and reliable 60fps at 1080p over a headline 4K figure that drops to 30fps. Mount the camera at or slightly above eye level rather than looking up from a desk, and choose a field of view narrow enough to exclude the room behind you. If you plan to use a green screen later, clean and noise-free pixels matter far more than pixel count, because noise around your outline is what makes a key look ragged. Suitable options are gathered in our roundup of the best webcams for streaming.
Monitors and Workspace
A second screen is the most underrated productivity upgrade in streaming. Running your game on one display and your streaming software, chat and alerts on another means you stop alt-tabbing mid-gameplay, which viewers notice immediately.
The second display does not need to be expensive, since it only shows dashboards and text. Your primary display is where refresh rate and response time matter for the games themselves. Panel type is worth a thought too: matte finishes handle your own key light far better than glossy ones, which throw reflections straight back at the camera. Our comparison of the best monitors for streaming covers sensible pairings.
The desk deserves attention as well, because it has to carry monitors, a microphone arm, a camera mount and cable runs while staying stable. A wobbly surface transmits every keystroke into a boom-mounted microphone. Depth matters for getting the right distance from the camera, and grommets or a cable tray keep the background tidy. Options built for this load appear in our list of the best desks for streaming.
Upload Bandwidth and Settings
Your connection sets a hard ceiling. As a rough guide, 720p at 60fps wants roughly 4 to 5 Mbps of upload, and 1080p at 60fps wants around 6 Mbps for most content. Always leave headroom above your target, because a saturated link produces dropped frames, and dropped frames look far worse than a lower resolution.
Use a wired connection if you possibly can. Wireless is workable but far more prone to the brief interruptions that show up as stuttering. Test at the time of day you stream, since shared connections behave very differently in the evening, and remember that fast-moving content needs more bitrate than slow content at the same resolution.
Three Realistic Budget Tiers
- Starter. Use the computer you own, add a decent USB microphone on a boom arm, one diffused desk lamp, and free broadcasting software. Stream at 720p60. This tier produces perfectly watchable content and tests whether you enjoy streaming at all.
- Committed. Add a graphics card with a modern encoder, a dedicated webcam, a proper key light plus a fill, a second monitor and a stable desk. Stream at 1080p60. This is where a channel starts looking deliberate rather than improvised.
- Serious. Add acoustic treatment, an audio interface with an XLR microphone, a three-point lighting setup, a capture card if you stream from a console, and possibly a second machine to separate gameplay from encoding.
Move up a tier only when a specific limitation is genuinely holding your stream back, not on a schedule.
Common Beginner Mistakes
The most common is buying everything at once before knowing which parts of streaming you enjoy, which leaves an expensive shelf of unused equipment. The second is spending heavily on a camera while streaming in a dark room, which no camera can rescue. The third is neglecting audio entirely, which costs more viewers than any visual flaw.
Two more are worth naming. Setting a bitrate above what your connection can sustain produces constant dropped frames that look worse than a lower setting would, and beginners frequently blame their computer for it. And ignoring the room itself, with its bare walls and hard surfaces, leaves an echo that a better microphone will only capture more faithfully.
Frequently Asked Questions
Do I need a second computer to stream?
No. A dual-PC setup solves problems that only appear at high settings on demanding games. A single modern machine with hardware encoding on the graphics card handles the vast majority of beginner and intermediate streams comfortably.
Should I stream at 1080p or 720p?
Start at 720p60 if your upload is modest. Smooth motion at a lower resolution looks better than a stuttering higher-resolution stream, and viewers notice dropped frames far more readily than they notice pixel count.
Is a USB microphone good enough?
Yes, for a long time. A quality USB dynamic microphone on a boom arm, positioned close to your mouth, sounds excellent. The move to XLR and an interface adds flexibility and headroom rather than an immediate leap in quality.
How important is a green screen?
It is optional and depends on your background. Good lighting and a tidy space often look better than a poorly lit green screen, which produces ragged edges and colour spill onto your hair and shoulders.
What is the single best first upgrade?
Audio, followed immediately by lighting. Both cost relatively little, both improve every stream you ever produce, and neither becomes obsolete when you change games or platforms.
Final Thoughts
A beginner streaming setup should be judged by whether it removes obstacles, not by how it photographs. Start with the machine you own, fix your audio, add a light, and go live. Once you have streamed enough to know what frustrates you, whether that is dropped frames, a dark picture or a cluttered workflow, the next purchase becomes obvious and you buy it once. Build in that order through 2026 and you will end up with a setup shaped by your own experience, at a fraction of the cost of copying somebody else’s.









