Owen Bradley
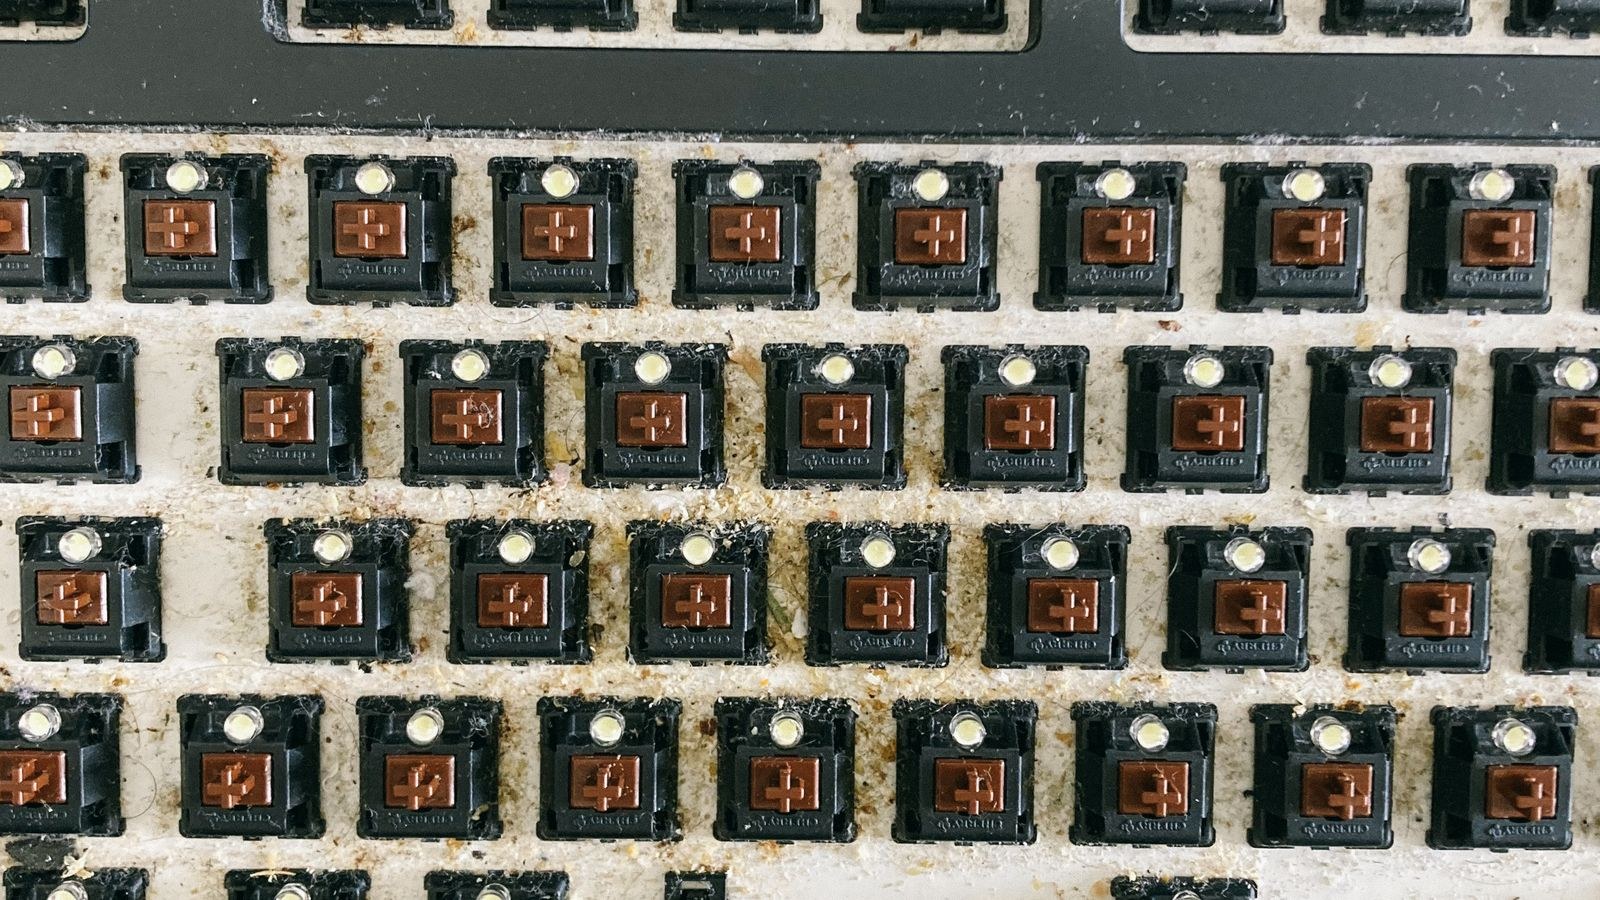
 A mechanical keyboard is an open structure with dozens of gaps for crumbs, hair, dust and skin oil to fall into, and unlike a membrane board there is no rubber sheet underneath catching it all. Left alone for a year, the plate turns grey, keys start feeling sluggish, and the sound goes dull and inconsistent. The good news is that the same open construction makes it far easier to clean properly than any laptop keyboard. This guide covers the whole range, from a five-minute weekly dust-out to a full keycap wash, plus the one situation where speed genuinely matters: a liquid spill that will destroy switches if you leave it.
Three Levels of Cleaning
Not every clean needs to be a full teardown. Matching the effort to the state of the board saves a lot of time.
Level one, the weekly dust-out, takes five minutes and needs no disassembly. Unplug the board, turn it upside down over a bin, tap the back, then blow between the keys. Wipe the keycap tops with a barely damp microfibre. Done consistently, this prevents you ever needing the deeper cleans.
Level two, the monthly surface clean, adds a soft brush between the keycaps to lift the compacted grime that air alone will not shift, plus a wipe of the case and the space around each key with a cloth lightly dampened with isopropyl alcohol.
Level three, the full strip and wash, means pulling every keycap, washing them, and cleaning the exposed plate. Most boards need this once or twice a year, or immediately after a spill. It is the only level that genuinely restores a board that looks and feels neglected, and it applies equally to every layout among the best mechanical keyboards.
What You Need
- A wire keycap puller, which grips under the cap instead of scratching its sides like the plastic ring type.
- Compressed air or a blower bulb to shift loose debris.
- A soft brush, an old toothbrush or a paintbrush, for the plate and between the switches.
- Microfibre cloths, at least two.
- Isopropyl alcohol, 70 percent or higher, for the case and plate only.
- Dish soap and a bowl of warm water for washing keycaps.
- Cotton swabs for the tight corners around stabilisers.
- A towel for drying caps and for photographing your layout against.
How to Deep Clean a Mechanical Keyboard Step by Step
- Photograph the layout and unplug the board. An overhead photo saves you guessing where the function-layer legends go later, especially on compact boards. Then disconnect the cable, or power off and remove the battery on a wireless model.
- Shake out the loose debris. Hold the keyboard upside down over a bin and tap the underside firmly several times. Do this before anything else, because everything that falls out now is debris you will not have to brush around later.
- Blow out what remains. Use short bursts of compressed air at a shallow angle so the dust travels across and out of the board rather than deeper into the switches. Keep a canister upright and at least a hand’s width away, since tilting it can spit cold liquid propellant onto the plate.
- Remove the keycaps. Slip the wire puller under two diagonally opposite corners and lift straight up with a slight wiggle. Never angle or lever the puller, because MX-style switch stems are brittle and shear off under sideways force. Take stabilised keys such as the spacebar, enter and shift extra slowly, lifting evenly from the centre.
- Sort the caps into a container. Keep them roughly in layout order. If a sculpted set gets shuffled, matching the rows back up is tedious.
- Wash the keycaps. Fill a bowl with warm, not hot, water and a drop of dish soap, drop the caps in and leave them two to three hours. Agitate occasionally, then work stubborn edges with a soft brush. Rinse thoroughly in clean water. Never put keycaps in a dishwasher or in boiling water, since the heat warps them and lifts printed legends.
- Dry the caps completely. Spread them legend-side down on a towel and leave them overnight. Water trapped inside a cap will not evaporate quickly and produces a musty smell if you refit them damp. A fan speeds this up considerably.
- Clean the exposed plate. Blow the board out again now that the caps are off, then brush between the switches, working the bristles into the corners. Wipe the plate with a cloth barely dampened with isopropyl alcohol, keeping liquid away from the switch openings.
- Detail the tight spots. Cotton swabs handle the gaps around stabiliser housings and the seam where the plate meets the case, which is where compacted grime hides. If the board separates from its case easily, a quick wipe of the underside is worth doing.
- Wipe the case and cable. The case tolerates a stronger cleaner than the plate does. Alcohol on a cloth removes hand oil from the front edge, and a wipe along the cable removes the greasy film that builds up on braided sleeving.
- Refit the keycaps. Only once everything is fully dry. Align each cap’s socket with the switch stem and press straight down until it seats with a soft click. Fit the stabilised keys last, pressing evenly across the whole cap so both stabiliser stems engage at the same time as the switch.
- Test every key. Plug in and run through the whole board in a text document or an online key tester, including modifiers and the function layer. A key that fails now is almost always a cap that is not fully seated.
What to Do After a Spill
A spill is the one scenario where minutes matter. Sugary drinks are the worst, because as the liquid dries it leaves a sticky residue that glues switch stems in place. Coffee and soft drinks are far more damaging than plain water.
- Disconnect power immediately. Unplug the cable or remove the battery. Do not press keys to test whether it still works; a powered board with liquid inside can short.
- Turn it upside down straight away. Hold it over a towel at an angle so gravity pulls the liquid out through the plate rather than deeper into the switches.
- Pull every keycap. You need direct access to the switches, and there is no shortcut.
- Blot, do not wipe. Press a dry cloth or paper towel against the plate to soak up pooled liquid. Wiping pushes residue sideways into switch openings.
- Flush sugary residue. For soft drinks, coffee with sugar or juice, a cloth dampened with isopropyl alcohol dissolves the sticky film far better than water, and alcohol evaporates quickly without leaving deposits.
- Dry it for at least 48 hours. Leave the board upside down at an angle in a warm, well-ventilated spot. Resist the urge to test it early. Do not use a hairdryer on high heat, which warps plastic and can lift solder.
- Test and diagnose. Once fully dry, plug in and check every key. A few dead or repeating keys usually mean residue inside those specific switches, and on a hot-swap board you can simply pull and replace them. On a soldered board that means desoldering.
If the damage is beyond repair, that is the moment to think about replacement. Boards built for shared living spaces and open offices, like many in the roundup of the best keyboards for home office use, often use hot-swap sockets that make spill recovery dramatically simpler.
How Often Should You Clean?
Frequency depends far more on habits than on the board. Eating at your desk is the single biggest factor, followed by pets, smoking and open windows near a busy street. As a baseline, dust weekly, surface-clean monthly, and strip fully twice a year. Heavy gaming sessions and long typing days add hand oil faster than most people expect, so boards used for both, such as the models found among the best gaming keyboards, tend to need the surface clean more often than a work-only board does.
A few preventive habits cut all of this down. Keep drinks off the desk surface the keyboard sits on, or at least behind it rather than beside it. Wash your hands before long sessions, which does more for keycap shine than any cleaner. Cover the board when it is unused for long stretches, especially in dusty rooms. And keep the wrist rest clean too, since a fabric or leatherette pad collects skin oil and transfers it straight back to your hands; the memory foam pads bundled with many of the best keyboards with wrist rest designs usually have removable covers for exactly this reason.
Mistakes That Damage Boards
- Running the whole keyboard under a tap. Some enthusiasts do this with fully waterproofed builds, but on a standard board it destroys the controller.
- Using a dishwasher for keycaps. Heat and detergent warp plastic and strip legends permanently.
- Alcohol on keycaps. It can fade or dissolve printed legends. Soap and water only for caps; save the alcohol for the case and plate.
- Refitting damp keycaps. Trapped moisture smells and can reach the switch below.
- Angling the puller. Sideways force is what snaps switch stems, not pulling too hard.
- Compressed air held at a steep angle. Blowing straight down drives debris deeper into the switch housings instead of out of the board.
Full-size boards deserve a little extra patience simply because there is more of them, and the numpad collects debris at a surprising rate given how often it goes unused. If you are working through one of the larger layouts covered in guides to the best full size keyboards, clean it in sections rather than pulling all 104 caps at once.
Frequently Asked Questions
Can I clean a mechanical keyboard without removing the keycaps?
You can do a decent surface clean with compressed air, a brush and a damp cloth, and for most weekly maintenance that is enough. Only a full strip reaches the plate and the compacted grime around the switches.
How long do keycaps take to dry?
Allow at least eight hours spread out on a towel, and overnight is safer. A fan or airing cupboard shortens it, but do not apply direct heat, which can warp the plastic.
Is isopropyl alcohol safe on my board?
It is fine on the case, the plate and the cable, and it is the best option for dissolving sugary spill residue. Keep it off printed keycap legends and out of the switch openings.
My keys feel sticky after cleaning. Why?
Residue almost certainly remains inside those switches, usually from an earlier spill rather than the cleaning itself. On a hot-swap board, replace the affected switches; otherwise, careful flushing with alcohol and thorough drying sometimes recovers them.
Final Thoughts
Cleaning a mechanical keyboard well is mostly about frequency rather than technique. A weekly tip-and-blow takes five minutes and stops debris ever compacting into something that needs a full teardown. When the deep clean does come around, work in order: photograph, unplug, shake out, blow out, pull caps straight up with a wire puller, wash the caps in warm soapy water, brush and wipe the plate, then dry everything completely before reassembling. Handle a spill within minutes rather than hours and use alcohol on sugary residue, and a good board will keep looking and sounding the way it did on day one for many years.