
 Owen Bradley
 Two people can put the same dishes into the same machine and get completely different results. One opens the door to spotless glassware; the other finds gritty plates, a cloudy tumbler and a spoon still wearing yesterday’s yogurt. The difference is almost never the detergent. It is the loading. A dishwasher cleans by spraying jets of hot water outward from rotating arms, so anything that blocks a jet, shadows another item or stops an arm from turning creates a dead zone where nothing gets clean. Learning how to load a dishwasher properly is really about learning how water moves inside the tub, and once that clicks, the rules make obvious sense. Here is the complete method, rack by rack, with the mistakes that cost you the most.
How a Dishwasher Actually Cleans
Picture the spray arm as a sprinkler at the center of the tub. Water leaves it under pressure, travels outward and upward, and strikes whatever surface it meets first. It does not wrap around obstacles and it does not clean what it cannot touch. Every loading rule follows from that single fact: soiled surfaces must face the spray, nothing may nest inside anything else, and the arms must be free to spin through a full rotation.
The second principle is drainage. Water that lands on an upward-facing flat surface has nowhere to go, so it sits there through the dry cycle and greets you as a puddle. Angle everything. The third principle is heat distribution: items in the lower rack sit closest to the heating element and take the hottest, most forceful spray, which is why dinner plates and pans belong down low and delicate items belong up top.
Before You Load: Scrape, Do Not Rinse
Scrape solid food into the bin, but resist the urge to pre-rinse under the tap. Modern detergents contain enzymes that need something to latch onto. Give them a spotlessly rinsed plate and they have nothing to work on, and in many machines the soil sensor reads clean water and shortens the cycle, leaving the genuinely dirty items under-washed. Scraping alone is enough. The exceptions worth rinsing are dried-on egg, oatmeal and anything that has been sitting for two days.
Check that the detergent cup closes and opens freely, and that nothing tall is leaning against it. A handle blocking the soap door means the tablet never releases at the right moment, which produces a whole load of poorly cleaned dishes for a reason that looks like a machine fault.
Step-by-Step: Loading for the Cleanest Results
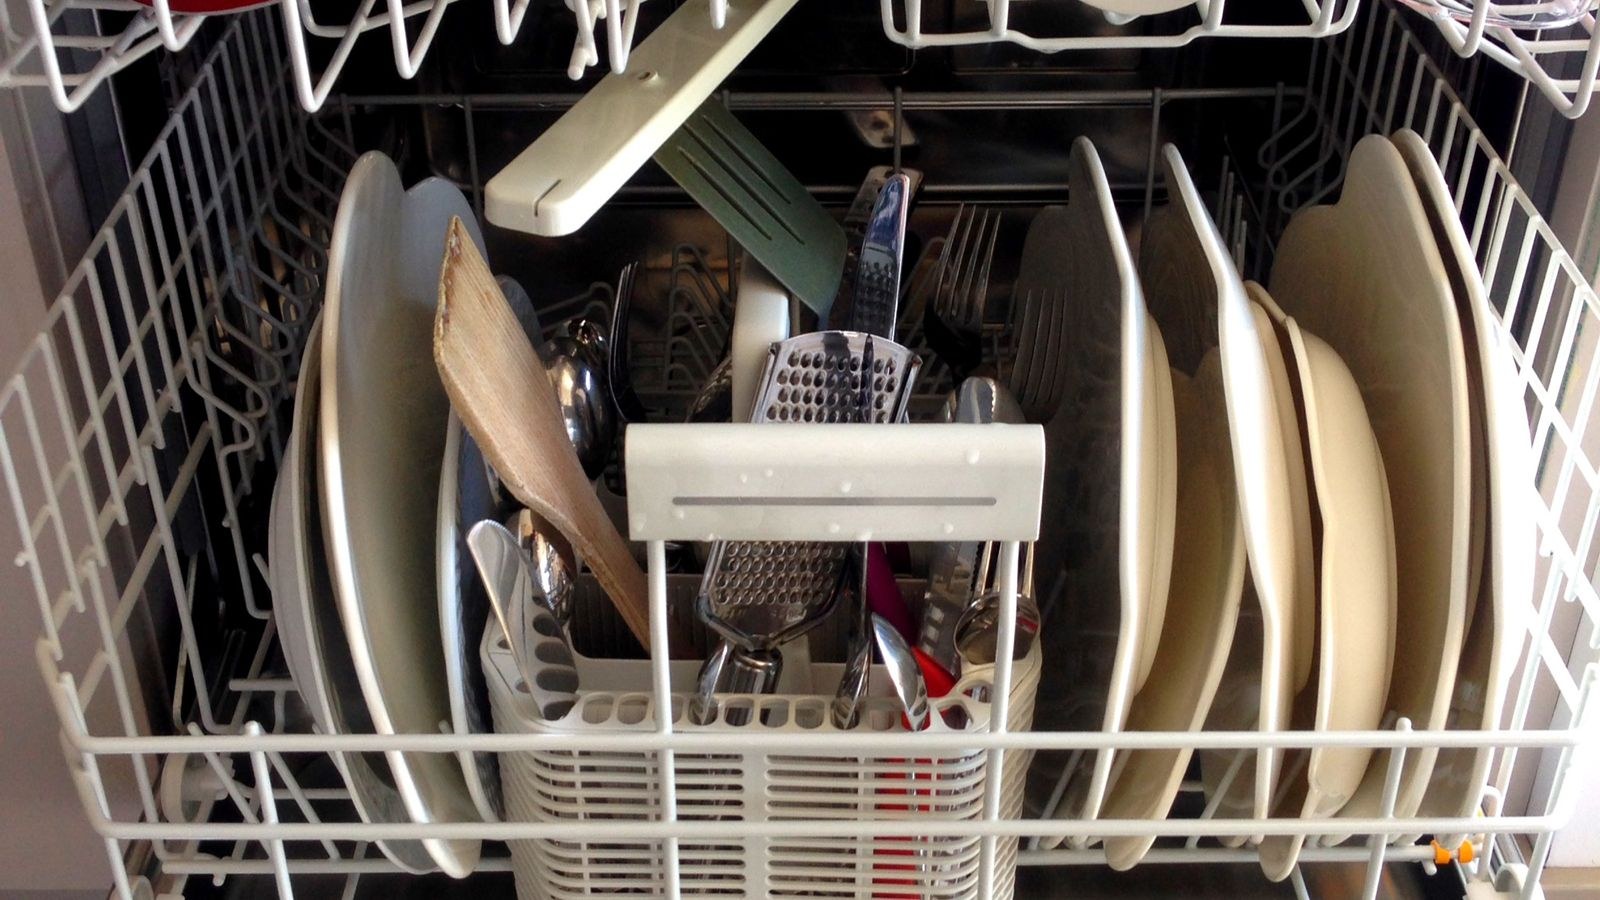
- Start with the bottom rack and the big items. Load dinner plates in the tine rows facing the center, soiled side inward toward the spray arm. Keep one tine slot empty between plates so water can pass between them. Plates that touch shadow one another and come out with clean fronts and dirty backs.
- Angle pots, pans and mixing bowls face down and tilted. Place them along the sides and back so they do not form a wall in front of the spray. Tilt each one so water can run out rather than pooling in the base. Very large stockpots that block half the arm are better washed by hand.
- Keep the spray arms clear. Before closing the door, spin the lower arm and the upper arm with your hand. If anything catches, rearrange it. A single spatula handle poking through the rack can stop an arm dead and ruin the entire cycle.
- Move all cups, glasses and bowls to the top rack. Everything goes face down or steeply angled, resting between tines rather than over them so the tine does not leave an unwashed ring. Bowls should slope toward the center of the machine so water sheets out instead of collecting.
- Protect stemware from vibration. Wine glasses go on the stemware clips if your rack has them, or wedged securely at an angle so the rims cannot knock together. Glass-on-glass contact during a cycle is the single most common cause of chipped rims. Tall stems that touch the upper spray arm will also block it, so lower the rack if your machine allows it.
- Lay plastics on the top rack only. The lower rack sits directly above the heating element and will warp or melt lightweight containers. Wedge lids under the tine rails so the water jets cannot flip them over, because a lid that lands face up fills with dirty water and dumps it back on everything when you unload.
- Mix cutlery so pieces cannot nest. In a basket, alternate handles up and handles down within each compartment. Spoons that spoon together trap food between them permanently. If you have a flat third-rack tray, lay pieces in a single layer with space between them and let the top spray reach every face.
- Point knives handle-up, everything else handle-down. Sharp blades facing down protect your hands when unloading. Forks and spoons clean better with the eating end facing up into the spray, so this is the one place where safety and performance pull in opposite directions and safety wins for knives.
- Separate different metals. Keep silver and stainless from touching. Prolonged wet contact between dissimilar metals causes pitting and dark staining that no amount of rewashing will remove.
- Fill from the back forward and the outside in. Loading in that order means you never have to reach over fragile items already in place, and it naturally leaves the center of each rack most open to the spray.
- Do a final check and start the cycle. Confirm both arms spin, the detergent door swings clear, no plastic dangles near the element, and nothing blocks the filter area at the base. Run the kitchen tap until hot before pressing start so the machine fills with hot water immediately.
What Should Never Go In
- Cast iron and carbon steel — detergent strips the seasoning and the pan flash-rusts.
- Wooden spoons, boards and knife handles — heat and prolonged soaking crack and warp them.
- Good chef’s knives — the edge dulls against the rack and the detergent etches the steel.
- Non-stick pans without a dishwasher-safe mark — the coating degrades cycle by cycle.
- Crystal, hand-painted china and gold trim — high heat and alkaline detergent lift decoration.
- Aluminum bakeware and insulated travel mugs — the first oxidises grey, the second fills its vacuum seal with water.
Detergent, Rinse Aid and Water Quality
Perfect loading still disappoints if the chemistry is wrong. Use a full dose of detergent in the closed dispenser rather than dropping a tablet loose in the base, where it dissolves during the pre-rinse and washes away before the main cycle. Keep the rinse aid reservoir topped up; it lowers water surface tension so droplets sheet off instead of drying into spots.
Hard water is the other variable. Dissolved minerals blunt detergent, leave a chalky film on glassware and slowly build scale on the heating element. If your glasses look cloudy no matter how carefully you load, that is mineral deposit rather than dirt. The same descaling chemistry that keeps laundry appliances healthy works here, and our comparison of the best washing machine detergents is a useful primer on how enzyme and builder blends handle mineral-heavy water in any household appliance.
Keeping the Machine Itself Clean
A dishwasher that is dirty inside cannot clean anything well. Rinse the base filter monthly, clear the spray arm jets with a toothpick when they clog, and run an empty hot cycle with a descaling product every four to six weeks. Our appliance cleaner guide explains how those products dissolve limescale and grease film, and the roundups of the best washing machine cleaners and the best cleaners for washing machines cover the formulations that shift heavy build-up fastest.
Common Loading Mistakes
- Overcrowding. One more plate means two items get no water at all. A slightly emptier load washed properly beats a packed load run twice.
- Facing plates outward. The soiled side must point at the center arm, not at the tub wall.
- Nesting bowls and spoons. Anything sitting inside anything else has a sealed, unwashed surface.
- Blocking the detergent door. A pan handle or tall bowl in the wrong spot stops the tablet releasing.
- Laying cups over tines. Balanced on a tine, a cup keeps an unwashed contact ring and drips onto whatever sits below.
- Pre-rinsing everything. Enzyme detergents need soil to work on, and the soil sensor shortens the cycle when it reads clean water.
Faucet Habits That Help
Running the tap hot before starting is genuinely worth the ten seconds, because the machine’s first fill sets the temperature for the whole wash. A fixture with a temperature readout makes it effortless, and our guide to the best smart faucets covers models with precise controls that also cut the water you waste while waiting for hot.
Frequently Asked Questions
Do I really need to skip pre-rinsing?
Yes, for the most part. Scrape off solids and load. Enzyme detergents cling to food residue, and most machines sense soil levels to set cycle length. Rinsing everything spotless wastes water and can produce a shorter, weaker wash.
Which rack should baking sheets go on?
Along the sides or back of the bottom rack, standing on edge and angled inward. Never lay one flat, and never place one across the front where it shields the detergent door and the lower spray arm from the rest of the load.
Why do my glasses come out cloudy?
Usually hard water minerals rather than poor washing. Increase the rinse aid dose, run a descaling cycle, and confirm the glasses are not touching each other. If the cloudiness will not wipe off, it is permanent etching rather than deposit.
Can I run a half-empty machine?
You can, and it will clean fine, but you use nearly the same water and energy as a full load. Use a light or half-load cycle if your machine offers one, and load the used rack normally rather than spreading items thinly across both.
Final Thoughts
Good loading is a short list of habits: face soiled surfaces at the center, leave space between everything, angle items so water drains, keep plastics and delicates up top, spin both spray arms before you close the door, and never block the detergent dispenser. Pair that with a proper detergent dose, healthy rinse aid levels and a filter you actually clean, and you will get consistently spotless results from the same machine that used to disappoint you. Spend one extra minute loading in 2026 and you will save yourself the far more annoying job of rewashing by hand.









