
 Owen Bradley
 Renting should not mean living with a lock you cannot control. Plenty of tenants want keyless entry, remote access for a dog walker, and an entry log they can check from work, but they also have a lease clause that forbids drilling or altering the front door. The good news is that a smart lock for renters almost never requires new holes. Retrofit designs sit on top of the deadbolt you already have, or swap the visible half of it while leaving the bore holes, strike plate, and frame exactly as the landlord left them. This walkthrough shows how to plan the install, fit the hardware without damage, and put everything back the way it was on the day you hand over the keys.
Check Your Lease Before You Touch the Door
Start with paperwork, not tools. Most residential leases include a clause about altering locks, and the wording usually falls into one of three camps: no changes at all, changes with written permission, or changes allowed as long as the landlord keeps a working key. That last condition steers you toward a specific type of hardware.
If your landlord must retain key access, you need a retrofit lock that leaves the outside keyway untouched. If they only care that the door is restored at move-out, you can consider a full keypad deadbolt. Send a short email describing exactly what you plan to install, note that no drilling is involved, and offer to remove it at the end of the tenancy. A written reply protects your deposit far better than a verbal yes in the hallway.
Apartment blocks often use a master key system so maintenance staff can reach every unit in an emergency. Replacing the exterior cylinder breaks that system, so if your building is master-keyed, choose interior-only hardware.
Understand the Two Renter-Friendly Install Types
There are two hardware approaches that avoid new holes, and picking the right one before you buy saves a return trip.
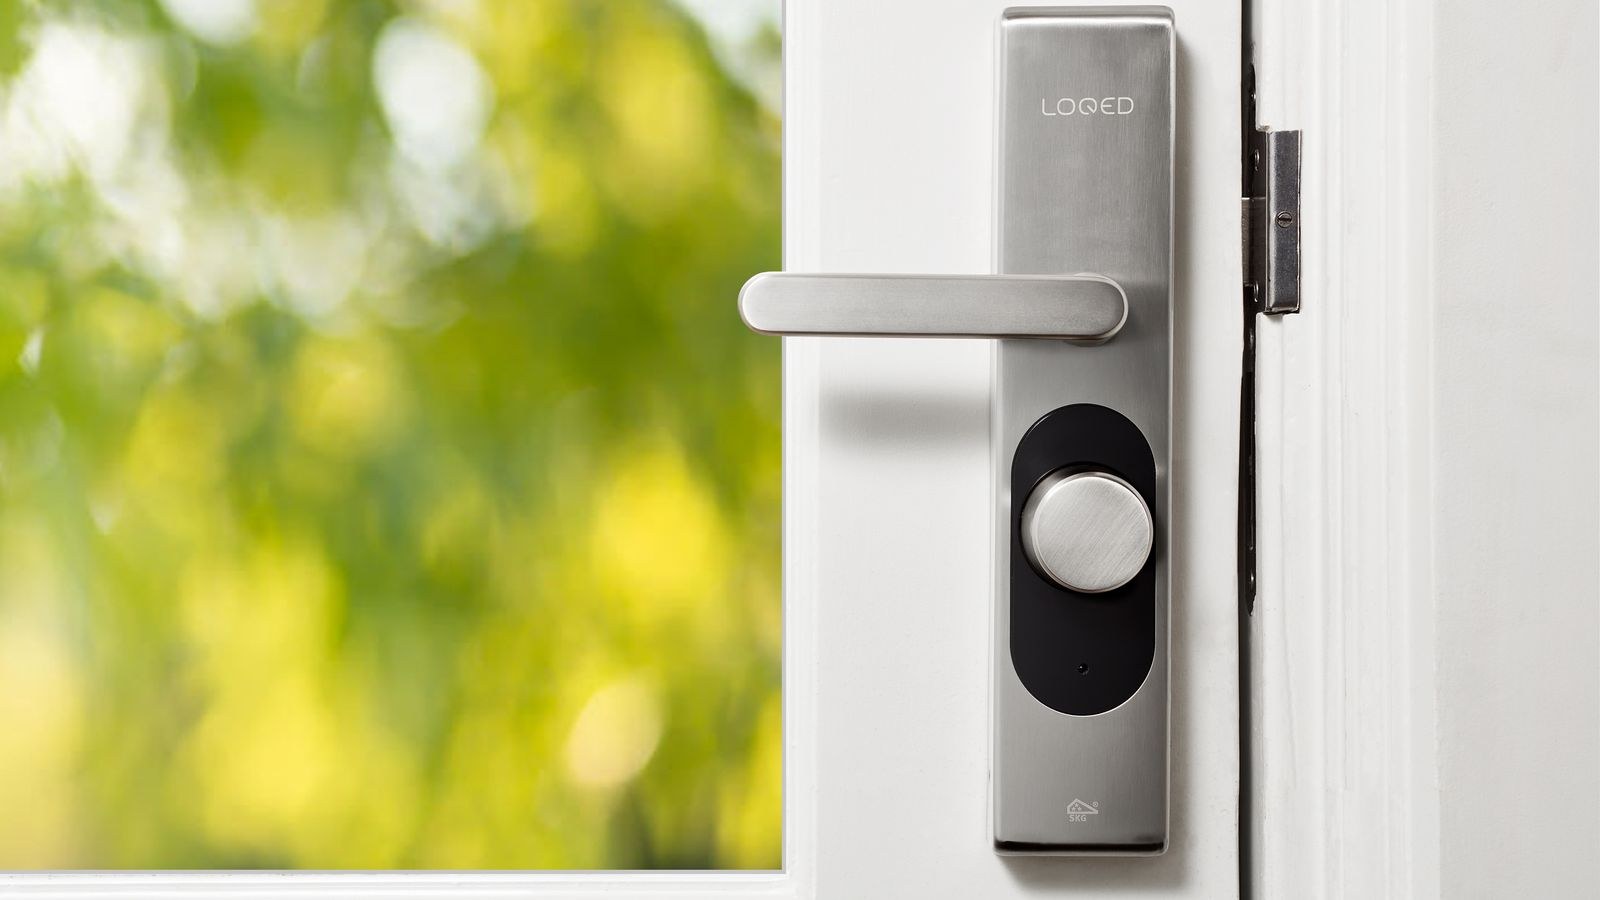
- Interior-only retrofit. The unit clamps over the thumb turn on the inside of your existing deadbolt and physically rotates it with a small motor. Nothing on the outside of the door changes, the original key still works, and the only fasteners are the two screws already holding your deadbolt together, or an adhesive mounting plate. This is the safest choice for strict leases.
- Half-swap keypad deadbolt. You remove the whole deadbolt and install a new one in the same bore holes. Standard doors use a 2-1/8 inch cross bore, so a replacement designed to that spec drops straight in. You keep the old lock in a bag and reinstall it when you leave. This gets you an exterior keypad, but it changes the key.
If you are weighing which style suits your door, our overview of the best smart locks explains how retrofit and full-replacement designs differ in practice, and the roundup of the best deadbolt smart locks covers the replacement models that match standard bore dimensions.
Tools and Materials You Will Need
This is a short list, and almost everything is either in the box or already in a kitchen drawer.
- A #2 Phillips screwdriver, preferably hand-driven rather than a power driver, so you do not strip the soft screws.
- A tape measure for backset and door thickness.
- A small zip-top bag and a marker for storing the original parts.
- The batteries the lock takes, usually four AA cells, plus a spare set.
- Your phone with the manufacturer app installed and your home network password to hand.
- A pencil and a strip of painter’s tape if you need to mark alignment without marking the door.
Notice what is not on the list: a drill, a chisel, or a hole saw. If a set of instructions asks for any of those, you are looking at a model that is not renter-safe.
Measure Before You Buy
Three measurements determine compatibility, and taking them takes about two minutes.
- Door thickness. Measure the edge of the door. Most interior and exterior doors run between 1-3/8 and 1-3/4 inches. Locks list a supported range, and anything outside it needs an extension kit.
- Backset. Measure from the edge of the door to the centre of the deadbolt hole. It will be either 2-3/8 or 2-3/4 inches. Replacement deadbolts usually ship with an adjustable latch that covers both, but confirm it.
- Thumb turn shape and clearance. For interior-only retrofits, check the shape of your existing thumb turn against the adapter list in the product manual, and make sure there is at least an inch of flat door surface around it for the mounting plate.
Write these three numbers down before you shop. Almost every renter return is caused by skipping this step.
Installing an Interior-Only Retrofit, Step by Step
- Photograph the existing lock. Take clear pictures of the inside face before you loosen anything. At move-out these photos are your reference for putting it back right.
- Remove the two interior screws. These long machine screws run through the door into the exterior half. Loosen them evenly so the exterior escutcheon does not tilt and scuff the paint. Set them aside in your labelled bag.
- Lift off the interior plate. The exterior half will stay put if you support it with one hand. Leave the latch body in the door edge untouched.
- Fit the mounting plate. Place the new plate over the thumb turn spindle and secure it with the supplied screws. Tighten by hand until snug, then stop. Overtightening bows the plate and makes the bolt bind.
- Select the correct thumb turn adapter. The kit includes several plastic collars for different thumb turn shapes. Test-fit each one until the turn seats with no wobble. A loose adapter is the single most common cause of a lock that jams halfway.
- Clip on the lock body and add batteries. Slide the motor housing onto the plate until it clicks, then load the cells and watch for the status light.
- Run the calibration routine. The app will ask you to lock and unlock so the motor learns the travel limits. Do this with the door open first, then repeat with it closed, because a slightly misaligned strike changes how far the bolt has to move.
- Connect to your network and set codes. Join it to WiFi or a hub, set a personal access code, and add any household members. Set an auto-lock delay if you want it, but leave it generous for the first week while you get used to the lock.
If You Are Swapping the Whole Deadbolt Instead
The sequence is similar but includes the exterior half. Remove the two interior screws, lift both halves off, then unscrew the two small screws holding the latch faceplate in the door edge and slide the latch out. Insert the new latch with the bolt facing the correct way, reinstall the faceplate screws in the same holes, feed the new exterior assembly’s cables or tailpiece through the bore, then mount the interior body and tighten. Keep every original piece, including the latch and the two faceplate screws, in your bag. If you want an exterior code pad on the door, compare designs in our guide to the best keypads and read the general smart lock installation walkthrough for the full replacement procedure.
Testing and Alignment Without Damaging the Frame
A motorised bolt is far less forgiving than your wrist. If the strike plate is slightly out of line, you would never notice turning a key, but the motor will stall, drain batteries fast, and eventually report a jam. Test by closing the door and throwing the bolt ten times in a row. It should extend fully and smoothly every time with no grinding.
If it binds, resist the urge to file the strike or move it. Instead, check whether the door is sagging by tightening the hinge screws on the frame side, a reversible fix that often cures the problem. Weather stripping compressed too tightly can also push the door out of position. Only ask the landlord about adjusting the strike if none of the reversible options work.
Protecting Your Deposit
Damage disputes come down to evidence. Keep the original deadbolt, its screws, the latch, the faceplate, and any keys in one labelled bag, then store that bag somewhere you will find it in two years. Do not use adhesive mounting on a painted or veneered door unless the manufacturer rates it as removable. Change batteries on a schedule rather than waiting for a failure, and keep a physical key with you if the exterior cylinder is still original.
Common Mistakes Renters Make
- Using a power driver on the mounting screws. They are soft brass or plated steel and strip in seconds. Hand tools only.
- Skipping calibration. The motor guesses its travel and either fails to fully extend the bolt or slams it against the strike.
- Throwing away the old hardware. Replacement deadbolts are cheap, but matching the exact finish and key two years later rarely happens.
- Choosing a model that needs a new bore. Anything requiring a hole saw is a renovation, not an installation.
- Mounting on a hollow or badly warped door. The plate needs a flat, solid surface to hold torque.
Removing It Cleanly at Move-Out
- Delete all user codes and remove the lock from your account and from any hub or voice assistant, so the next tenant inherits nothing.
- Take out the batteries and store them separately to prevent leakage in the box.
- Unclip the lock body, unscrew the mounting plate, and remove any adapter collars.
- Refit the original interior plate or the complete original deadbolt using your move-in photos as the reference.
- Test the key and the thumb turn several times, then photograph the restored door with a date stamp for your records.
Frequently Asked Questions
Can I install a smart lock without telling my landlord?
You can physically, but you should not. Even a no-drill install is a change to the entry hardware, and disclosing it in writing costs nothing while protecting your deposit and your relationship with the building.
Will an interior retrofit still let my key work?
Yes. Interior-only units leave the exterior cylinder completely untouched, so every existing key, including the landlord’s, continues to work exactly as before.
What happens if the batteries die while I am out?
With an interior retrofit you simply use your key. With a keypad replacement, most models offer emergency power through a terminal on the underside of the keypad or retain a backup keyway, so check which fallback yours provides before you rely on it.
Which type is best if I move often?
Interior retrofits transfer between homes in about ten minutes and fit almost any standard deadbolt, which makes them the practical choice for frequent movers. Browse the best smart locks for home use for portable options and read our keyless entry guide for a broader look at how these systems fit together.
Final Thoughts
Adding keyless entry to a rental is far less risky than most tenants assume. Measure your door, get your landlord’s answer in writing, choose hardware that reuses the existing bore holes, and keep every original part in a labelled bag. Take your time on the two steps people rush, adapter fitting and calibration, and the lock will run reliably for years. When the lease ends, twenty minutes with a screwdriver returns the door to its original condition.









