
 Owen Bradley
 Installing a processor is the shortest step in a PC build and the one that causes the most anxiety, because the failure mode is expensive and usually permanent. Bent pins mean either a dead chip or a dead motherboard depending on which socket type you own, and no amount of careful work afterward recovers a bad seating. The good news is that the operation itself requires almost no force and takes under two minutes once you know what to check. This guide walks through how to install a CPU safely, from preparing the workspace to confirming a successful first boot, with the specific handling habits that prevent damage.
Know Which Socket You Are Working With
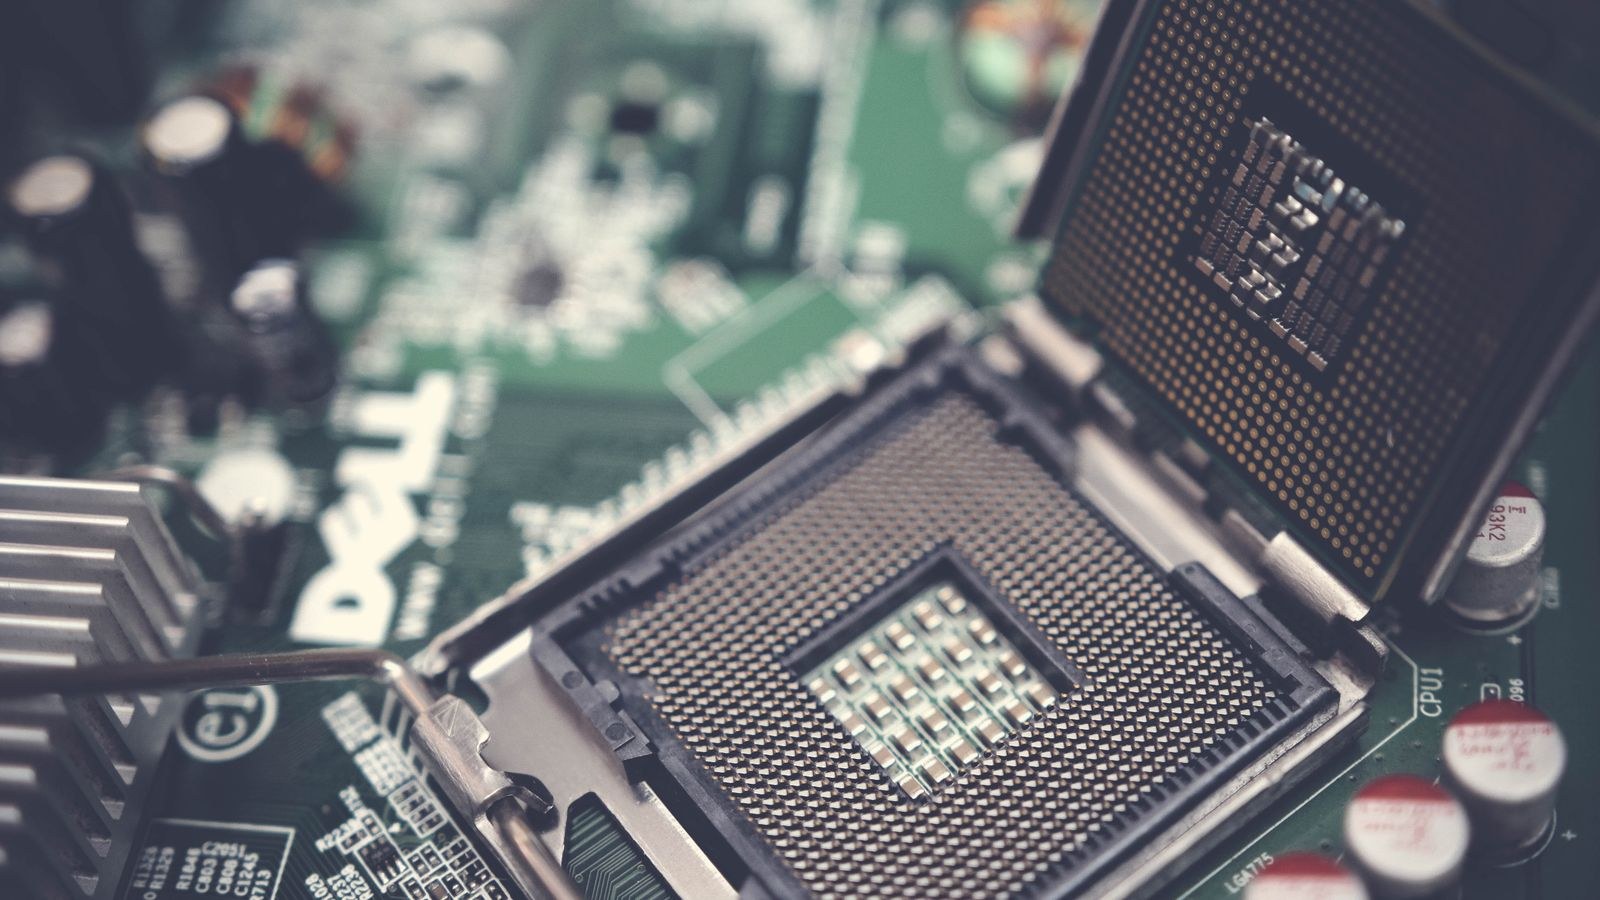
Before touching anything, identify where the pins live, because it determines what you must protect. In an LGA socket, the delicate gold pins are an array in the motherboard socket itself, and the processor has flat contact pads. Intel platforms and AMD’s AM5 platform both work this way. Here the chip is relatively robust and the motherboard is fragile, so the risk is dropping the CPU into the socket or setting the board down on a hard object.
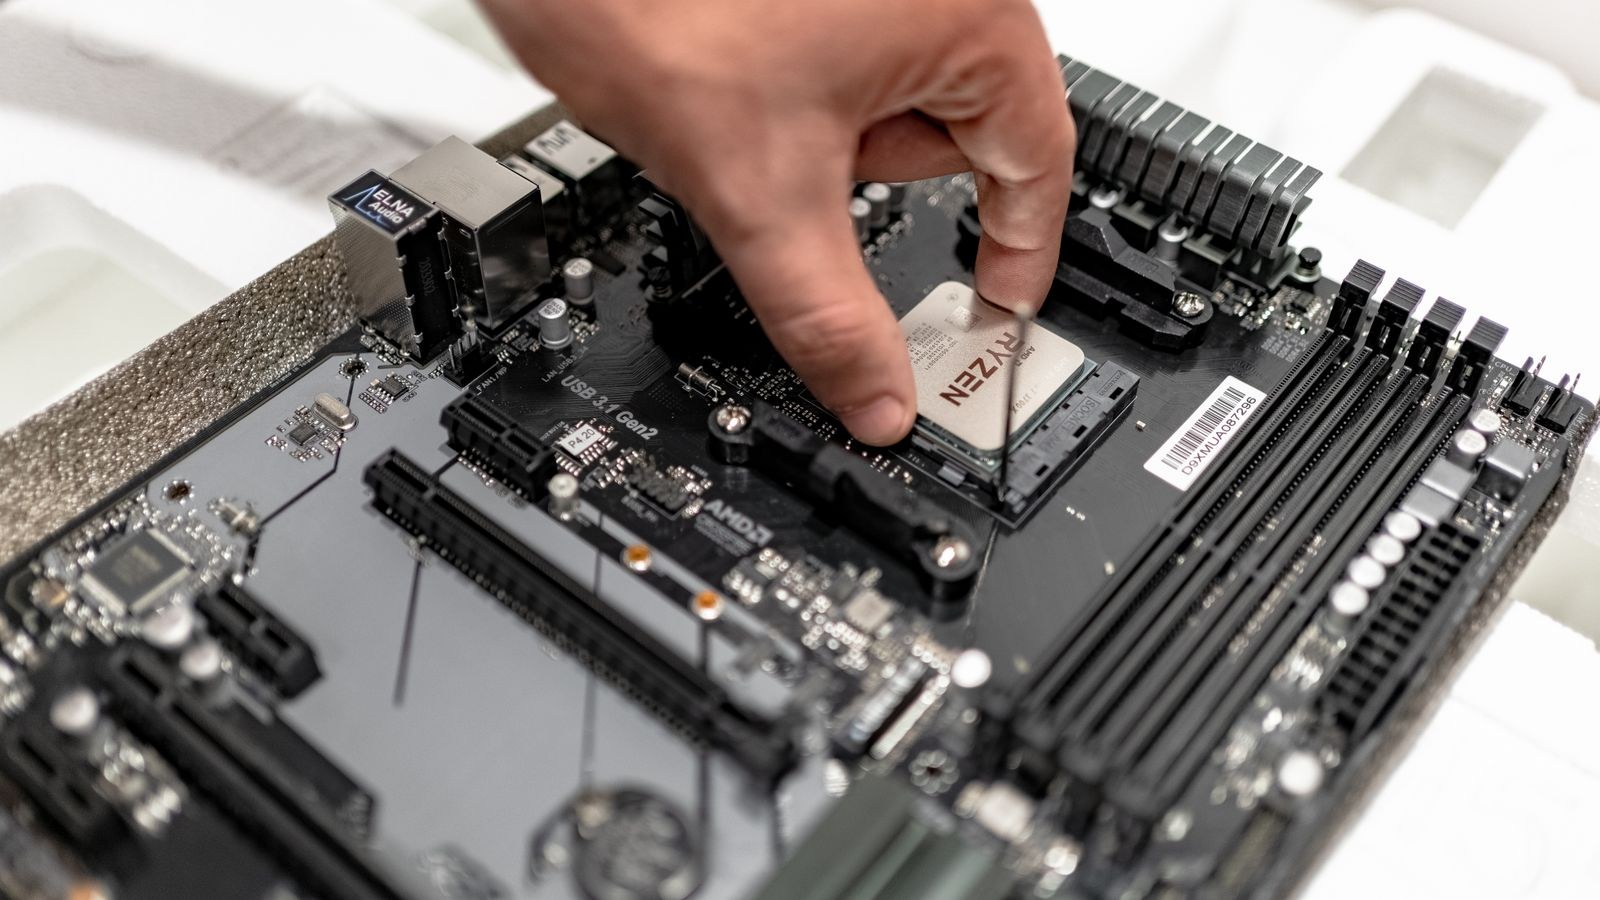
In a PGA socket, used by AMD’s older AM4 platform, the pins are on the underside of the processor and the socket contains holes. Here the chip is fragile. Never set a PGA processor pin-side down on any surface, and never push it into the socket while the retention lever is closed.
Either way, the principle is identical: the processor should drop into place under its own weight. If you are pressing, something is wrong. If you are unsure which platform you have, check the socket designation printed on the motherboard box or the boards covered in our roundup of the best AM5 motherboards, which explains how current AMD sockets differ from the previous generation.
Tools and Preparation
- A clean, flat, well-lit work surface, ideally a table rather than carpet.
- An anti-static wrist strap, or a habit of touching the bare metal of the case or power supply chassis before handling components.
- A magnifying glass or your phone’s camera zoom for inspecting the socket.
- Thermal paste, unless your cooler ships with a pre-applied pad.
- Isopropyl alcohol of 90 percent or higher and a lint-free cloth for cleanup.
- The motherboard manual, open to the CPU installation page.
Install the processor while the motherboard is outside the case, resting on its own anti-static bag on top of the flat cardboard box it came in. That gives a firm, non-conductive surface with clearance underneath for the rear socket bracket. Working inside a case makes it far harder to see the socket clearly and to line up the chip, which is exactly when mistakes happen.
Step by Step: Seating the Processor
- Ground yourself and clear the area. Remove drinks, tools, and anything that could roll onto the board. Touch a bare metal surface to discharge static, and repeat that if you walk away and come back, particularly on carpet in dry weather.
- Remove the socket cover. Push the retention lever down and outward from the small hook holding it, then lift it fully. The retention frame swings up with it. On LGA boards, the black plastic protective cover either pops off with the frame or lifts off separately. Do not remove it early; it protects the pins until the moment you are ready.
- Inspect the empty socket. Look across the pin array at a shallow angle under good light. Every pin should stand at the same height in a perfectly regular grid. A pin leaning out of line, or a dust particle sitting in the array, must be dealt with now, because once the chip is clamped down, a stray pin can be crushed flat. On a brand new board, a damaged socket is a warranty claim, so photograph anything suspicious before proceeding.
- Pick up the CPU by its edges only. Hold it between thumb and forefinger on the sides of the substrate. Do not touch the gold contact pads or the pins, and do not press on the heat spreader in a way that could tip the chip out of your fingers.
- Find the alignment markers. Every processor has a small golden triangle on one corner, and the socket has a matching triangle marked on the plastic frame. Rotate the chip so the two triangles are on the same corner. Most sockets also have one or two notches cut into the edge of the substrate matching keys in the socket walls, giving a second confirmation. Verify both before lowering the chip.
- Lower it straight down. Hold the processor level and parallel to the board, position it above the socket, and let it settle vertically. It should drop the last millimetre by itself and sit flat with no gap at any corner. Never slide the chip sideways into position, and never rotate it once it is in the socket, as both actions drag contacts across pins.
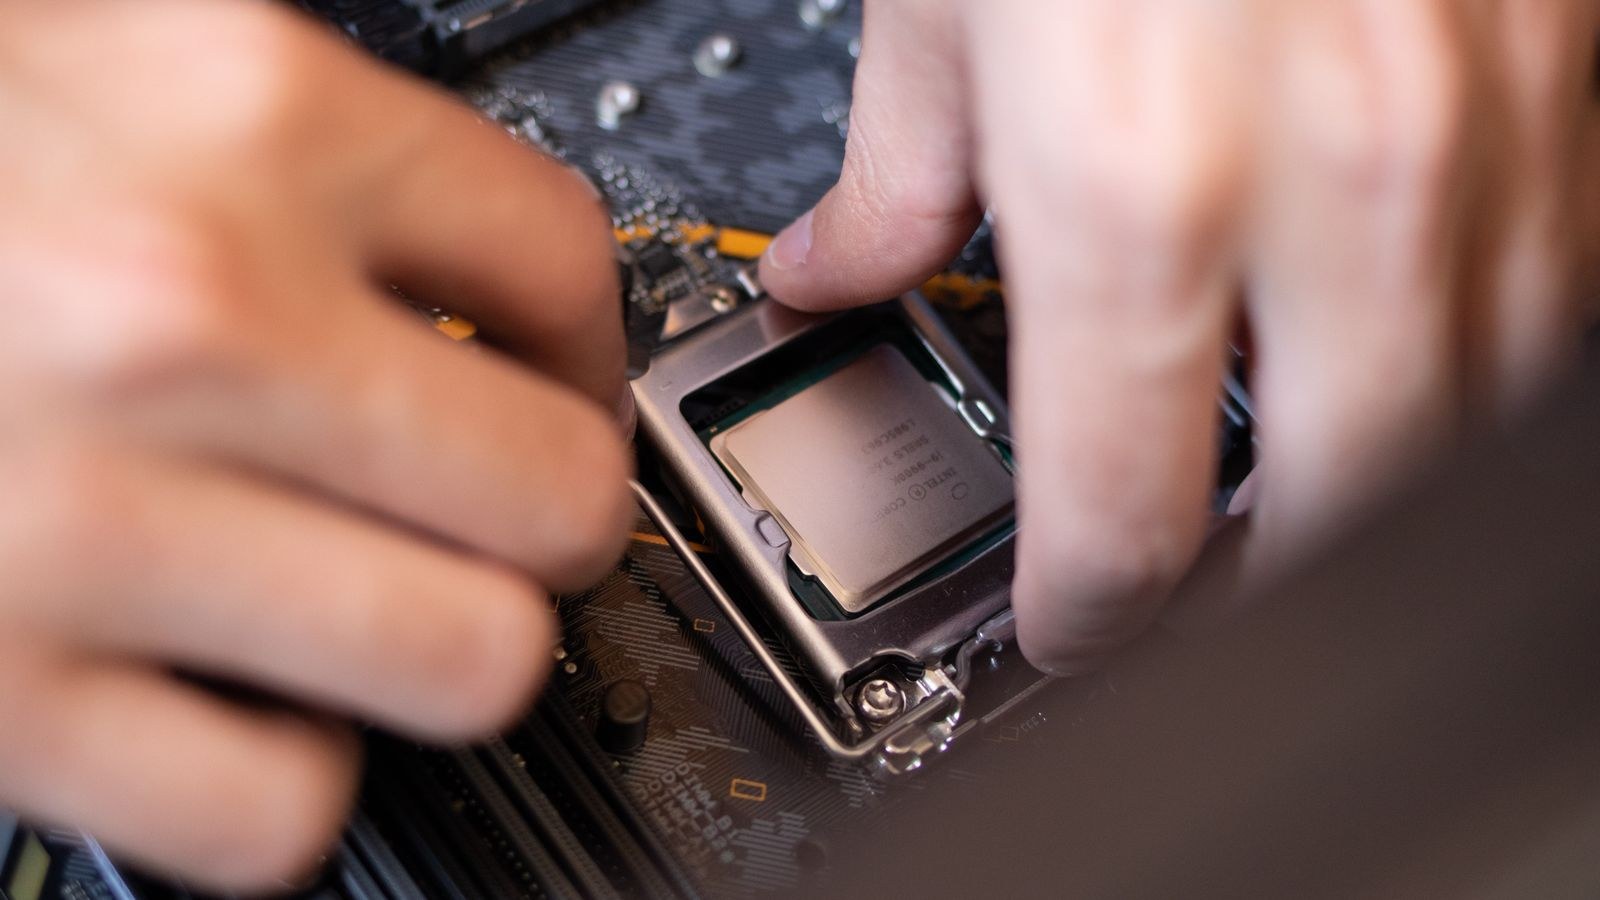
- Confirm it is seated. Nudge the edge of the chip very gently with a fingertip. A correctly seated processor has a tiny amount of play within the socket walls and sits perfectly flush. If one corner sits proud, lift it straight out, check the orientation and the socket, and try again.
- Close the retention frame. Swing the frame down over the chip, then press the lever down and hook it under its catch. There will be noticeable resistance in the final part of the travel; this is normal and is the frame applying clamping pressure. It should never feel like you are forcing something that will not go. If the resistance feels like an obstruction rather than spring tension, stop and reopen.
- Let the cover pop off. On many Intel boards the plastic cover releases as the lever locks. Keep it, since you will need it if you ever return the board.
Thermal Paste and Cooler Mounting
With the chip locked in, apply thermal paste before mounting the cooler. A pea-sized dot in the centre of the heat spreader is the reliable default for most modern processors, since mounting pressure spreads it outward evenly. Rectangular AMD chips sometimes benefit from a short line or a small cross instead. Do not apply so much that it squeezes out over the substrate edges and onto the socket. Compound choice matters less than a correct mount, but a good paste holds its performance longer; the options in our roundup of the best CPU thermal paste cover the practical differences between them.
Mount the cooler with even pressure. If it uses four screws, tighten them in a diagonal cross pattern, a few turns each, rotating around the pattern until all are snug. Tightening one fully before the others tilts the cold plate and gives you an uneven contact patch and high temperatures. Do not overtighten; the spring-loaded screws bottom out at the correct pressure by design.
One warning specific to older AMD PGA systems: if you ever remove an air cooler, twist it gently while the system is warm rather than pulling straight up. Cold thermal paste can bond the cooler to the heat spreader hard enough to pull the processor out of a closed socket, which bends every pin at once. This is the single most common cause of bent pins in existing systems, and it happens during removal rather than installation.
What to Do If You Find a Bent Pin
Do not power the board on. Photograph the area at high magnification so you know exactly which pins are out of line, and compare against a healthy region of the array. A single pin leaning slightly can sometimes be straightened with a mechanical pencil with the lead retracted, using the tip to nudge it back into the grid, working under strong light with the board flat and stable. A credit card edge or a fine razor blade can realign a whole row that has tilted uniformly.
Be realistic about the odds. One gently bent pin is often recoverable. Several crushed pins, or a pin that has snapped, is not, and repeated attempts only make it worse. Attempting a repair typically voids warranty coverage, so if the board is new, contact the retailer before you touch anything. The same logic applies in reverse to PGA processors: a chip with bent pins is worth one careful attempt and no more.
First Boot and Verification
Before closing the case, do a bench test. Connect the power supply, one stick of memory in the slot the manual specifies for single-module use, and a display, then power on. A working install reaches the firmware setup screen, where you can confirm the processor is detected by the correct model name and check the reported temperature. An idle temperature in the 30s or 40s Celsius indicates a good cooler mount; readings above 70C at idle mean the cooler is not making proper contact.
If the system does not post, check the diagnostic LEDs or beep codes rather than guessing. A steady CPU indicator usually points to seating, cooler pressure, or the eight-pin CPU power connector left unplugged, which is a very common oversight. If everything is verified good and you are working through a whole build for the first time, our walkthrough on how to build your first gaming PC step by step covers the order of the remaining assembly.
Common Mistakes to Avoid
Forcing the retention lever when the chip is misaligned causes the majority of catastrophic damage, and it is entirely preventable by checking the triangle twice. Sliding the processor across the socket instead of lowering it vertically is the second. Removing a cooler cold on a PGA system is the third. Beyond those, avoid touching the contact pads with bare fingers, which leaves oils that degrade contact quality.
One more: buy a processor and board that actually match. A modern AMD chip will not fit an older socket regardless of how carefully you handle it. Confirm compatibility against the board’s supported CPU list, and check whether a firmware update is required for a newer chip on an older board revision. If you are still selecting parts, our comparisons of the best CPUs for gaming and the best AM5 CPUs lay out which generations pair with which sockets.
Frequently Asked Questions
How much force should closing the lever take?
Firm but smooth spring pressure through the last portion of travel, using one or two fingers. If you find yourself using your palm or a tool, stop and reinspect the alignment.
Can I install a CPU with the motherboard already in the case?
You can, but visibility is much worse and the board flexes on its standoffs. Doing it on the bench first is safer and takes no extra time.
Is thermal paste required if my cooler has a pre-applied pad?
No. A factory pad is a complete application. Adding paste on top gives you a thicker layer and worse thermal performance, not better.
Final Thoughts
A safe processor install comes down to four habits: work outside the case on a flat surface, inspect the socket before the chip goes anywhere near it, match the triangles and lower straight down, and never apply force to anything that resists. Do those and the two minutes this takes will be uneventful, which is exactly what you want from the most fragile connection in the entire machine.









