
 Owen Bradley
 A dryer that needs two or three cycles to finish a single load is rarely a broken dryer. Nine times out of ten the machine is fine and the duct behind it is choked with lint, and that trapped lint is both an energy drain and a genuine fire risk. The good news is that learning how to clean a dryer vent is a genuinely beginner-friendly job. With a rotary brush kit, a vacuum and roughly forty-five minutes you can strip a season of packed lint out of the duct, restore airflow and cut your drying times back to where they belong. This guide walks through the warning signs, the tools, the full step-by-step process for both short and long duct runs, and the maintenance schedule that keeps the problem from returning.
Why a Clogged Dryer Vent Matters
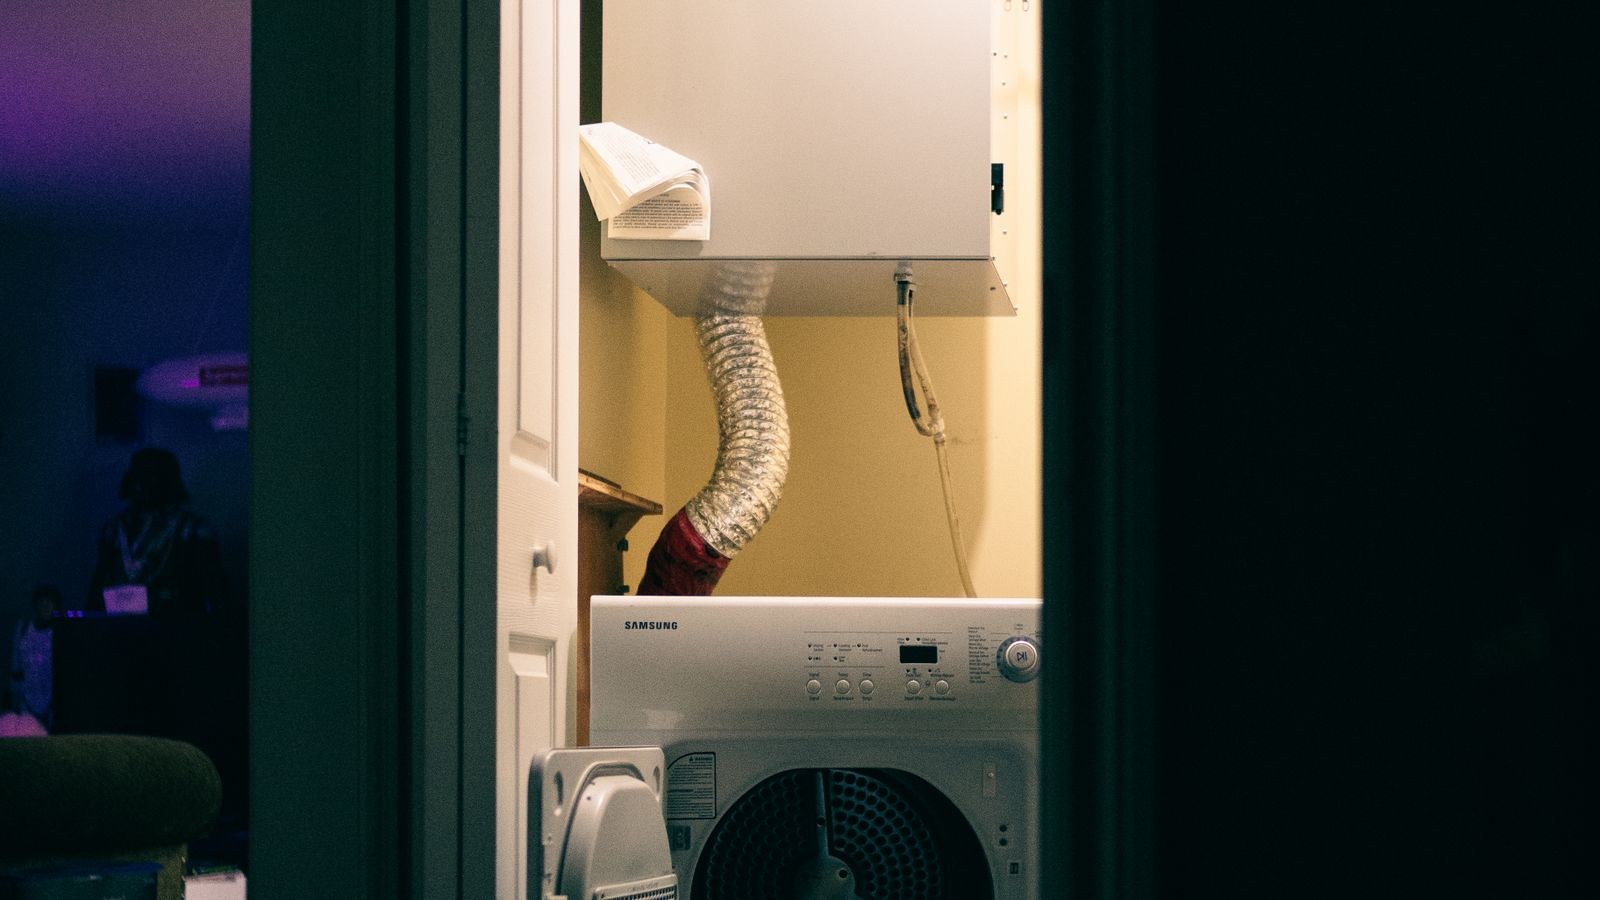
Every load you dry sheds fibre. The lint screen catches most of it, but a meaningful fraction slips past and settles inside the duct, especially at elbows, sags and the wall cap. As that layer thickens the dryer has to push hot, wet air through a narrower and narrower pipe. Moisture stays in the drum, cycles run longer, the heating element and motor work harder, and the appliance runs hotter than it was designed to run.
The consequences stack up quickly. Energy use climbs because a load that once took 45 minutes now takes 90. Component life shortens because thermal cut-outs trip repeatedly. And packed lint sitting next to a heat source is one of the most common causes of household appliance fires, which is why fire services recommend an annual duct clean as basic home maintenance. None of that requires a technician to prevent.
Warning Signs Your Vent Is Blocked
- Clothes are still damp at the end of a normal cycle, or need a second run.
- The outside of the dryer, or the laundry room itself, gets noticeably hot during a cycle.
- A burnt or musty smell appears when the machine is running.
- The exterior vent flap barely opens, or you feel weak airflow at the wall cap.
- Lint is visible around the door seal, behind the machine or at the outside vent hood.
- The dryer shuts itself off mid-cycle because a thermal sensor has tripped.
Any one of these is enough reason to pull the machine out and look. Two or more means the duct is almost certainly restricted.
Tools and Materials You Will Need
Nothing here is exotic, and most of it lives on a single shelf at any hardware store.
- Rotary dryer vent brush kit — a nylon-bristle head on flexible fibreglass rods, usually 12 to 30 feet of reach, with a drill adapter.
- Wet and dry vacuum with a crevice tool and a long hose. A shop vac pulls out the loosened debris far better than a household upright; if you are shopping for one, the best wet and dry vacuum cleaners handle fine lint without clogging the filter.
- Cordless drill set to a low speed with clutch engaged.
- Screwdriver or nut driver for the duct clamps, plus a pair of pliers.
- Foil duct tape and a spare clamp in case a connection is damaged.
- Dust mask, safety glasses and work gloves — dryer lint is fine and it goes everywhere.
- A flashlight and a stepladder if the vent exits high on the wall or through the roof.
- Slim vacuum attachments for the tight gap behind the machine; a pet-hair style brush head, like those in our roundup of the best vacuum attachments for pet hair, is ideal for matted fibre.
Before You Start: Safety First
Unplug the dryer at the wall. If it is a gas model, also close the gas shut-off valve behind it and take care not to strain or twist the flexible gas connector when you move the machine. Electric dryers on a 240-volt outlet may need a firm pull to release; grip the plug body, never the cord. Lay a towel or cardboard on the floor before you slide the appliance so you do not gouge vinyl or hardwood, and get a second pair of hands for heavy stacked units.
How to Clean a Dryer Vent Step by Step
- Disconnect power and gas. Unplug the dryer and shut the gas valve if applicable. Wait a few minutes for the drum and exhaust to cool if the machine has just run.
- Pull the dryer forward. Walk it out far enough to work behind it comfortably, usually 2 to 3 feet. Keep the transition hose slack so it does not tear.
- Detach the transition duct. Loosen the clamp at the back of the dryer and at the wall, then pull the flexible hose free. Inspect it: if it is crushed, torn or made of thin foil or plastic, replace it with rigid or semi-rigid metal duct while you have access.
- Clean the transition hose separately. Take it outside, shake out the loose lint, then run the brush through it by hand and vacuum both ends. Do not stretch it any longer than it needs to be.
- Vacuum the dryer’s exhaust port. Use the crevice tool inside the outlet on the back of the machine, and clear the lint trap housing from below with a long slim nozzle. This cavity often holds a surprising amount of packed fibre.
- Assemble the rotary brush. Screw two or three rods onto the brush head to start, fit the drill adapter and set the drill to rotate clockwise only. Reversing the drill will unscrew the rods and leave a brush stranded in your duct.
- Feed the brush into the wall duct. Start the drill at low speed, push the brush in gently and let the bristles do the work. Add rods one at a time as you advance, tightening each joint firmly. Work in and out in short strokes rather than driving straight through.
- Work the full length of the run. Keep going until you feel the brush emerge at the exterior cap, or until you have covered the known length of the duct. Then withdraw slowly, still rotating clockwise, so the brush drags debris back with it.
- Vacuum the loosened lint. Push the shop vac hose as far into the duct opening as it will reach and clear everything the brush has knocked free. Repeat the brush-then-vacuum pass once more; the second pass almost always brings out more than you expect.
- Clean the exterior vent hood. Go outside, open or remove the flap or louvre and pull out any nest of matted lint. Check that the flap swings freely and that no bird or insect nest is blocking it. Brush from this end inward for a few feet as well.
- Reconnect everything. Refit the transition duct at both ends, tighten the clamps and seal seams with foil tape if needed. Never use standard cloth duct tape on a dryer duct.
- Test and reposition. Plug the dryer back in, restore gas if applicable, and run a 10-minute air-fluff or timed cycle. Step outside and confirm strong, warm airflow at the vent hood. Then slide the machine back, leaving a few inches so the duct is not crushed against the wall.
Long, Roof and Second-Floor Duct Runs
Ducts that travel more than about 25 feet, or exit through a roof, are harder and more likely to be badly clogged because every extra elbow adds resistance. A longer rod kit helps, but the safer approach on a roof run is to brush from inside as far as you can reach and clear the last section from the exterior cap using a ladder, if you can do so safely. If the vent terminates on a steep or high roof, hire a professional rather than improvise.
Where a duct has multiple tight 90-degree bends, feed the rods slowly and never force them. If the brush repeatedly jams at the same point, the duct is likely crushed or disconnected and deserves inspection rather than more force.
Common Mistakes to Avoid
- Running the drill in reverse, which unthreads the rods and leaves the brush head lost inside the duct.
- Using a leaf blower instead of brushing. Air alone compacts packed lint further down the run rather than removing it.
- Reinstalling flimsy foil or plastic transition hose. It sags, traps lint and is not fire-resistant; metal is the correct choice.
- Leaving the duct too long. Extra hose coiled behind the machine creates sags where moisture and lint settle.
- Skipping the exterior cap. The blockage is often right at the flap, and cleaning only the inside leaves the worst part untouched.
- Venting into a garage, crawlspace or attic. A dryer must exhaust outdoors; indoor venting dumps litres of moisture into the structure.
How Often Should You Clean the Vent?
Once a year is the baseline for an average household with a short, straight duct. Move to every six months if you dry more than five loads a week, if the run is longer than 15 feet or full of bends, or if you regularly wash bedding, towels and pet blankets, all of which shed heavily. Clean the lint screen after every single load, and wash the screen itself with warm soapy water every few months to remove the invisible film that fabric softener sheets leave behind. Vacuum behind and underneath the machine each time you clean the duct.
If your dryer is well past its useful life and drying times stay long even after a thorough vent clean, the machine itself may be the limiting factor. Comparing current washer dryer combinations or matched washer and dryer sets gives you a sense of how much moisture sensing and heat-pump efficiency have improved. Our washer and dryer set buying guide explains which features actually shorten cycles rather than simply adding menu options.
Frequently Asked Questions
How long does cleaning a dryer vent take?
A typical short run behind a ground-floor laundry takes 30 to 45 minutes including moving the machine. Long runs, roof vents or a duct that has never been cleaned can stretch to two hours.
Can I clean a dryer vent without a brush kit?
You can vacuum the first few feet from each end, which helps a little, but you will not clear the middle of the run. A rotary brush kit is inexpensive and is the only reliable way to scrub the full duct.
Is a lint trap the same as the vent?
No. The lint screen sits inside the dryer and catches the coarse fibre; the vent is the duct carrying hot moist air outdoors. Cleaning the screen after each load does not keep the duct clear.
Does a clean vent really save money?
Yes. Restoring proper airflow can cut drying time substantially, and a dryer is one of the highest-consumption appliances in the house, so shorter cycles show up directly on the bill.
Final Thoughts
Cleaning a dryer vent is one of the highest-value hours of maintenance available to a homeowner. It costs the price of a brush kit, needs no specialist skill, and it simultaneously lowers your energy use, extends the life of an expensive appliance and removes a real fire hazard from your home. Put it on the calendar once a year, do the lint screen after every load, and keep the duct short, metal and straight. Do that and your dryer will finish a load in one cycle, the way it was designed to.









