
 Owen Bradley
 Running out of storage is the most common reason people open their desktop, and it is also the easiest upgrade to get right. Adding a second drive costs less than a new machine, takes under half an hour, and leaves your existing installation completely untouched. The only decisions are which slot to use, how to power and connect the drive, and where to physically mount it. This tutorial walks through the whole job: choosing between an M.2 slot and a SATA bay, running the cables, mounting the drive securely, preparing it in Windows, and moving a game library across without reinstalling everything from scratch.
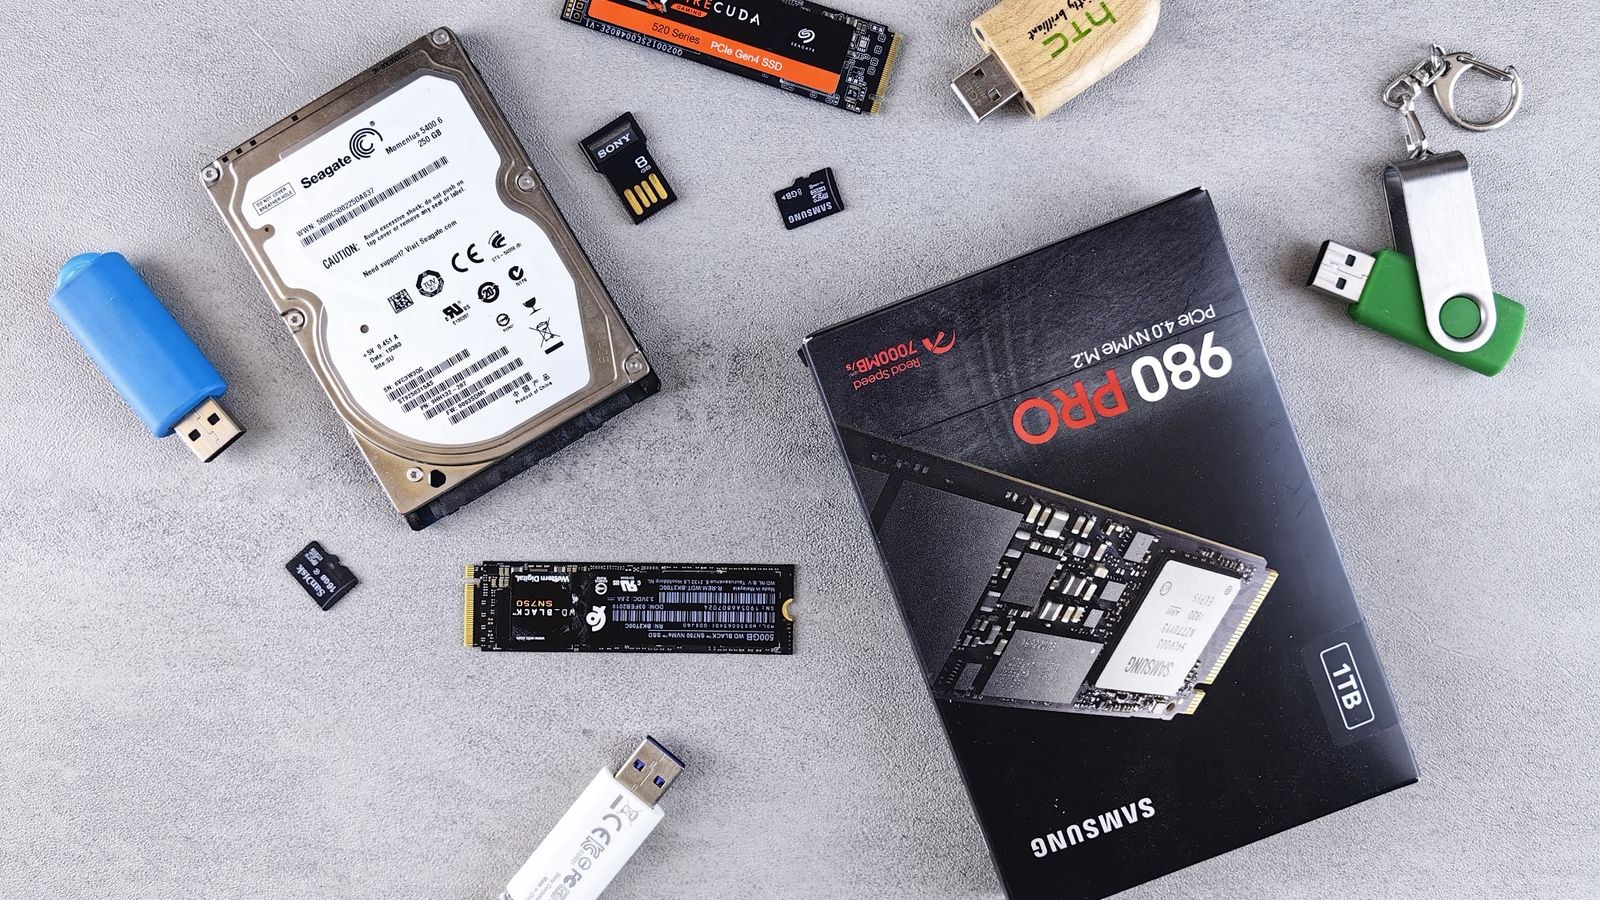
M.2 or SATA: Which Slot Should You Use
Modern motherboards offer two ways to attach a drive, and the right answer depends on what is already occupied.
M.2 slots take a bare stick of a drive that screws directly to the board. There are no cables at all, which makes installation trivial in a tidy case. NVMe drives in these slots are dramatically faster than SATA for large sequential transfers. The catch is that boards typically have only two or three slots, and some share bandwidth with SATA ports or a PCIe slot, meaning populating one disables another. Check the manual before you buy.
SATA ports take a 2.5-inch SSD or a 3.5-inch hard disk and need two cables: a data cable to the board and a power cable from the PSU. SATA tops out around 550MB/s, which is plenty for bulk storage, media libraries, and most games. Boards usually offer four to eight ports, so capacity expansion is easier here.
The practical rule: use M.2 if a free slot exists and you want speed; use SATA when you want lots of cheap capacity or the M.2 slots are full.
Tools and Parts
- A Phillips screwdriver, preferably magnetic, and a small one for the M.2 standoff screw.
- The new drive, plus any mounting bracket your case requires.
- A SATA data cable, which usually ships with the motherboard, if you are using a SATA drive.
- A spare SATA power connector from the power supply, or a modular cable if the PSU needs one added.
- An M.2 mounting screw and standoff, normally supplied with the motherboard.
- A torch or phone light for reading tiny slot labels, and a couple of zip ties for cable management.
Step-by-Step: Installing the Drive
- Shut down and isolate the PC. Turn the machine off, flip the power supply switch at the rear, and unplug the mains lead. Press the case power button once to discharge residual voltage, then remove both side panels so you can reach the rear cable channel.
- Ground yourself. Touch a bare metal part of the chassis before handling components, and repeat periodically. Work on a hard surface rather than carpet.
- Identify the free slot or bay. Consult the motherboard manual for the M.2 slot numbering and any sharing restrictions, or locate an empty drive cage. Note which SATA ports are already in use so you can pick the next free one.
- For an M.2 drive: remove the heatsink cover if fitted, move the standoff to the length position matching your drive (2280 is the common size), insert the drive into the slot at roughly a thirty degree angle until the connector seats fully, then press it flat and secure it with the retaining screw. Do not overtighten; the screw only needs to hold the board down.
- For a SATA drive: slide it into the bay or bracket and secure it with four screws, or clip it into a toolless tray. Mount 3.5-inch hard disks on rubber-isolated mounts if the case offers them, as this cuts vibration noise noticeably.
- Connect the data cable. Plug one L-shaped end into the drive and the other into a free SATA port on the motherboard. The connectors are keyed and click gently into place. Use the lowest-numbered free port to keep drive ordering predictable.
- Connect power. Find a spare SATA power connector on the PSU cable loom, or add a modular cable if needed. Never use a molex-to-SATA adapter of unknown quality; a proper cable from your own PSU is safer.
- Tidy the cables. Route both leads behind the motherboard tray where possible and secure them with zip ties so they cannot drift into fan blades. Confirm nothing is pinched before refitting the panels.
- Power on and check the BIOS. Enter the firmware setup and look at the storage configuration page. The new drive should appear by model name. If it does not, power down and reseat the connections before going further.
- Initialise in Windows. Boot to the desktop, right-click the Start button, and open Disk Management. A dialog will offer to initialise the new disk; choose GPT for any drive over 2TB and for any modern system.
- Create and format the volume. Right-click the unallocated space, choose New Simple Volume, accept the full size for a single partition, assign a drive letter, and format as NTFS with the default allocation unit size. Give it a clear label such as Games or Media.
- Verify performance. Copy a large file across and confirm the transfer speed matches what the interface should deliver. A NVMe drive limping along at SATA speeds usually means it landed in a bandwidth-shared slot.
Choosing the Right Second Drive
Match the drive to the job. For a games and applications drive, capacity and sustained write speed matter more than headline peak figures. For a bulk archive of photos and video, cost per terabyte dominates. If you are filling a SATA bay, our comparison of the best SATA SSDs covers reliable options that suit older boards too, and the wider list of the best internal SSDs spans both interfaces.
If you are adding serious capacity, the best 4TB SSDs looks at the drives that make sense as a single large library volume. Anyone moving big video files or disk images regularly should check sustained write behaviour rather than burst numbers, which our roundup of the best SSDs for large files explains in detail. For a broader view of where storage fits alongside other upgrades, see our guide to upgrading a desktop computer’s RAM and storage.
Moving Your Game Library Across
You rarely need to redownload anything. Steam lets you add a second library folder on the new drive, then move individual titles through each game’s properties under installed files. Epic, EA, and Ubisoft launchers offer similar move options, though some require you to relocate the folder manually and then point the launcher at the new path. For general data, drag folders across in Explorer and update any shortcuts afterwards.
Redirecting your user folders is worth doing too. Right-click Documents, Pictures, or Videos, open Properties, choose the Location tab, and point them at a folder on the new drive. Windows moves the contents and keeps every application pointing at the correct place, which frees the boot drive without breaking anything.
Common Mistakes to Avoid
- Ignoring slot sharing. Populating a second M.2 slot can silently disable two SATA ports and drop a drive off the system.
- Choosing MBR instead of GPT. MBR caps at 2TB and limits partition counts unnecessarily.
- Changing the allocation unit size without reason. The default suits nearly every workload; larger clusters waste space on small files.
- Using cheap molex adapters. Poorly made SATA power adapters are a genuine fire risk under sustained load.
- Leaving cables loose. A dangling SATA lead in a fan is the classic cause of a mysterious new rattle.
- Forcing the M.2 screw. The drive should sit flat under gentle pressure; forcing it cracks the PCB.
Troubleshooting a Drive That Does Not Appear
If the BIOS does not see the drive, check the physical connection first: reseat the M.2 stick, or swap the SATA cable and try a different port. If BIOS sees it but Windows does not, open Disk Management, since an uninitialised drive has no letter and stays invisible in Explorer. If the drive appears with the wrong capacity, the partition table may be stale from a previous system, in which case deleting all volumes and recreating one resolves it. And if a NVMe drive is missing entirely after installation, verify in the manual that the slot is not disabled when a particular PCIe lane configuration is in use.
Frequently Asked Questions
Can I add a second drive without reinstalling Windows?
Yes. A data drive is entirely separate from the boot volume. Install it, initialise it, format it, and your existing system is untouched.
Do I need to change the boot order?
No, provided the new drive has no operating system on it. If the machine tries to boot from it, set the original drive as first in the boot priority list.
Is NVMe worth it for games?
Load times improve modestly over SATA in most titles, and more noticeably in games built around streaming assets. For general storage, SATA capacity often gives better value per pound.
Can I mix an SSD and a hard disk?
Absolutely, and it is a sensible pairing. Keep Windows and frequently used applications on the SSD, and use the mechanical disk for archives, backups, and media you access occasionally.
Final Thoughts
Adding a second drive is the highest-value half hour you can spend inside a desktop. Check your manual for free slots and any sharing quirks, pick the interface that matches your goal, mount the drive securely, and initialise it as GPT with a single NTFS volume. Then move your game library and user folders across so the boot drive gets breathing room. Do that once and the storage anxiety that has been nagging you all through 2026 disappears, without touching your Windows installation or reinstalling a single application.









