Owen Bradley
 Repotting is the chore most plant owners put off, and it is almost always the mess that stops them rather than the plant care itself. Soil on the rug, water rings on the floor, roots snapping in half — it feels like a job that needs a garden and a hose. It does not. With a drop cloth, the right pot size, and a sensible order of operations, you can repot a houseplant on a kitchen counter in about fifteen minutes and leave nothing behind but a bag of spent soil. This guide covers when to repot, how to size the new pot, the exact steps to move the plant without shredding its root ball, and how to keep the whole process contained.
When Does a Houseplant Actually Need Repotting
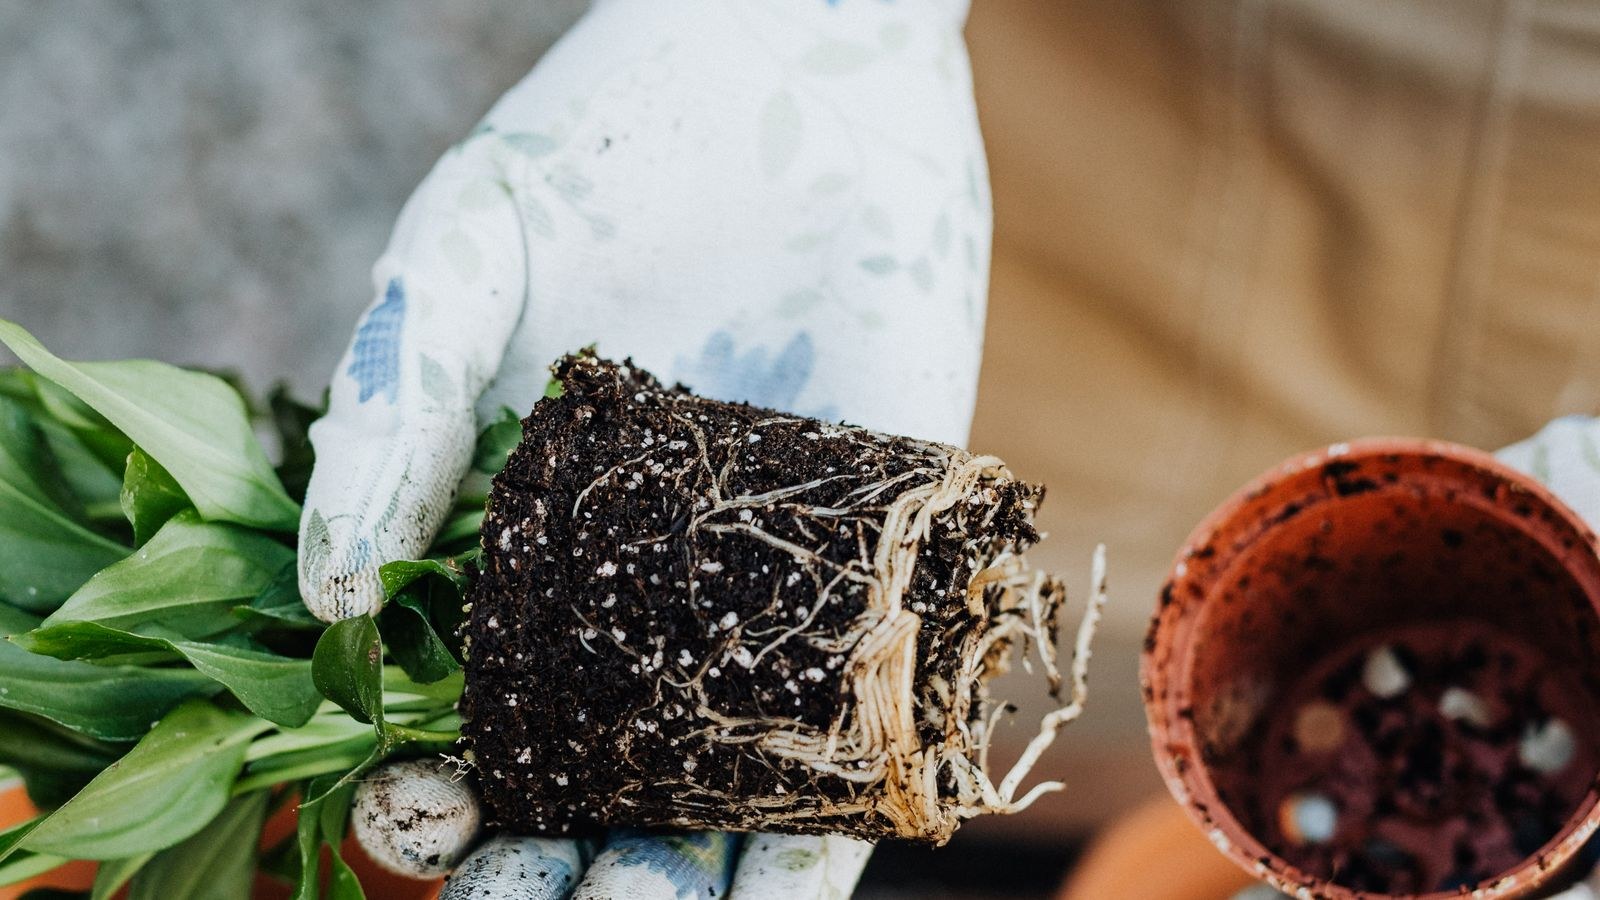
Repotting on a schedule is a mistake. Plants get repotted when they show specific signs, not when a calendar says so. Look for roots circling the surface of the soil or pushing out of the drainage holes, water that runs straight through without soaking in, a plant that dries out within a day or two of watering, or growth that has stalled despite good light and feeding. A pot that tips over because the plant has outgrown its base is another clear signal.
The opposite is also true: a plant that is watering normally, growing steadily, and sitting stable does not need a bigger pot just because it has been two years. Many houseplants flower and grow best slightly root-bound. If your plant looks fine, the most useful thing you can do is refresh the top inch or two of soil and leave the roots alone.
Timing Within the Year
Early spring, as growth resumes, is the ideal window. The plant has the energy to push new roots into fresh soil and recovers quickly. Repotting in the depths of winter, when growth is slow, extends the recovery period and raises the risk of root rot because the plant uses water so slowly. If a plant is in genuine distress — rotted roots, collapsed soil, a cracked pot — repot immediately regardless of season.
What You Will Need
- A new pot one size up, with drainage holes.
- Fresh potting mix suited to the plant type — a chunky aroid mix, a gritty cactus mix, or a general-purpose indoor blend.
- A large drop cloth, old bedsheet, or flattened cardboard box to work on.
- A trowel or a large plastic scoop; a coffee scoop works for small pots.
- Clean scissors or pruning snips for trimming dead or mushy roots.
- A watering can with a narrow spout for settling the soil afterward.
- Gloves if you are handling anything with sap, spines, or irritating leaves.
Set everything out before you lift the plant. The mess almost always happens when you are holding a bare root ball in one hand and reaching for something with the other.
Sizing the New Pot Correctly
Go up one size only. For pots under 10 inches that means roughly 1 to 2 inches of extra diameter; for larger pots, 2 to 3 inches. The temptation to jump several sizes and buy yourself years of not repotting is the single most damaging thing you can do. A huge volume of soil around a small root system stays wet far longer than the roots can use it, and persistently saturated soil is how root rot starts.
Material matters too. Terracotta breathes and dries faster, which suits succulents, cacti, and anything prone to overwatering. Glazed ceramic and plastic hold moisture longer, which suits ferns, calatheas, and other humidity lovers. Whatever you choose, it needs drainage holes. A decorative cachepot with no holes is fine as an outer sleeve, but the plant itself should live in a nursery pot that drains.
Step-by-Step: Repotting Without the Mess
- Lay down your work surface. Spread the drop cloth wider than you think you need — at least three feet across. Set the new pot, soil bag, and tools on it. Working over a sheet turns cleanup into folding and pouring instead of vacuuming.
- Water lightly a day ahead, or work with barely damp soil. Bone-dry soil crumbles into dust the moment you lift the plant. Soaking-wet soil smears everywhere. Slightly damp soil holds together in a clump, which is exactly what you want.
- Add a base layer to the new pot. Pour in enough fresh mix that when the root ball sits on top, its surface lands about an inch below the pot rim. Check the height by resting the old pot inside the new one before you commit.
- Loosen the plant from its current pot. Squeeze a flexible plastic pot around its circumference, or run a butter knife around the inside edge of a rigid pot. Do not yank the stem — that tears the plant away from its roots.
- Tip and support. Turn the pot on its side or upside down with your hand spread across the soil surface and the stem between two fingers. Ease the pot off rather than pulling the plant out. Doing this over the drop cloth catches anything that falls.
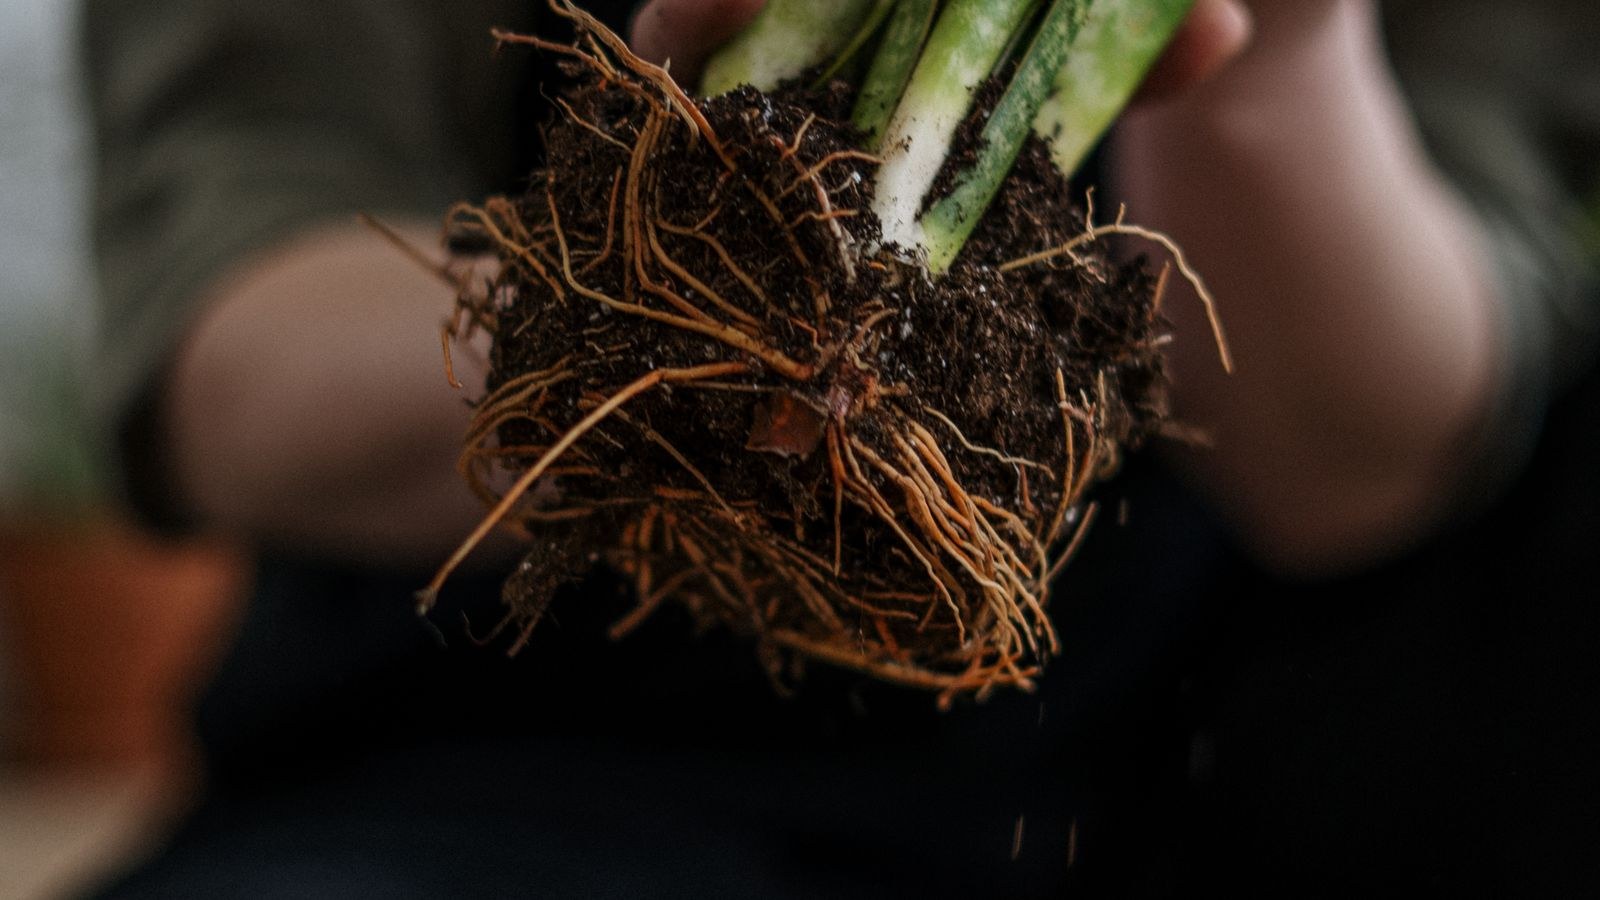
- Inspect the roots. Healthy roots are firm and pale. Trim anything black, mushy, or foul-smelling with clean snips. If the root ball is a solid mat, tease the bottom third apart with your fingers or make three shallow vertical cuts down the sides so new roots grow outward instead of continuing to circle.
- Remove old soil sparingly. Shake off loose material but do not wash the roots bare unless you are treating rot or pests. Keeping some original soil around the roots reduces transplant shock significantly.
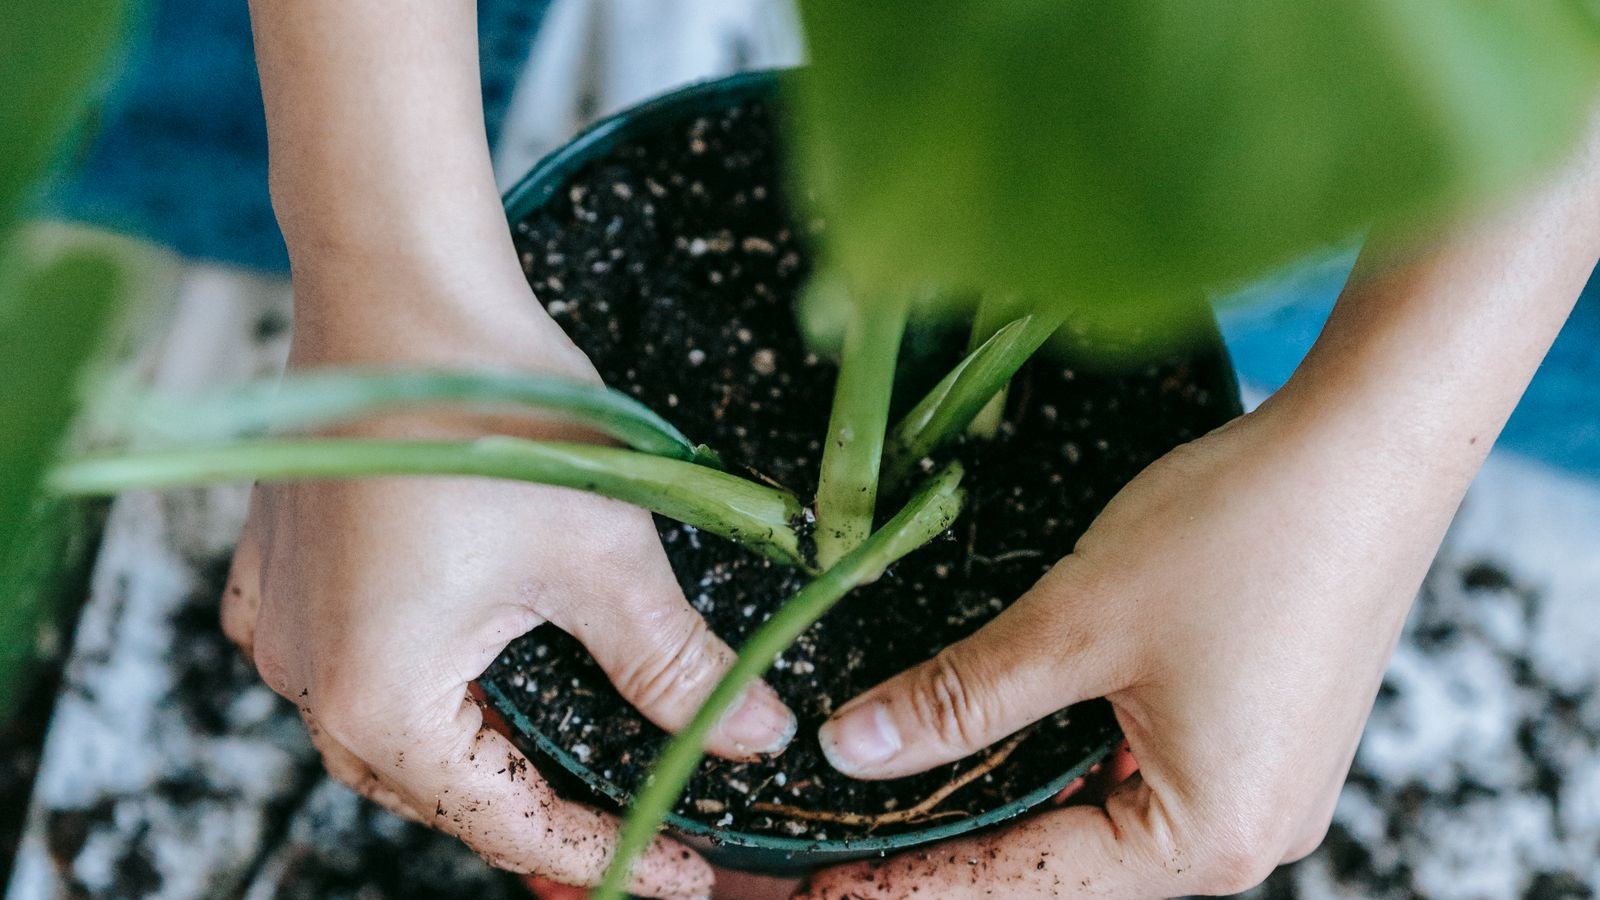
- Center the plant in the new pot. Set it on the base layer, check that it sits at the same depth it grew before, and hold it upright with one hand. Burying the stem deeper than it was is a common cause of rot.
- Backfill in stages. Add soil around the sides a few scoops at a time, tapping the pot on the surface between additions to settle it. Do not press hard with your hands — compacted soil drives out the air pockets roots need.
- Leave a watering gap. Stop filling about an inch below the rim so water has somewhere to sit instead of overflowing across your floor every time you water.
- Water thoroughly over a sink or tray. Water slowly until it runs from the drainage holes, then let it drain completely before returning the plant to its saucer or cachepot. Never let it stand in collected runoff.
- Fold and clean up. Gather the corners of the drop cloth, funnel the spilled soil back into the bag, and wipe the pot exterior. The whole cleanup should take under two minutes.
Aftercare for the First Few Weeks
Skip fertilizer for four to six weeks. Fresh potting mix already contains nutrients, and feeding a plant with disturbed roots can burn them. Keep the plant out of harsh direct sun for a week or two while it settles, and resist the urge to water on your old schedule — a larger pot holds more moisture, so check the soil with a finger before watering rather than watering by habit.
Some drooping in the first days is normal and usually resolves on its own. What is not normal is yellowing that spreads, soft stems, or a sour smell from the soil, all of which point to overwatering in the new, larger volume. Back off the water and give it time.
Light Is What Actually Drives Recovery
A freshly repotted plant needs energy to build new roots, and energy comes from light. Most indoor spots deliver far less usable light than they appear to, especially in winter or several feet back from a window. Supplementing makes a visible difference in how fast a plant re-establishes. Our comparison of the best grow light bulbs for indoor plants covers spectrum and output for standard fixtures, and the practical walkthrough on how to set up grow lights for indoor plants explains mounting distance and coverage. If you want something that fits an existing lamp, the roundups of the best light bulbs for indoor plants and the best light bulbs for growing plants are the place to start, and a simple schedule using the approach in our guide to setting up grow light timers keeps the daily photoperiod consistent without you thinking about it.
Common Mistakes
- Jumping several pot sizes at once. The excess wet soil suffocates roots. One size up, every time.
- Using a pot with no drainage. Decorative pots without holes should be sleeves, not homes.
- Packing the soil down hard. Roots need air. Tap to settle, do not compress.
- Fertilizing immediately. Fresh mix has nutrients; disturbed roots are easy to burn.
- Pulling the plant out by the stem. Loosen the pot instead, or you separate the plant from its own root system.
- Repotting a stressed plant that just needs light or water adjustment. Repotting adds stress; make sure it is the actual fix.
Frequently Asked Questions
How often should I repot a houseplant?
Most fast-growing plants need it every 12 to 18 months; slow growers can go 2 to 3 years. Let the signs decide rather than the calendar.
Should I loosen root-bound roots or leave them alone?
Loosen them. A tightly circled root ball will keep growing in circles and never spread into the new soil. Tease the bottom apart or make a few shallow vertical cuts.
Can I reuse old potting soil?
Not for the same plant in a fresh pot. Old mix is depleted and compacted, and it may carry pests or pathogens. Use it in outdoor beds or compost it instead.
Why is my plant drooping after repotting?
Mild transplant shock is normal for a few days. Keep it out of harsh sun, water when the top inch is dry, and skip fertilizer. Persistent yellowing usually means too much water in the larger pot.
Do I need gravel at the bottom for drainage?
No. A gravel layer raises the saturated zone in the soil rather than improving drainage. Use a well-draining mix and a pot with holes.
Final Thoughts
Repotting only feels messy when it is improvised. Lay a drop cloth, work with barely damp soil, size up exactly one pot, and follow the order — base layer first, loosen the plant, inspect the roots, center it, backfill in stages, water over a sink. Everything that usually goes wrong comes from either rushing that sequence or over-potting in the hope of skipping the job next year. Do it properly once and the plant repays you with a growth spurt, and your floor never knows it happened.