
 Owen Bradley
 Installing RAM looks like the simplest job inside a computer, and physically it is: two clips, a firm push, done. Yet more upgrades go subtly wrong here than almost anywhere else, because the slot you choose determines whether your memory runs in dual channel or at half its effective bandwidth, and because a module that looks seated can still leave the machine refusing to start. Then there is the final step almost everyone skips, enabling the memory’s rated speed profile in the BIOS, without which brand new high-speed RAM quietly runs at a slow default. This guide covers the whole process: choosing compatible modules, identifying the correct slots, seating them properly, and confirming afterwards that you are actually getting the speed you paid for.
What You Need Before You Start
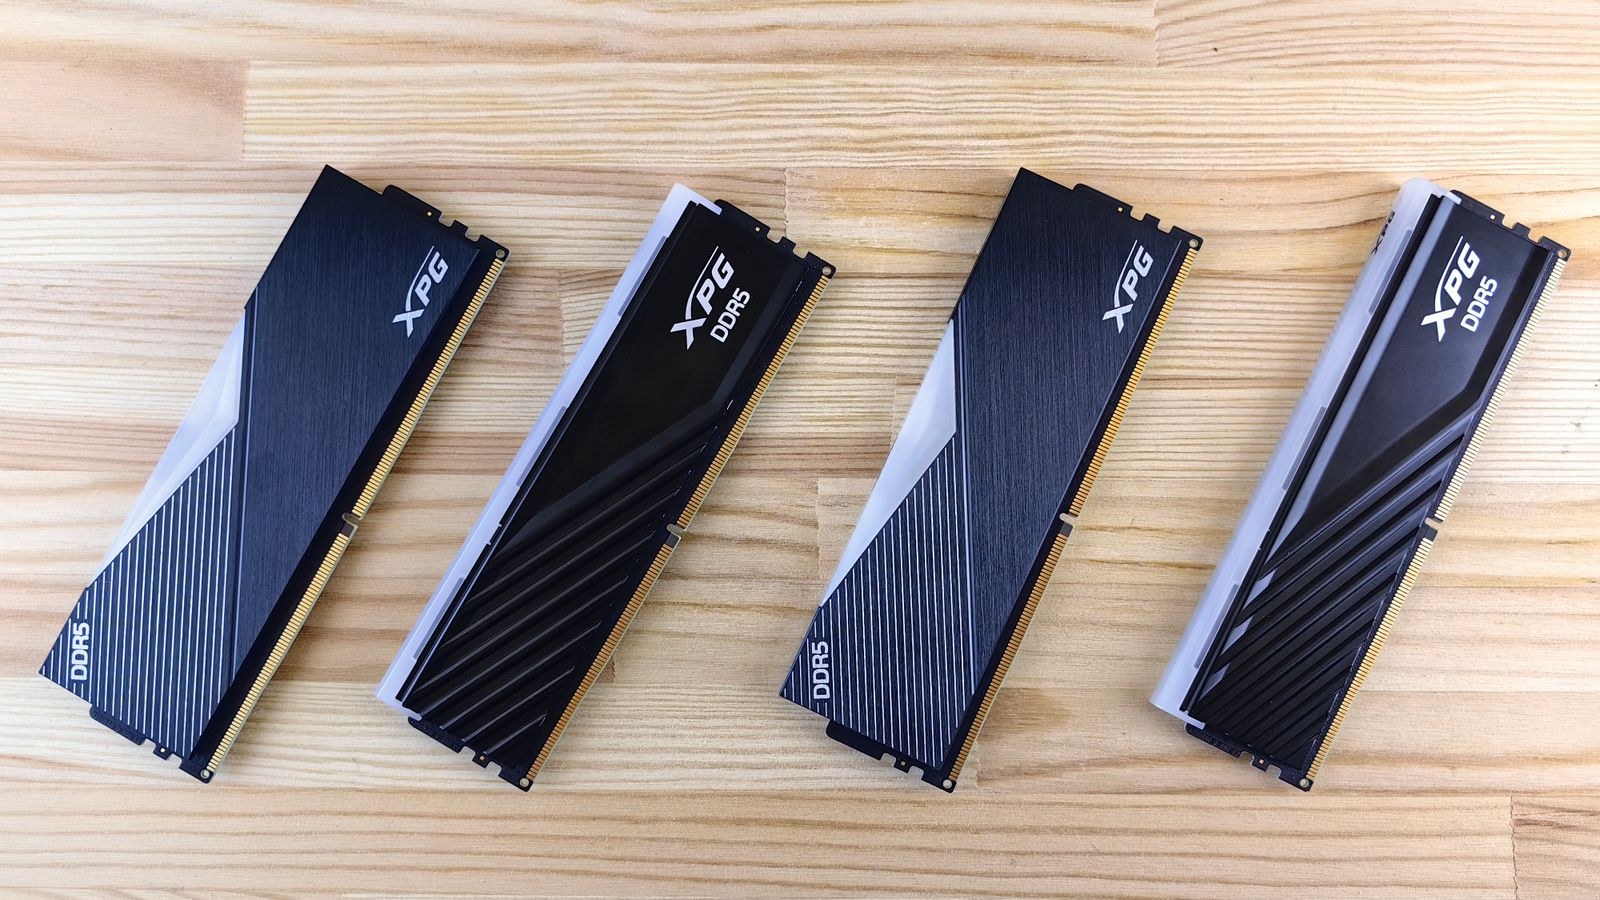
- Compatible memory modules of the correct generation for your board: DDR4 and DDR5 are physically keyed differently and are not interchangeable.
- Your motherboard manual or its online support page, which lists the slot population order and the qualified memory list.
- A Phillips screwdriver for the side panel, and nothing else for the memory itself.
- Anti-static precautions, ideally a wrist strap, or at minimum touching bare chassis metal after unplugging.
- Clearance awareness, since tall heat spreaders can collide with a large air cooler over the first slot.
Check three things before buying: the memory generation your board accepts, the maximum capacity and number of slots, and the speeds officially supported by your CPU and board combination. Buying a matched kit rather than mixing individual sticks is the single best way to avoid instability, because kits are factory tested to run together at their rated timings.
Understanding Dual Channel and Slot Order
Modern desktop platforms use a dual-channel memory controller. Two modules placed in the correct slots communicate with the processor over two independent channels, roughly doubling memory bandwidth compared with the same capacity in a single channel. In games and creative applications this is worth a genuinely noticeable performance difference, and it costs nothing but putting the sticks in the right holes.
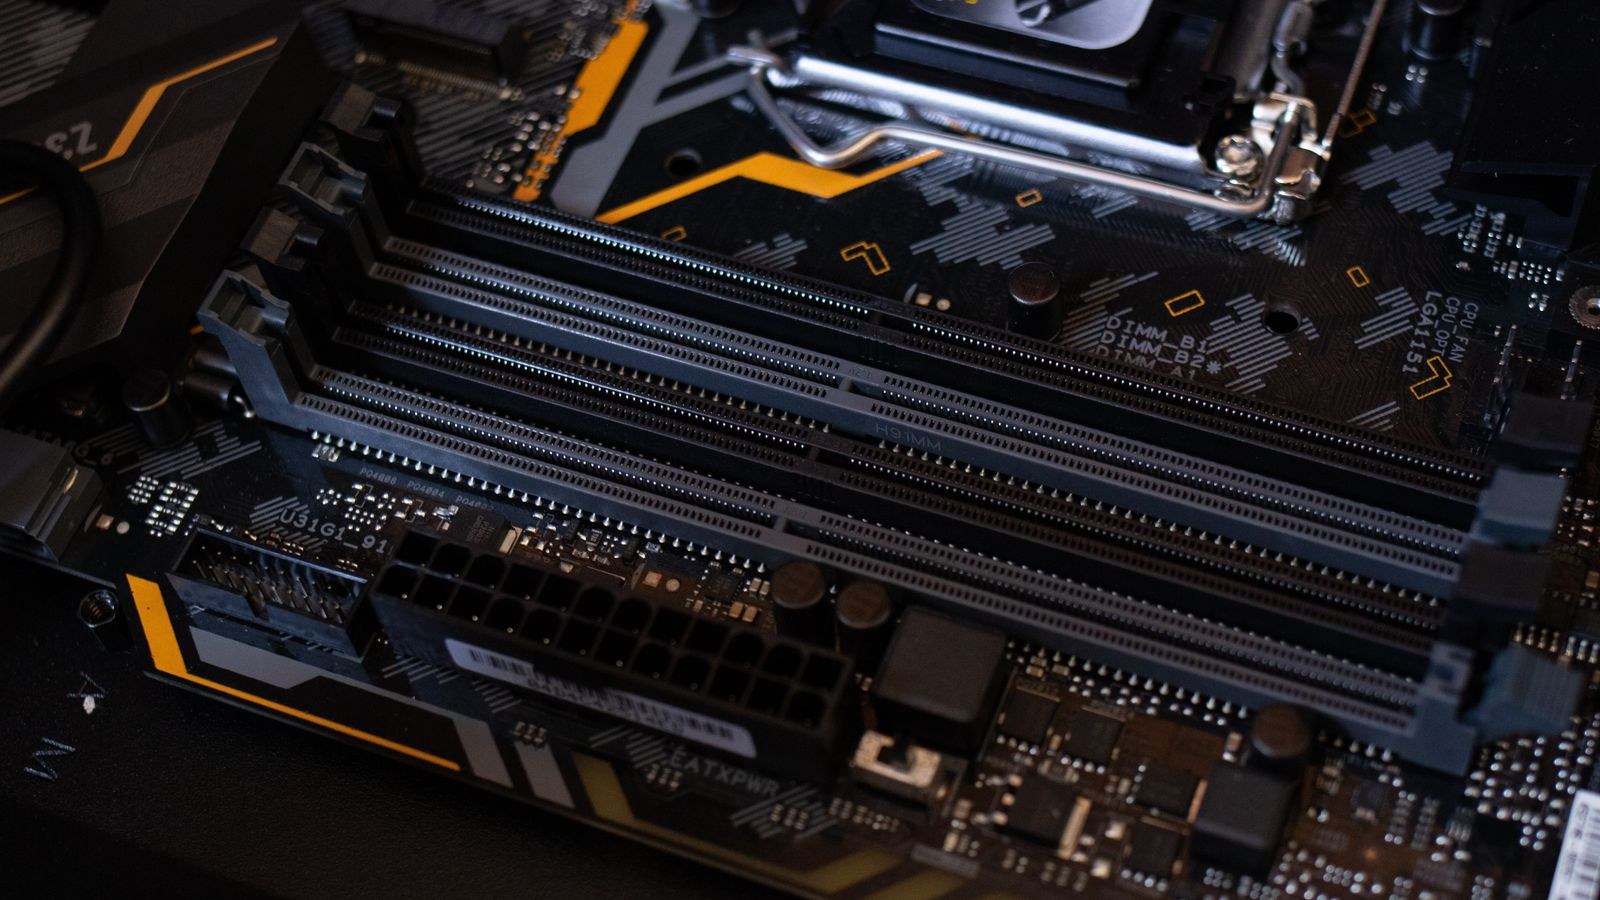
On a four-slot board, the slots alternate between channels. Counting from the CPU they are typically labelled A1, A2, B1, B2, and the correct pair for two modules is almost always A2 and B2, the second and fourth slots from the processor. That means you leave a gap between the two sticks. Filling the two slots nearest the CPU instead often lands both modules on the same channel, halving bandwidth.
The manual is definitive here, since a few boards number their slots differently. It usually prints a small diagram showing which slots to fill for one, two, or four modules.
Two Sticks or Four?
Two modules are generally the better choice. Populating all four slots increases electrical load on the memory controller and often forces a lower stable speed, particularly on DDR5. If you want 32GB, two 16GB modules will typically clock higher and more reliably than four 8GB ones. Our roundup of the best dual channel RAM kits covers matched pairs designed for exactly this, and the best DDR5 RAM list is the place to start for current platforms.
Step-by-Step RAM Installation
- Shut down and cut power completely. Turn the PC off, switch the power supply off at the rear, unplug the mains cable, and hold the case power button for five seconds to discharge the board.
- Open the case and ground yourself. Lay the chassis on its side, remove the side panel, and touch bare metal on the frame before touching any component.
- Identify the memory slots. They sit to the right of the CPU socket, long and narrow with retention clips at one or both ends. Check the labels printed on the board next to them.
- Remove existing modules if needed. Push the retention clips outward at each end and the module lifts partly out on its own. Grip it by the top edges and pull straight up.
- Check for obstructions. Large air coolers frequently overhang the first slot. If a tall heat spreader will not clear, either use lower-profile memory or shift the cooler’s fan up slightly.
- Open the clips on the target slots. Push down and outward on the clips for the slots your manual specifies, normally the second and fourth from the CPU for a two-stick kit. Some boards have a fixed clip at one end, which is normal.
- Align the notch. Each module has an off-centre notch in its gold contacts that matches a ridge in the slot. Line it up and confirm the orientation before applying any pressure. If it does not line up, turn the stick around rather than forcing it.
- Seat the module firmly. Place your thumbs at both ends of the top edge and press straight down with steady, even force. Modern memory needs more pressure than people expect. The clips should snap closed on their own, and the gold contacts should be fully hidden.
- Verify both ends. Look along the slot from the side. The module must sit level, with no gap at either end and both clips fully upright. A stick that is high at one end is the number one cause of a system that will not post.
- Repeat for the second module in its matching slot, then tidy any cables you moved and refit the side panel.
- Boot into the BIOS. Reconnect power and start the machine. First boot after a memory change can take noticeably longer while the board trains the memory, sometimes with several restarts. This is normal, so let it run.
- Enable the memory profile. In the BIOS, find the XMP or EXPO setting and enable profile 1. This applies the rated speed and timings. Without it, the memory runs at a slow JEDEC default regardless of what the box promised. Save, exit, and confirm the reported speed on the main BIOS page.
Confirming It Worked
Once Windows loads, open Task Manager and look at the Memory tab under Performance. It reports total capacity, the current speed, and how many slots are in use. Compare the speed shown against your kit’s rating. If it reads a lower figure, the memory profile is not active.
To confirm dual channel specifically, a free system information utility will report the channel configuration directly, usually as “dual” or “2 x 64-bit”. Finally, run a memory stability test for a while after enabling a speed profile, because an unstable profile produces occasional crashes that are hard to attribute later. If you are shopping for a kit that will hold its rated speed reliably, the best RAM for gaming and best motherboard compatible RAM lists prioritise kits with broad platform support. For a wider view of refreshing an older machine, our guide on how to upgrade a desktop computer’s RAM and storage covers doing both together.
Safety Notes
- Never install memory with power connected. Standby power remains on the board after a shutdown, so unplug the mains lead.
- Handle modules by their edges. Avoid touching the gold contacts, which pick up skin oils and static.
- Do not force a module. If it resists at the correct orientation, a clip is closed or the notch is misaligned.
- Press evenly. Rocking a stick in one end at a time can bend the slot’s internal contacts.
- Keep the original packaging for any modules you remove, since anti-static trays protect them properly.
Troubleshooting
The system will not post after installing
Reseat both modules with firm, even pressure and confirm every clip is fully closed. If it still fails, test with one module alone in the slot your manual recommends for single-stick operation, then swap modules and slots to isolate whether the fault is a stick or a slot.
Only part of the memory is recognised
Usually one module is not fully seated, or you filled slots that place both sticks awkwardly. Reseat, and check the manual’s population diagram. Very old systems may also have a maximum capacity limit below what you installed.
Memory shows a lower speed than advertised
The speed profile is not enabled. Return to the BIOS and switch on XMP or EXPO. If the system becomes unstable afterwards, try the second profile if one exists, or a slightly lower speed, which usually restores stability with minimal performance loss.
Random crashes after the upgrade
Run an overnight memory test. Errors point to either a faulty module or a speed profile the CPU’s memory controller cannot handle with that many sticks installed.
Common Mistakes
The most common by far is populating the first and second slots instead of the second and fourth, leaving the system in single channel and quietly slower. Close behind is never enabling XMP or EXPO, so expensive fast memory runs at base speed indefinitely. Third is being too gentle when seating a module, since modern slots need real pressure and a half-seated stick prevents booting entirely. Fourth is mixing leftover sticks from different kits, which frequently causes instability even when the specifications look identical on paper. Fifth is panicking during the long first boot and cutting power mid-training, which can leave the BIOS in a confused state.
Frequently Asked Questions
Can I mix different RAM brands or speeds?
It sometimes works, but mismatched modules default to the slowest common speed and timing, and stability is far less predictable. A matched kit is always the safer purchase.
How much memory do I actually need?
16GB remains comfortable for general use and most gaming, while 32GB gives real headroom for heavy multitasking, large creative projects, or virtual machines. Beyond that, capacity only helps specific professional workloads.
Does the first boot really take that long?
Yes. Memory training on a new configuration, particularly with DDR5, can take a minute or more and may restart the system several times. Wait at least a couple of minutes before assuming a failure.
Final Thoughts
Installing RAM correctly comes down to three things the manual will tell you in about a minute: use the slots the board specifies, which is nearly always the second and fourth from the CPU for a two-stick kit; press firmly enough that both clips snap shut on their own; and enable the XMP or EXPO profile in the BIOS so the memory runs at its rated speed. Verify capacity, speed, and channel configuration once Windows loads, and run a stability test before you forget about it. Handle those steps and a memory upgrade delivers exactly the smoother, more responsive machine you were expecting.









