 Marcus Bell
 If your desktop spends hours each day rendering 4K video exports, crunching Blender scenes, or pushing Adobe apps to their limits, you already know how hot a workstation can run. Picking the best thermal paste for graphic design work isn’t just a spec-sheet detail — it directly affects how long your CPU and GPU can sustain boost clocks before throttling kicks in. This guide breaks down what actually matters when choosing a thermal compound for a creative workstation, compares our top picks for different budgets and use cases, and flags the mistakes that trip up even experienced builders.
Quick answer: For most people in 2026, the best thermal paste for graphic design workstations is the ARCTIC MX-4 — our #1 rated choice. See the full ranked comparison, alternatives and buying advice below.

Pros
- Metal-free, non-conductive carbon microparticle formula, so a slip onto nearby SMD components will not short the board
- 4 g syringe covers roughly 15 to 20 desktop CPU applications at a pea-sized dot
- Manufacturer states an 8-year service life, so one application normally outlasts the build
- Continuous-use range of -50 to 150 C covers sub-ambient loops and hot mini-ITX cases alike
- Viscosity of 31,600 poise spreads under mount pressure without needing a spreader card
Cons
- No spatula or cleaning wipe in this variant, so you supply isopropyl and a lint-free cloth
- Grey compound stains PCB and fabric and will not wash out of clothing
- Conductivity trails liquid-metal compounds by a few degrees under sustained full load, which is the trade for being non-conductive
The 4 g syringe holds enough carbon-microparticle compound for roughly 15 to 20 standard desktop CPU applications, or fewer if you are covering a large heatspreader such as an AM5 or LGA 1700 lid.
- Density: 2.50 g/cm3
- Viscosity: 31,600 poise, thick enough to stay put yet still spread under mount pressure
- Volume resistivity: 3.8 x 10^13 ohm-cm, effectively an insulator
- Continuous-use range: -50 to 150 C
- Colour: grey
Stated service life is eight years, so a single application normally spans the whole life of the build. The formula has stayed the same across packaging revisions, and each tube carries an authenticity code you can verify with the manufacturer before use.
Strip the old compound first. Isopropyl alcohol at 90 percent or higher on a lint-free cloth clears both the heatspreader and the cooler base; neither item is included here, so buy them separately.
A pea-sized dot in the centre of the lid suits most square LGA and AM5 chips. Rectangular Threadripper and older HEDT lids do better with a thin line down each axis. Lower the cooler straight down and tighten the mounting screws in a diagonal cross pattern, a quarter turn at a time, so the compound spreads evenly and no air pocket forms in a corner.
Do not spread it with a card unless you are covering a bare GPU die, where a thin even film matters more. Any smear that reaches surrounding capacitors is harmless because the formula carries no metal, but wipe it away anyway to keep the board readable.
Because the formula is metal-free and non-conductive, it is safe on every socket type in current use, on bare GPU dies, on laptop heat pipes and on memory or VRM heatsinks. There is no risk of bridging pins on a shim-less die, and no galvanic corrosion of an aluminium cooler base, which rules out the two failure modes that make liquid metal risky for a first-time builder.
The trade is raw conductivity: liquid-metal compounds shift a few more degrees under sustained full load. For an air tower, an all-in-one loop or a console teardown, that gap rarely changes fan behaviour. Storage is simple too, since the compound does not cure inside the tube, so a partly used 4 g syringe stays usable for later builds if you cap it and keep it out of direct sun.

Pros
- Carbon microparticle formula is metal-free and non-conductive, so a stray smear cannot short a socket pin
- Volume resistivity of 3.8 x 10^13 ohm-cm alongside a density of 2.50 g/cm3 and a viscosity of 31,600 Poise
- Holds up across a continuous-use range of -50 to 150 degrees C
- A 4 g tube covers roughly ten desktop CPU mounts at 0.3 to 0.4 g each
- Plastic spatula included for spreading an even film on bare dies and rectangular heat spreaders
Cons
- No thermal conductivity figure in W/mK is published for the compound, so a direct spec comparison against rivals is not possible
- The 4 g tube suits a home builder but runs out quickly on a repair bench doing weekly rebuilds
- Surface cleaning solution is not included; the MX Cleaner is a separate item
The compound is built around carbon microparticles rather than metal oxides or liquid metal. Those particles fill the microscopic pits in a processor lid and a cooler base, replacing the trapped air that would otherwise sit in the gap and block heat flow.
- Density is quoted at 2.50 g/cm3 with a viscosity of 31,600 Poise, giving a firm but spreadable body
- Volume resistivity of 3.8 x 10^13 ohm-cm means it does not conduct electricity
- Continuous-use range spans -50 to 150 degrees C, covering sub-ambient loops through to a heavily loaded overclock
Because the formula is metal-free, paste that escapes onto a socket pin or a surface-mount component will not short anything, and there is no corrosion risk to a copper or nickel cooler base of the kind liquid metal introduces.
A plastic spatula is in the box, which matters because the consistency of this compound suits spreading as much as the single pea-dot method.
- Clean both mating surfaces with isopropyl alcohol first; the dedicated cleaning solution is sold separately and is not bundled here
- A central dot works for square heat spreaders, while the spatula suits rectangular lids and bare dies where an even film matters more
- Seat the cooler in one straight motion and tighten in a diagonal cross pattern so trapped air is pushed outward
There is no cure or burn-in period, so temperatures read true from the first boot. The compound does not dry out or crack in service, so a remount months later usually needs only a fresh clean and a new layer rather than scraping hardened residue off the lid.
Four grams sounds small but goes a long way on typical desktop hardware.
- A standard AM5 or LGA1700 heat spreader takes roughly 0.3 to 0.4 g per application, so the tube covers around ten CPU mounts
- A bare GPU die needs less, while a large workstation socket or a heat-spreader-free laptop chip needs more careful metering
- Leftover compound stores for years if the cap is refitted and the tube kept out of direct sun
For anyone repasting one machine every couple of years, this quantity outlasts the hardware itself. A repair bench turning around several rebuilds a week will prefer a larger tube of the same formula to avoid constant cap-fiddling. The included spatula is a single plastic tool, so a busy workshop will want spares of it.

Pros
- Non-conductive and silicone free, so a stray smear near surface components will not short a board
- A quoted thermal resistance of 0.0076 K/W, aimed squarely at large heatsink and water block contact areas
- One gram covers roughly three to five desktop CPU applications, or a single large GPU die with some spare
- Stays paste-like instead of curing, so a cooler can be lifted and refitted months later
- Ships with a syringe and a spreading spatula, useful on the wide heat spreaders inside a PS5 or Xbox Series X
Cons
- A one gram syringe is a small quantity, so a full graphics card rebuild with pads will want a second tube
- Non-curing pastes can pump out from between surfaces after years of heavy thermal cycling and eventually need renewing
- No cleaning supplies are included, so isopropyl alcohol and lint-free cloths must be sourced separately
A gram sounds small until you see how little compound a joint actually needs. The layer only has to fill microscopic gaps between two machined surfaces; excess simply squeezes out and adds thermal resistance rather than removing it.
- A standard desktop CPU takes roughly 0.2 to 0.3 grams applied as a central pea
- A large heat spreader on an LGA1700 chip takes a little more, spread thin
- A bare GPU die takes very little, since the contact patch is small
- A console heat spreader is the greediest, closer to half a gram
Plan on three to five processor applications from this tube, or one console service with some to spare. If a rebuild involves multiple cards and thermal pads as well, order accordingly rather than running short halfway through a strip-down.
Preparation matters more than technique. Both mating surfaces must be clean and dry before anything is applied, or old compound will keep the new layer from making full contact.
- Wipe the old compound off with isopropyl alcohol and a lint-free cloth
- Let both surfaces dry fully before starting
- Apply a pea-sized dot at the centre for a square heat spreader
- Use the supplied spatula to spread a thin even film across a wide console spreader
- Seat the cooler straight down and tighten fasteners in a cross pattern
Do not spread by hand on a small CPU. Mounting pressure distributes it more evenly than any manual attempt, and hand spreading tends to trap air. Resist the urge to use more than needed; a thicker layer is worse, not better.
Two properties define how this compound behaves over time. It is electrically non-conductive, and it contains no silicone.
- Non-conductive means an accidental smear onto nearby components will not create a short
- Silicone free means no low molecular weight siloxane gases to creep onto contacts
- It does not harden, so removal later needs no chipping or heat
The quoted thermal resistance of 0.0076 K/W puts it among the stronger non-metallic compounds. It will not match liquid metal on a bare die, but it also will not attack aluminium coolers or risk shorting a board, which is why it remains the sensible default for water blocks and large air towers alike. Expect several years of service before renewal is worth considering.

Pros
- Thermal conductivity of 14.2 W/mK, among the higher figures for a paste rather than a liquid metal compound
- Built to withstand a -250C to +350C temperature range, so it stays usable under liquid nitrogen extreme overclocking sessions
- Zero electrical conductivity (0 pS/m) removes the short-circuit risk that liquid metal compounds carry near exposed pins
- Includes 12 cleaning wipes (6 wet, 6 dry) to degrease the old paste before reapplication, no separate solvent purchase needed
- Non-curing formula stays workable over time instead of hardening, so reapplication does not require chiseling off a dried layer
Cons
- 2g syringe is a small volume, likely only enough for a handful of CPU/GPU applications before running out
- Thin bead application takes more care than a pre-cut thermal pad, since it is easy to overapply on GPU die-sized contact areas
- No pre-applied thermal pad convenience, applying paste with the included syringe and applicator takes extra prep steps
Kryonaut Extreme carries a 14.2 W/mK thermal conductivity figure, with a viscosity of 130-180 Pas and a specific weight of 3.76 g/cm3, numbers that put it toward the higher end of paste-based thermal compounds rather than liquid metal alternatives. Electrical conductivity sits at 0 pS/m, meaning it will not short a circuit if a small amount spreads onto surrounding contacts, unlike liquid metal pastes that carry that risk near exposed pins.
The compound is built to remain stable across a -250C to +350C range, covering everything from sub-zero liquid nitrogen overclocking sessions to sustained high loads under air or water cooling. Nano-aluminum oxide particles in the formula are sized to fill microscopic surface irregularities on a CPU or GPU die, which is what the manufacturer credits for the improved heat transfer over standard silicone-based pastes.
The 2g syringe ships with a dedicated applicator for spreading a thin, even line across the die before mounting a cooler. The formula is non-curing, meaning it stays soft rather than hardening over months of use, so reapplying paste later does not require scraping off a dried layer first. It works across air, water, and even liquid nitrogen cooling setups, and across CPU, GPU, and console hardware including the PS3, PS4, PS5, and Xbox 360, One, Series S, and Series X.
Included with the syringe are 12 cleaning wipes, split evenly between 6 wet and 6 dry, meant to degrease the old paste and any residue off the contact surface before applying a fresh layer. This removes the need to buy a separate isopropyl alcohol kit for prep work, though the 2g tube itself is a small volume best planned for a handful of applications rather than repeated whole-system use.
The package includes a 2g syringe of thermal paste, a specially designed applicator for spreading it evenly, and 12 cleaning wipes (6 wet and 6 dry) for surface prep. That combination covers a full paste-swap job start to finish without needing to source cleaning solvent or an application tool separately.
Because the paste ships in a small syringe rather than a bulk tube, it suits a single build or a small number of upgrade sessions rather than a shop doing repeated builds, where a 9ml bulk size would go further. The wide device compatibility list, spanning desktop CPUs and GPUs to gaming console coolers, makes it a reasonable pick for anyone reapplying paste on a console alongside a PC rather than buying separate compounds for each.

Pros
- Nano-aluminium and zinc oxide filler fills surface pits on both the heat spreader and the cold plate without curing hard
- Stays stable at a sustained 80 C, so it does not dry out under long overclocked sessions
- Electrically non-conductive, so a small overspill onto surrounding components will not short a board
- Bundled flat spatula spreads thin films on bare dies, which suits PS4, PS5 and Xbox repaste work
- Sealed in its coated original packaging the compound stays usable for at least three years
Cons
- 1 gram is a working amount rather than a stock supply, and a large GPU die consumes a noticeable share of it
- Must be at room temperature and spread slowly, so a cold garage repaste fights back
- Documented to dry over time on very hot dies, so plan on periodic reapplication rather than fitting once and forgetting
This compound is built around nano-aluminium and zinc oxide carried in a non-curing base. The filler occupies the microscopic pits in a heat spreader and cooler cold plate, replacing trapped air with a far better conductor.
- Stays stable at a sustained 80 C without hardening or cracking
- Non-curing, so a cooler can be lifted later without prying against set material
- Not electrically conductive, so minor overspill onto the substrate is not an instant short
Real temperature results depend as much on mounting pressure, cooler flatness and case airflow as on the compound itself, which is why a single conductivity figure never tells the whole story. Expect a meaningful drop against dried factory material, and a smaller one against a fresh mainstream compound.
The 1 gram syringe ships with a flat spatula, which suits both the centre-dot method on a heat spreader and thin manual spreading on a bare die.
- Strip the old compound with isopropyl alcohol and a lint-free cloth until both faces are dry and residue-free
- Bring the syringe up to room temperature first; cold material is stiff and tears rather than flows
- Spread slowly, since pushing hard drags the compound off the surface instead of levelling it
On consoles the spatula matters more, because PS4, PS5 and Xbox processors sit as bare dies where an uneven blob will not spread under clamping pressure alone. Reseal the syringe and store it in the coated original packaging, which is what supports the three-year shelf claim.
This is a compound aimed at people chasing the last few degrees rather than simply getting a machine running again.
- Desktop processors and graphics cards under sustained overclocked load
- Console repastes where factory material has dried after years of service
- Laptop and small-form-factor rebuilds where cooler headroom is already tight
One gram is a working amount, not a lifetime supply: a standard desktop heat spreader takes a modest dot, while a large graphics die consumes considerably more. Larger syringe sizes exist for anyone maintaining several machines. Because it never cures, it is also a sensible pick for testers who reseat coolers often, since teardown does not mean fighting hardened material off a die.
Pros
- Zinc oxide compound is non-conductive, so a stray smear on socket pins will not short anything
- 3 gram syringe covers roughly a dozen mainstream CPU applications
- Stencil and spreader in the box remove the guesswork from pattern and thickness
- Low viscosity flows into the fine machining marks on a cooler base rather than bridging them
- Contains no volatile compounds, so it resists drying, cracking and pump-out over years
Cons
- 3 grams is a small quantity for anyone rebuilding several systems a year
- Zinc-oxide compounds trail liquid metal and top carbon-based pastes by a few degrees on hot chips
- No isopropyl alcohol or lint-free wipes included, so old paste removal needs supplies of your own
The compound is a zinc oxide formulation supplied in a 3 gram syringe with a stencil and a spreader. Zinc oxide matters for two reasons: it is electrically non-conductive, so a smear that escapes onto socket pins or surface components will not cause a short, and it stays chemically stable over years in place.
- Low viscosity, so it flows into the fine machining marks on a cooler base
- No volatile compounds, so it resists drying out, cracking or pumping away from the die
- 3 grams covers roughly a dozen mainstream CPU dies, fewer on large GPU packages
The stencil is the genuinely useful extra. It sets both the pattern and the thickness, which is exactly where most first attempts go wrong by applying far too much.
Strip the old compound off first with a lint-free cloth and isopropyl alcohol on both the chip lid and the cooler base. Neither is supplied here, so have them ready before you start. Both faces need to be dry and residue-free before the new layer goes on.
- Lay the stencil over the heat spreader and fill it, or place a pea-sized blob at the centre
- Lower the cooler straight down and tighten the screws in a diagonal cross pattern
- Avoid spreading by hand, which works air pockets into the layer
Do not overtighten one corner, because uneven mounting pressure causes worse temperatures than any compound choice ever will. Once mounted, run a load test and watch the numbers settle across the first few heat cycles.
Replacing an old, dried-out layer on a machine several years into service usually produces the biggest change, often several degrees under sustained load. Swapping from a fresh mainstream compound to this one yields a much smaller difference, since the paste is only one link in the chain.
- Cooler mounting pressure and contact flatness matter more than compound choice
- Case airflow sets a ceiling that no paste can lower
- Liquid metal and high-end carbon compounds still lead by a few degrees on hot chips
Where this formulation earns its place is stability. It will not dry out, crack or need redoing on a yearly cycle, so a machine you build now should hold its thermal behaviour for years without the cooler having to come off again.

Pros
- 20% BETTER PERFORMANCE With its improved composition, the MX-6
- PROVEN QUALITY With over 20 years of experience in the PC cooling
- RISK-FREE APPLICATION MX-6 is neither electrically conductive nor
- VERSATILE APPLICATION With its new composition, the MX-6 is suitable
- 100 % ORIGINAL DUE TO AUTHENTICITY CHECK Due to our Authenticity Check,
Cons
- Requires checking placement surface dimensions before setup
- Periodic cleaning recommended to maintain the Thermal Paste finish
- Initial setup requires checking operating instructions carefully
The ARCTIC MX-6 - Ultimate Performance Thermal Paste for CPU offers reliable functional utility tailored for modern home and workplace environments. Designed to enhance daily productivity, this unit integrates 20% BETTER PERFORMANCE With its improved composition, the ARCTIC MX-6 alongside PROVEN QUALITY With over 20 years of experience in the PC cooling. Users will find the intuitive design straightforward to operate across various room configurations and daily routines. The versatile construction adapts easily to personal workspaces, providing consistent practical value and streamlined usability. Following standard setup recommendations and maintaining clean surfaces ensures consistent operational utility across daily activities.
Built using resilient structural components, this unit features a sturdy outer housing engineered to resist operational wear. Precision manufacturing ensures that all joints and surface connections remain firmly aligned during regular daily activity. RISK-FREE APPLICATION MX-6 is neither electrically conductive nor reinforces overall physical stability over extended service periods. Premium Thermal Paste construction maintains structural integrity and cosmetic appearance under routine handling. Structural integrity remains firm throughout regular usage, giving owners peace of mind. Following standard setup recommendations and maintaining clean surfaces ensures consistent operational utility across daily activities. This functional equipment provides steady performance and practical convenience when properly integrated into your workspace.
Initial setup requires placing the unit on a flat, stable surface with adequate clearance around all sides for proper operation. Ensure all power or connection cables are routed neatly without sharp bends to prevent wire strain. Regular care involves wiping exterior housing surfaces with a soft cloth to remove dust buildup. Inspecting mechanical connections periodically preserves operational efficiency and maintains cosmetic appearance over time. Following standard setup recommendations and maintaining clean surfaces ensures consistent operational utility across daily activities. This functional equipment provides steady performance and practical convenience when properly integrated into your workspace.

Pros
- 4 gram syringe bundled with six cleaner wipes, so surface prep is covered rather than sourced separately
- Neither electrically conductive nor capacitive, so contact with nearby pins and pads cannot short a board
- Viscosity is set for direct-die work on bare GPU and console processors as well as heat spreaders
- Measurably lower thermal resistance than the previous generation compound it replaces
- Every syringe carries an authenticity code that can be checked against counterfeits
Cons
- Thicker than the compound it replaces, so it needs firm, slow spreading and works better warmed to room temperature
- The six cleaner wipes run out long before 4 grams of compound does
- A non-conductive compound still trails liquid metal by several degrees on delidded and direct-die extreme setups
MX-6 is a reformulation of the long-running MX-4 line, with a measurably lower thermal resistance from a revised filler mix.
- Neither electrically conductive nor capacitive, so contact with pins, pads or surrounding components cannot cause a short
- Does not cure, so a cooler can be lifted later without prying against hardened material
- Viscosity is set for direct-die work as well as heat spreaders
The non-conductive property is what makes this a sensible default for anyone repasting a laptop, console or graphics card where a slip near exposed circuitry is plausible. It gives up a few degrees against liquid metal in extreme setups and takes back all of the risk liquid metal introduces. Long quoted durability means annual reapplication is not expected.
This bundle pairs a 4 gram syringe with six cleaner wipes, which covers the prep step most repaste kits leave you to source yourself.
- Wipe both the die or heat spreader and the cooler cold plate until dry and residue-free
- Warm the syringe to room temperature so the compound flows rather than tears
- Spread slowly and evenly, since this mix is thicker than its predecessor and rewards patience
Four grams is a working stock rather than a single application, covering a run of desktop processors, several graphics cards or a household of laptops. The wipes will be gone well before the compound is, so keep isopropyl alcohol and lint-free cloth on hand for later jobs. Each syringe carries an authenticity code for verification.
The application list is unusually broad for a single compound.
- Desktop processor heat spreaders under tower and liquid coolers
- Bare graphics dies, including direct-die contact
- Console processors during PS5 and Xbox teardowns
- Laptop repastes where the cooler clamps straight onto the silicon
The one place it is not the answer is extreme overclocking on a delidded chip, where liquid metal still leads by several degrees. For everything short of that, a non-conductive compound removes corrosion and short-circuit risk entirely, works on aluminium as well as copper and nickel, and needs no barrier tape around the die. Anyone who maintains machines for other people will find that safety margin more useful than the last two degrees.

Pros
- Carbon filler compound that is neither electrically conductive nor capacitive, so a stray smear near surface components will not short a board
- Reaches full performance the moment the cooler is torqued down, with no burn-in period to sit through
- Measurably lower thermal resistance than the outgoing formula it replaces, verified on lab test equipment rather than on a processor
- Viscosity holds its shape on bare silicon, which suits direct-die work on graphics chips and console processors
- 2 g syringe covers a build plus later cooler swaps instead of a single one-shot sachet
Cons
- No spreader card, alcohol wipes or cleaning cloth in the pack, so surface prep supplies are on you
- A non-metallic compound will not match liquid metal temperatures on delidded or extreme overclocking setups
- Only the 2 g volume appears in this listing; the 4 g and 8 g tubes are separate items
This is a carbon filler based compound suspended in a silicone gel carrier, and both halves of that description matter. Carbon does not conduct electricity, and the gel carrier lets the paste spread under mounting pressure rather than relying on a perfect manual spread across the heat spreader.
- Thermal resistance is measurably lower than the formula it succeeds, a difference the maker puts near 20 percent on lab equipment
- No burn-in curve to wait through, so the temperatures you see on the first boot are the temperatures you keep
- Non-capacitive as well as non-conductive, which removes the short-circuit and discharge risk that comes with metallic pastes
The 2 g syringe is the mid-size option and stretches across several standard desktop applications, so one tube normally outlives the build it was bought for.
Clean first, always. Strip the old compound with isopropyl alcohol and a lint-free cloth, then let both surfaces dry completely before new paste goes down. Neither the alcohol nor a spreader is supplied, so have them on the bench before you start.
- A pea-sized dot in the centre of the heat spreader covers most desktop chips; long rectangular spreaders take a thin line down each half
- Even, gradual clamping pressure does the spreading, so tighten cooler screws in a diagonal cross pattern a few turns at a time
- For direct-die work on bare graphics or console silicon, the thicker viscosity stays put instead of creeping off the edges
Cap and reseal the syringe afterwards. Stored sealed, the remaining paste keeps its consistency for the next cooler swap or laptop teardown.
This suits anyone re-pasting a desktop processor, a laptop heat pipe assembly, a graphics card or a games console where factory compound has gone dry and crumbly. Because nothing in the mix conducts electricity, it is the calmer choice for cramped laptop boards and exposed dies where a metallic paste could bridge nearby contacts.
- Builders mounting a tower air cooler or an all-in-one liquid block for the first time
- Console owners chasing down thermal throttling on a machine several years into service
- Technicians who want an authenticity check code to confirm a tube is genuine before it goes on a client machine
It is not a liquid metal substitute. On delidded chips under extreme cooling, gallium compounds still lead, at the cost of conductivity and aluminium corrosion risk this paste sidesteps.

Pros
- 4 g syringe covers roughly ten to fifteen mainstream desktop applications, so one tube spans several cooler swaps
- Electrically non-conductive and non-capacitive, so squeeze-out onto socket pins or surface components cannot short them
- High cohesion resists pump-out, dry-out and bleeding through repeated heat cycles, so repasting is not an annual chore
- Spreads under cooler mounting pressure rather than by spatula, which avoids trapping air bubbles in the bond line
- Tube measures 0.8 x 0.5 x 4.2 inches, small enough to live in a toolbox drawer between builds
Cons
- The dense formula cannot be spread by hand, so anyone used to the spatula method must trust the pressure-spread approach
- No spatula, gloves or cleaning fluid are included; the matching cleaner is a separate purchase or bundle
- It is a paste, not a pad, so the thicker gaps over VRM stages and memory packages still need thermal pads of a measured thickness
This compound is deliberately dense and will not spread with a spatula. That is by design rather than a fault. The method is to place a modest amount at the centre of the heat spreader and let cooler mounting pressure push it into a thin bond line. Because adhesion is low and cohesion is high, the paste flows outward without dragging air pockets along with it.
- Clean both surfaces with isopropyl alcohol or a dedicated paste cleaner, then let them dry fully.
- Apply a pea-sized blob for a mainstream desktop processor, slightly more for a large heat spreader such as Threadripper.
- Tighten the cooler diagonally, a half turn at a time, so clamping force lands evenly across the die.
Resist the urge to lift the cooler and check coverage, since that breaks the bond line and means starting again.
The compound is electrically non-conductive and non-capacitive. That specification matters most to anyone nervous about a shaky hand: paste that squeezes out onto surface-mount components or the pins around a socket will not carry current or cause a short. It is therefore usable on desktop processors, graphics dies, laptop chips and games consoles alike, including bare-die parts where the margin for error is tight.
It is a paste rather than a pad, so it is not the answer for the thicker gaps between voltage regulator stages, memory packages and a heatsink. Those need pads of a measured thickness. High cohesion also fights pump-out, the slow migration of compound away from the die caused by repeated heating and cooling that leaves older formulas thin in the middle and hot at the core.
The 4 g syringe, in a tube measuring 0.8 by 0.5 by 4.2 inches, covers roughly ten to fifteen mainstream desktop applications depending on how generous you are, and fewer if you are pasting large graphics dies or console processors. For most builders that is several years of cooler swaps and rebuilds from a single tube.
Reapplication intervals are where a stable compound earns its keep. Because the formula resists dry-out and bleeding across repeated thermal cycles, there is no need to schedule an annual repaste the way older silicone compounds sometimes demanded. Repaste when the cooler comes off for another reason, or if core temperatures climb ten degrees or more above their usual idle and load figures. Keep the cap on and store the syringe upright at room temperature so the fillers do not settle.
Why Thermal Paste Matters for Graphic Design Workstations
Rendering software, video editors, and 3D modeling tools load the CPU and GPU differently than gaming does. Gaming spikes load in short bursts, but rendering often holds near 100% usage for 20, 30, even 60 minutes straight. That sustained load turns your cooler’s thermal paste into the weak link in the whole system.
Thermal paste fills microscopic gaps between the metal lid of your chip and the cooler’s baseplate. Without it, air pockets trap heat and clock speeds drop to protect the hardware. A quality compound with strong thermal conductivity keeps temperatures lower during long render queues, which means fewer thermal throttling dips and more consistent export times. For a deeper dive into chip-specific options, see our guide to the best CPU thermal paste picks.
Think about a typical day: color grading footage in DaVinci Resolve, exporting a 4K timeline in Premiere Pro, then switching to a Blender Cycles render overnight. Each of those tasks can push your GPU close to its thermal ceiling for extended periods.
For a creative workstation, that stability matters more than raw peak performance. You want your render to finish in the same amount of time at minute 45 as it did at minute five.
What Makes the Best Thermal Paste for Graphic Design Workstations
Not all thermal compounds perform the same under sustained load. Here’s what separates a paste built for all-day rendering from one meant for light everyday use.
Thermal Conductivity
Higher conductivity, measured in W/mK, means heat moves away from the chip faster. For a workstation running long export queues, this is the single biggest factor in keeping temperatures stable. Pastes with a higher rating buy you a few extra degrees of headroom before the fans have to spin up.
Viscosity and Ease of Application
Thicker pastes spread less evenly and are harder to apply without air bubbles. A paste with the right viscosity spreads in a thin, even layer, which matters if you’re reapplying it yourself between GPU upgrades.
Electrical Conductivity
Metal-based pastes conduct electricity, so a stray smear near a VRM or capacitor can cause a short. Non-conductive, ceramic-based pastes are safer for anyone applying their own compound on a graphics card.
Long-Term Stability
Cheap pastes can dry out, crack, or “pump out” from under the cooler within a year or two. A workstation that runs hot daily needs a compound rated for longer service life before it needs reapplication.
Top Picks for Different Creative Workflows
Every workstation setup is different, so we grouped these recommendations by the situation you’re most likely to be in. If you’re shopping strictly by budget, our thermal paste picks under $10 narrow the list further.
Best Overall Value: ARCTIC MX-4
The ARCTIC MX-4 is priced at $4.99 and holds a 4.8-star rating across more than 105,000 reviews. It spreads easily, isn’t electrically conductive, and handles sustained rendering loads without drama. For most people building or upgrading a design workstation, this is the safest starting point.
Best for Heavy Overclocking: Thermal Grizzly Kryonaut
If you push your CPU or GPU past stock clocks for faster renders, the Thermal Grizzly Kryonaut is worth the step up. At $8.99 with a 4.7-star rating from nearly 60,000 buyers, it’s built specifically for demanding, overclocked builds. If your workflow leans more toward benchmarking and overclocking than daily editing, our guide to the best thermal paste for overclocking covers this in more depth. For extreme overclockers running near the thermal limit constantly, the Kryonaut Extreme pushes conductivity even further, though at a higher $22.99 price point.
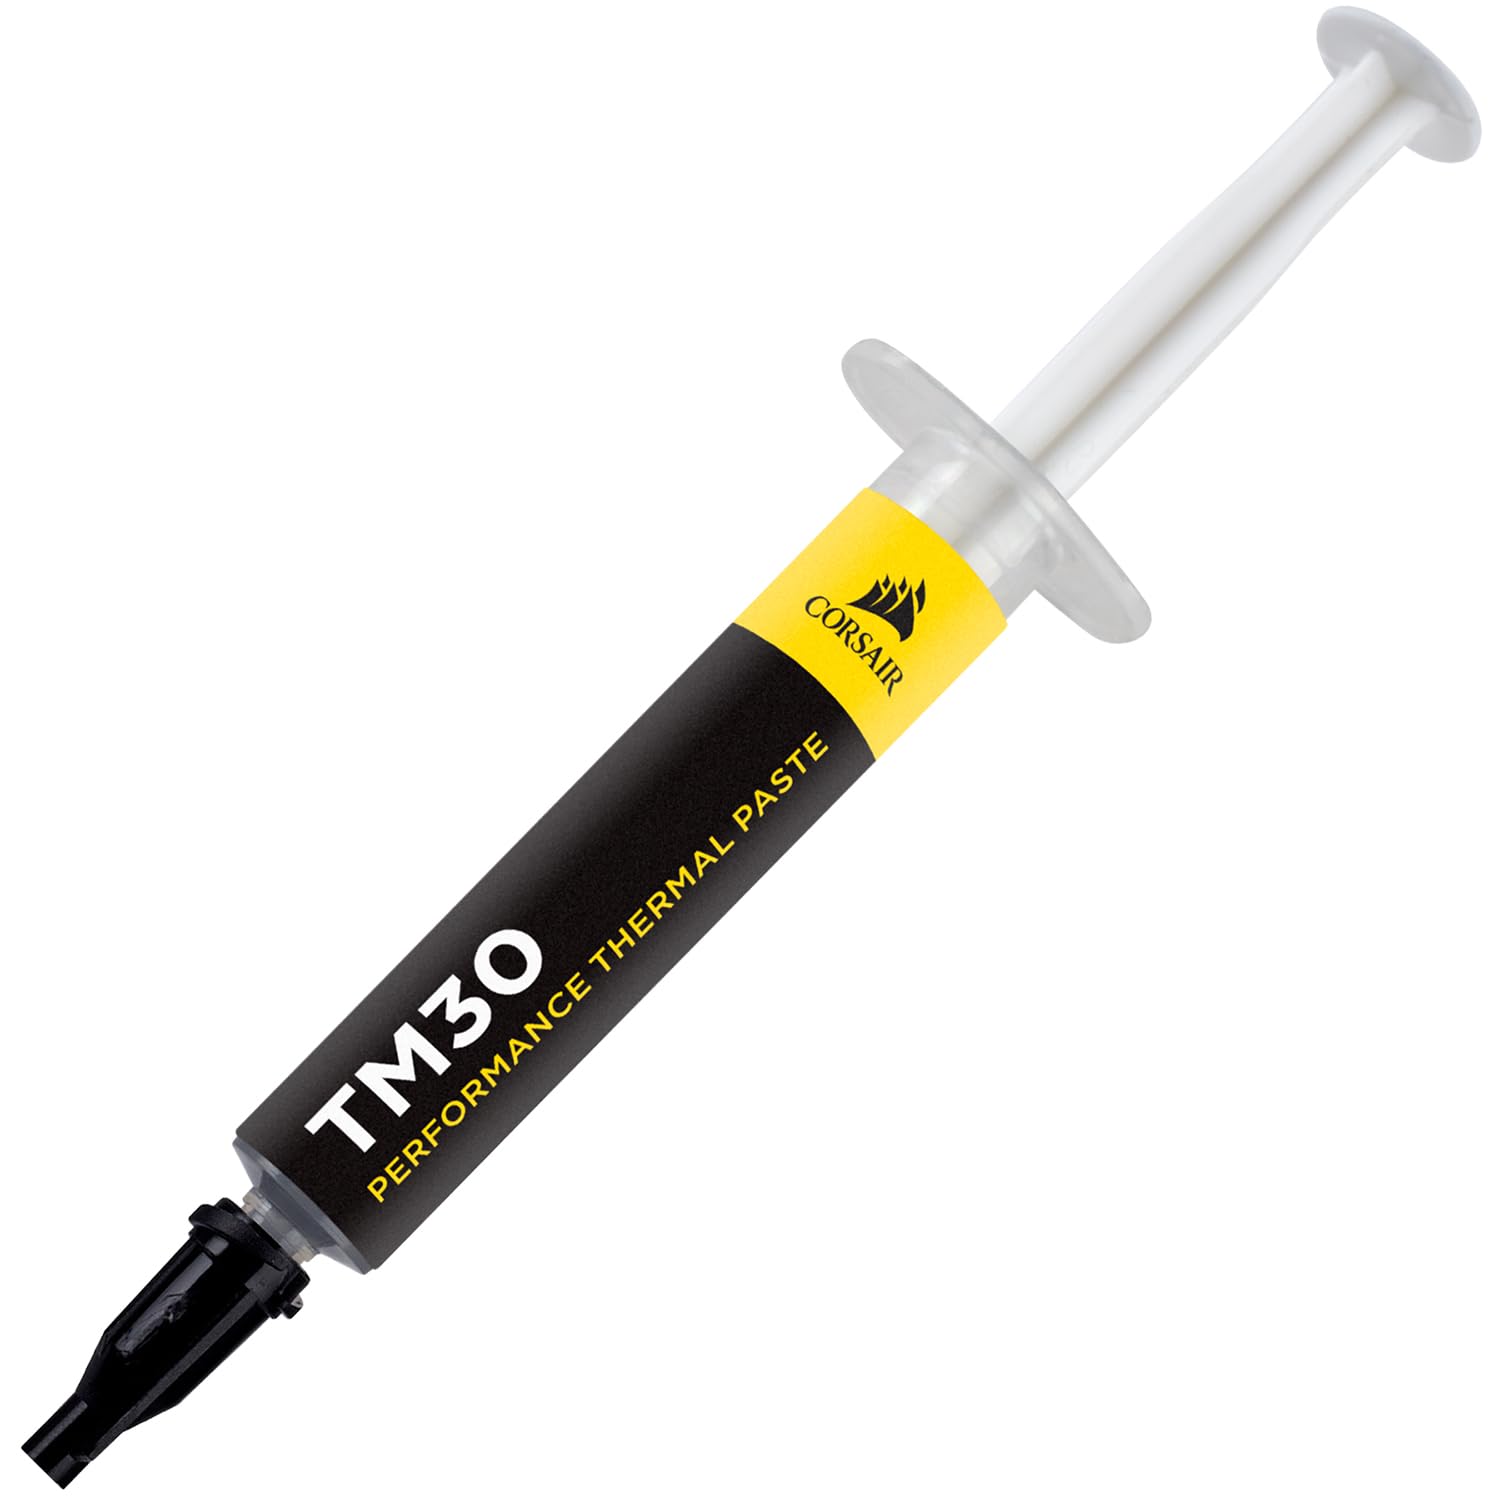
Best Budget Silver-Based Option: Corsair TM30
The Corsair TM30 comes in at $7.00 with a 4.7-star rating and includes its own applicator. It’s a solid middle ground if you want stronger performance than a basic paste without spending on a premium formula.
Best Upgrade Pick: ARCTIC MX-6
The ARCTIC MX-6 is ARCTIC’s newer, higher-conductivity formula at $8.39, rated 4.7 stars. If your current GPU or CPU runs a bit warm under sustained rendering, swapping in MX-6 is one of the least expensive ways to buy back a few degrees of headroom.
How to Apply Thermal Paste on a Design Workstation
You don’t need to be a PC-building expert to apply thermal paste correctly, but a few habits make a real difference on a workstation that runs hot every day.
Start with a clean surface. Wipe off old paste completely with isopropyl alcohol before adding a new layer, since mixing old and new compound reduces performance. Use a pea-sized dot in the center of the chip for most CPUs, or a thin X or line pattern for larger GPU dies.
Let the cooler’s mounting pressure spread the paste naturally rather than manually smearing it edge to edge. Over-application is one of the most common mistakes: excess paste can squeeze onto the socket or nearby components, especially with electrically conductive metal-based pastes.
After reassembly, run a stress test or a long render job and check temperatures. If idle and load temps look normal for your chip, you’re done. If you’re specifically cooling a graphics card feeding a render engine, our picks for the best GPU thermal paste options are worth a look too.
Common Mistakes to Avoid When Buying Thermal Paste
The biggest mistake is assuming any paste will do because it’s “just goop between two metal plates.” Cheap, unrated paste can dry out within months under daily rendering loads, quietly costing you clock speed you paid for.
Another common error is using metal-based paste without care around a GPU’s surface-mounted components. If you’re not confident applying it precisely, a ceramic or carbon-based non-conductive paste like MX-4 removes that risk entirely.
Buyers also overlook viscosity. A paste that’s too thick can leave gaps at the edges of a large GPU die, creating uneven cooling across the chip. Skipping proper alcohol cleanup before reapplying also compresses old, dried paste into the new layer, which hurts conductivity from day one.
Finally, don’t assume a higher price always means better results for your use case. If you’re not pushing extreme overclocks, a mid-range compound often performs within a degree or two of premium options, but at a fraction of the cost.
One more mistake worth calling out: buying based on a single synthetic benchmark chart instead of your actual workload. A paste that wins by half a degree in a lab CPU test may perform almost identically to a cheaper option once you factor in your case airflow, cooler size, and room temperature during a real overnight render.
Frequently Asked Questions
Do graphic design workstations really need special thermal paste?
Not a special paste exactly, but you do want one rated for sustained load. Rendering and video export keep your CPU and GPU near full usage for long stretches, which is harder on thermal paste than typical gaming sessions.
How often should I replace thermal paste on a render-heavy PC?
Most quality pastes last two to four years under daily heavy use. If you notice rising idle temperatures or a louder fan curve over time, it’s a good sign the paste has dried out.
Is metal-based thermal paste safe to use on a graphics card?
It can be, but it requires careful, precise application since it conducts electricity. If you’re not confident working around a GPU’s surface components, a non-conductive paste is the safer choice.
Does better thermal paste actually speed up rendering?
Indirectly, yes. Lower sustained temperatures mean your CPU or GPU can hold higher boost clocks for longer during a render, rather than throttling down midway through.
Can I use the same thermal paste for both CPU and GPU?
Yes, in most cases. A general-purpose paste rated for high-wattage components works fine on both, as long as you match the application pattern to the chip size.
A workstation built for graphic design lives or dies by how well it handles sustained heat, and thermal paste is one of the lowest-cost upgrades that actually moves the needle. Start with a proven, non-conductive option if you’re applying it yourself, and step up to a premium formula only once you’re pushing real overclocks. Whichever pick you land on from the list above, checking the current price on Amazon before you buy is the easiest way to compare what fits your budget today.