 Owen Bradley
Dryer venting is the most consequential appliance detail that almost nobody inspects. Fire departments attribute thousands of house fires a year to clothes dryers, and the leading cause is not a faulty machine but a restricted or improperly built vent that lets lint accumulate against hot air. A bad vent also costs you money every load, because a dryer that cannot expel moist air runs far longer to do the same work. Getting this right is not complicated: rigid metal duct instead of flexible foil, the shortest and straightest run you can manage, a proper exterior hood, and never, under any circumstances, a discharge into the house. This guide covers how to vent a dryer correctly from planning through final testing.
Why the Duct Material Matters So Much
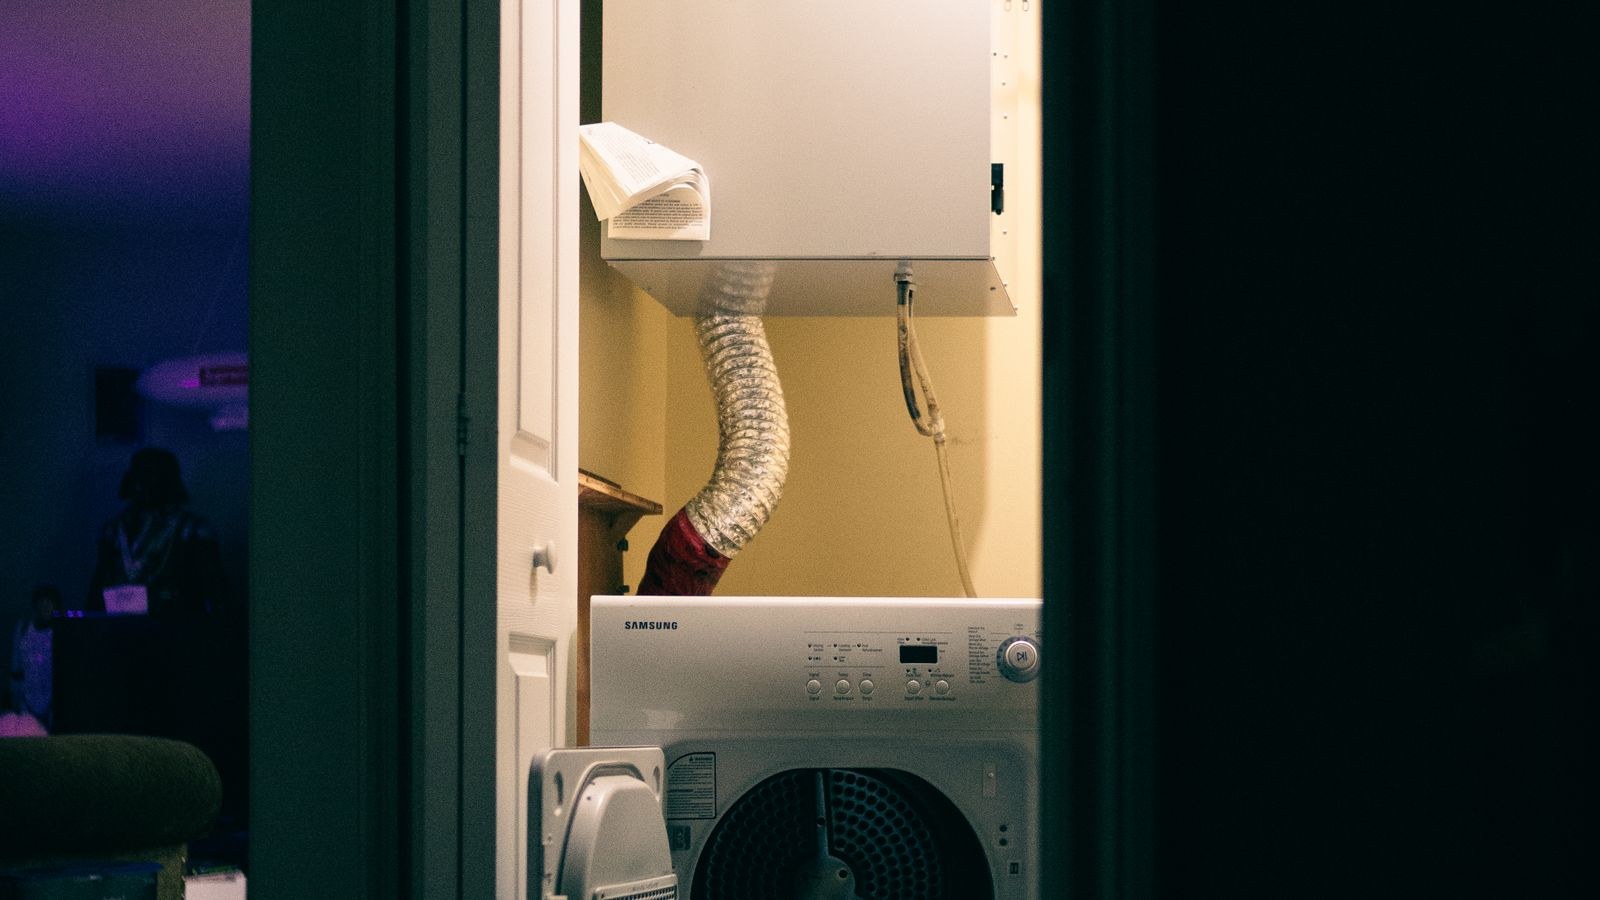
Walk into any hardware store and you will find three products sold for this job. Only one of them belongs in a permanent installation. Rigid galvanised metal duct in 4-inch diameter is the correct choice for the concealed run: it is smooth inside, so lint slides through rather than catching, it does not sag or crush, and it will not burn. Semi-rigid aluminium is acceptable for the short, visible transition between the dryer and the wall, where you need a little flexibility to slide the machine into place. Flexible foil or plastic accordion hose is the product responsible for most of the trouble — its corrugations trap lint at every ridge, it kinks when the dryer is pushed back, and plastic versions can ignite outright.
Screws are the other frequent error. Never fasten duct joints with sheet metal screws, because the protruding tips inside the duct snag lint and build a blockage from the inside out. Use foil tape or approved clamps on the outside of each joint instead.
Tools and Materials
- 4-inch rigid galvanised duct and matching elbows for the concealed run.
- A UL-listed semi-rigid transition hose, no longer than 8 feet, for the connection behind the machine.
- An exterior vent hood with a damper — hooded or louvred, never a screened cover.
- Foil duct tape and worm-drive clamps, not sheet metal screws.
- Drill, hole saw or reciprocating saw sized for a 4-inch penetration.
- Exterior caulk for sealing the wall penetration.
- Tin snips, tape measure, level and gloves — cut galvanised edges are sharp.
- A dryer vent brush kit for the cleaning you will do afterward.
Step by Step: Venting a Dryer Correctly
- Plan the shortest possible route to an exterior wall. Stand behind the dryer and pick the nearest outside wall, ideally the one directly behind or beside the machine. Every foot of duct and every turn adds resistance. Sketch the run before cutting anything.
- Calculate your equivalent length. The standard limit for a 4-inch rigid duct is 35 feet of total equivalent length, and you must subtract for fittings: a 90-degree elbow counts as roughly 5 feet, a 45-degree elbow as about 2.5 feet. A run with three 90-degree turns therefore burns 15 feet of your budget before any straight pipe. Check your dryer’s manual too, since some manufacturers specify shorter maximums. If your planned route exceeds the limit, reroute rather than hope.
- Cut the exterior penetration. Mark the wall from inside, drill a small pilot hole through to the outside to confirm the location clears siding features and interior framing, then cut the 4-inch opening from the exterior with a hole saw. Never cut blind through a wall — check for wiring, plumbing and framing first.
- Install the exterior hood. Fit a hood with a swinging damper that opens under airflow and closes when the dryer stops, keeping out rain, cold air and pests. Do not use a cover with a mesh screen. Screens are the number one cause of exterior blockages because lint mats against them within weeks. Seal the flange to the siding with exterior caulk and fasten it securely.
- Run the rigid duct from the hood inward. Assemble sections with the male crimped end pointing in the direction of airflow, toward the outside, so lint travels over joints rather than catching on lips. Support the duct every 4 feet or so with strapping to prevent sag, and keep the run as straight as the framing allows. Slope any horizontal run very slightly downward toward the exterior so condensation drains out.
- Seal every joint with foil tape. Wrap each connection with UL-listed foil duct tape. Skip cloth duct tape entirely — its adhesive dries out and fails within a couple of years in a warm, humid duct.
- Connect the dryer with a short transition hose. Slip the semi-rigid transition over the dryer’s outlet and the wall stub, clamp both ends, and keep it as short and straight as possible. Do not conceal the transition hose inside a wall or ceiling; it is designed to be accessible and visible.
- Position the dryer without crushing the duct. Slide the machine back slowly and check behind it. A hose flattened against the wall is a restriction that no amount of cleaning will fix. Recessed dryer boxes or a periscope-style rigid fitting solve tight installations neatly.
- Test the airflow. Run the dryer on a heated cycle with a load in it and go outside. Hold your hand at the hood: you should feel strong, warm, moist air and see the damper standing fully open. Weak flow means a crushed hose, a blockage or an over-long run. Check that the damper closes completely when the cycle ends.
- Verify drying performance over a few loads. A properly vented dryer finishes a normal load in around 30 to 45 minutes. If loads take substantially longer, or clothes come out hot but still damp, or the laundry room becomes humid during a cycle, the vent is restricted somewhere along the run.
- Set a cleaning schedule. Clean the lint screen after every load, and brush the full duct run at least annually — more often with a long run, a large household or a machine that sees heavy use. Disconnect the transition hose, work a vent brush through from both ends, and vacuum what comes loose.

Why You Must Never Vent a Dryer Indoors
Indoor venting kits that discharge into a bucket of water or a mesh bag turn up in stores every winter, marketed as a way to recover heat. They are a bad idea in almost every home. A single load of laundry releases roughly a gallon of water as vapour, and pushing that into a closed room produces condensation on windows, damp drywall and eventually mould. With a gas dryer the problem is far more serious, because combustion byproducts including carbon monoxide go into the living space along with the moisture. Gas dryers must always vent outside, without exception.
Similarly, never terminate a dryer duct into an attic, crawl space, garage, soffit or wall cavity. Warm, lint-laden, saturated air deposited into an enclosed structure rots framing and creates an ideal fire load in a space nobody inspects.
Matching the Vent to the Machine
Venting requirements vary by machine type, so it pays to know what you are installing before you build the duct. Standard vented electric and gas dryers need the full 4-inch run described above. Condenser and heat pump dryers require no external vent at all, collecting water in a reservoir or draining it, which makes them attractive for interior laundry closets and apartments where an exterior wall is not available. Compact and stacked units often specify a shorter maximum equivalent length than full-size machines.
If you are choosing new appliances alongside this work, our roundup of the best washing machine and dryer sets covers matched pairs and their venting requirements, while the wider best washing machines and dryers comparison includes ventless options for tricky spaces. Space-constrained laundry closets often come down to stacked or combination units, which the best washing machine dryers guide addresses directly. For a broader look at sizing, capacity and hookup planning before you commit to a layout, the washer and dryer set buying guide walks through the whole decision, and since you will already be behind the machines, it is worth replacing aging supply lines at the same time — our notes on the best washing machine hoses explain why braided stainless is the standard recommendation.
Warning Signs of a Restricted Vent
- Loads taking noticeably longer than they used to, or needing a second cycle.
- The dryer cabinet or the clothes feeling unusually hot at the end of a cycle.
- A humid or musty laundry room while the machine runs.
- Little or no airflow at the exterior hood during a cycle.
- Lint visible around the hood or the door seal.
- A burning smell — stop using the dryer and clean the duct immediately.
Common Mistakes to Avoid
- Using flexible plastic or foil hose for the concealed run. It traps lint and can burn.
- Fastening joints with sheet metal screws. The protruding tips build blockages from inside.
- Fitting a screened exterior cover. Use a damper hood instead.
- Exceeding the equivalent-length limit. Elbows count for far more than people expect.
- Crushing the transition hose against the wall. Leave real clearance behind the machine.
- Sealing joints with cloth duct tape. Its adhesive fails in a warm, damp duct.
Frequently Asked Questions
How long can a dryer vent be?
The general limit is 35 feet of equivalent length for 4-inch rigid duct, minus about 5 feet for each 90-degree elbow and 2.5 feet for each 45. Always check your dryer’s manual, as some specify less.
Can I vent a dryer through the roof?
It is permitted but not ideal. Vertical runs are harder to clean, lint settles back down the pipe, and roof terminations are more prone to blockage. Choose a sidewall route whenever one is available.
How often should a dryer vent be cleaned?
At least once a year for a typical household, and every six months for long runs, large families or pet-heavy homes. Clean the lint screen after every single load regardless.
Is flexible foil duct ever acceptable?
Only as a short, listed transition between the dryer and the wall connection, and only where it stays visible and accessible. It must never be used inside walls, ceilings or floors.
Final Thoughts
A dryer vent is a small piece of ductwork carrying a large amount of heat, moisture and combustible lint, which is exactly why the details matter. Use rigid metal for the concealed run, keep the route short and straight, stay inside the equivalent-length budget, seal with foil tape rather than screws, and terminate at a proper damper hood outdoors. Then treat cleaning as routine rather than reactive. Build it that way in 2026 and you get faster drying, a lower energy bill, a laundry room that stays dry, and the removal of one of the most common preventable fire risks in the house.